
Overview
The Client Profile page includes general information and statistical data ❶, such as population and number of households. When statistical data is added here, they are used in the Averages report. It is also the place where municipal logos and user signatures can be added ❷ and previewed ❸. The Client logo will appear on various screens and reports throughout the system, while the Regional Receipt logo will appear on Permitting receipts.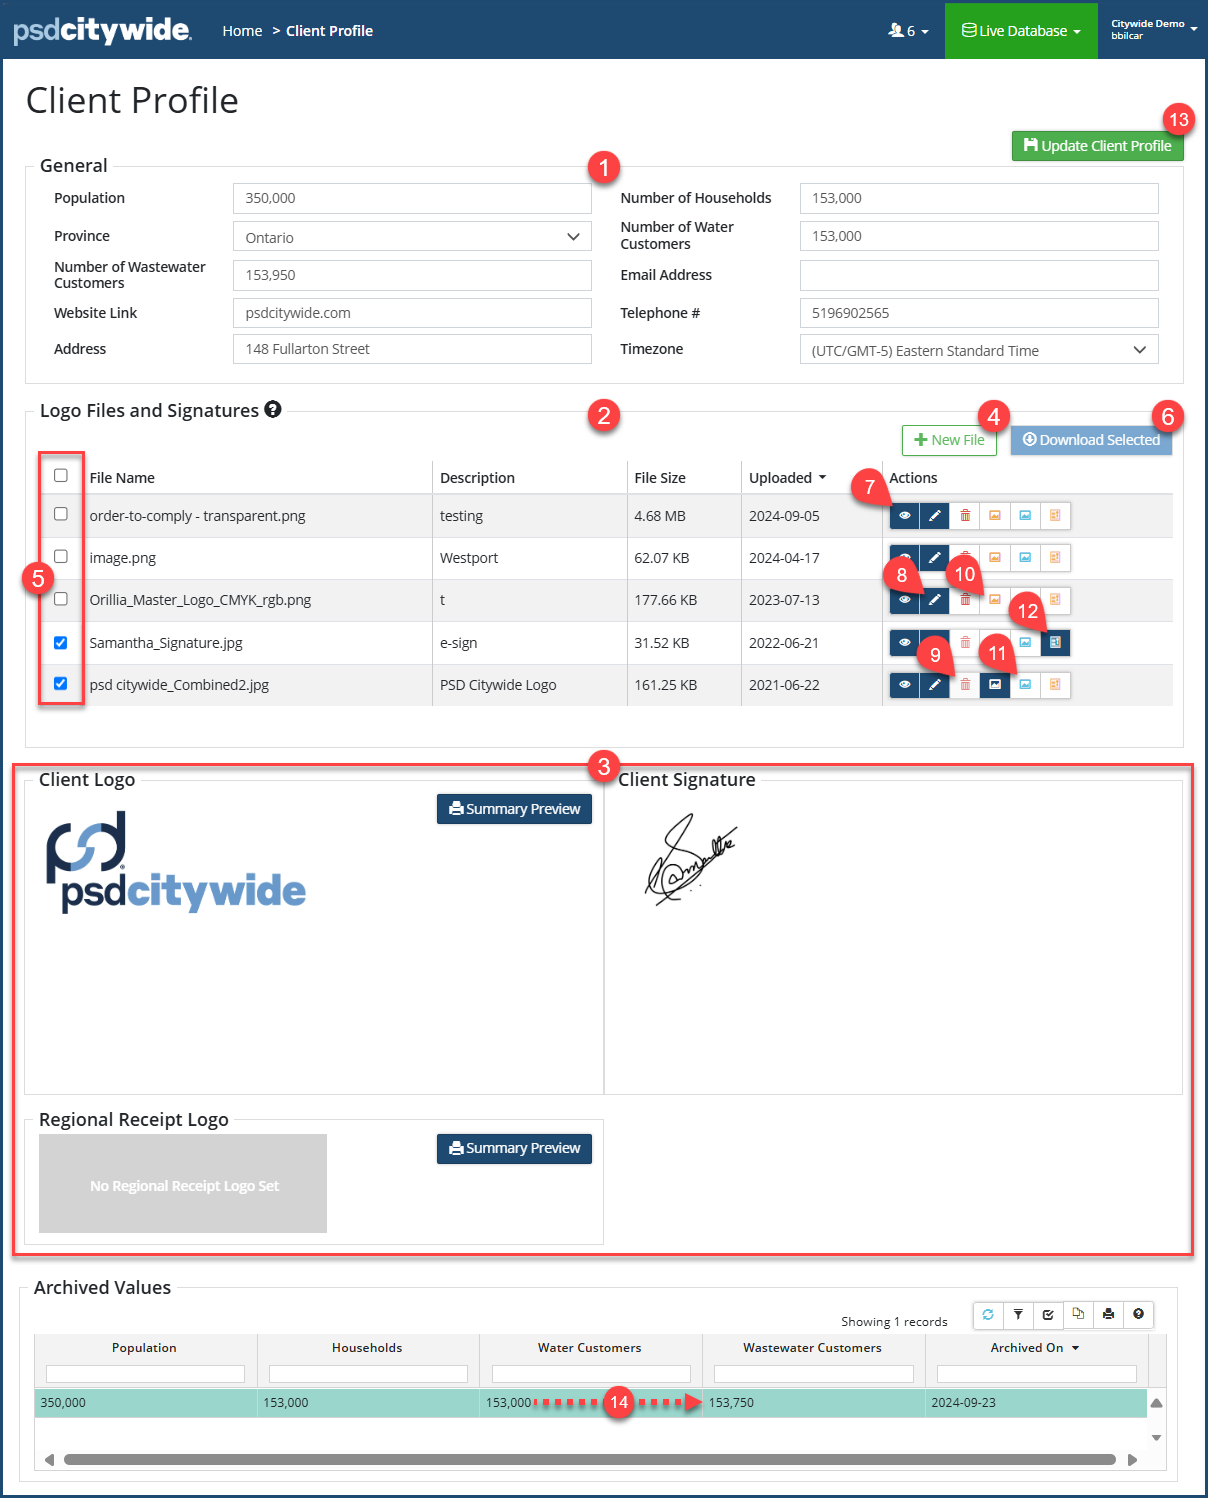
Logos or Signatures
To add a log or signature:
- Click on +New File ❹. The Add Files dialog box appears:
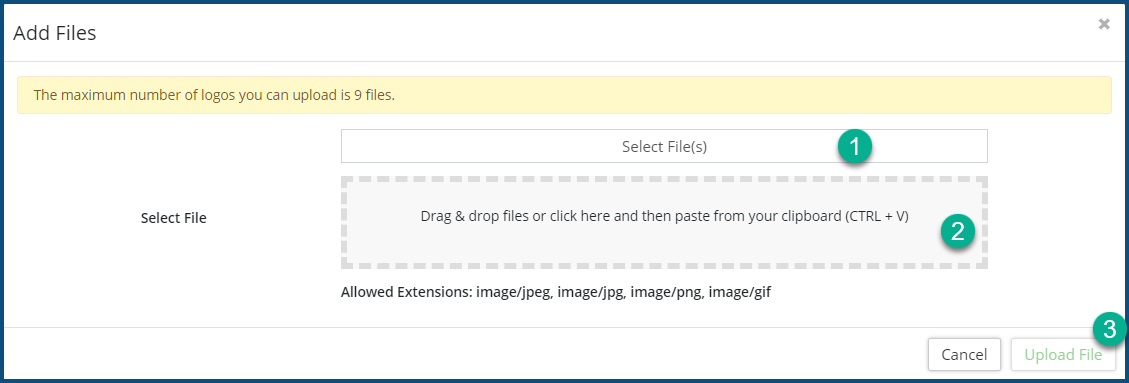
- Click on Select Files(s) ❶ to locate and select files using your File Manager, or drag and drop the files into the perforated box ❷. Any graphic file using the extensions jpeg, jpg, png, or gif can be uploaded.
- Click Upload File(s) ❸.
To download (an) existing logo or signature:
- Check ✅❺ the file(s) to be downloaded.
- Click Download Select ❻ and then select the folder to which the selected files are to be written.
To preview a file, click on the eye icon ![]() ❼.
❼.
To edit a the file Description, click on the Edit icon ![]() ❽.
❽.
To remove a file (log or signature), click on the Delete icon ![]() ❾.
❾.
To set the file in the current row as the organizational logo, click on Set Client logo icon ![]() ❿. Once set, the icon will take of a navy blue shading:
❿. Once set, the icon will take of a navy blue shading: ![]() .
.
To set the file in the current row as the Regional Receipt logo, click on the Set Regional Receipt logo icon ![]() ⓫. Once set, the icon will take of a navy blue shading:
⓫. Once set, the icon will take of a navy blue shading: ![]() .
.
To set the file in the current row as the Client Signature, click on the Set Client Signature icon ![]() ⓬. Once set, the icon will take of a navy blue shading:
⓬. Once set, the icon will take of a navy blue shading: ![]() .
.
Updating the Client Profile
Any changes made within the profile must be saved. To do so:
- Click on Update Client Profile ⓭. If you've changed or added data in the General section ❶, the Archive Statistics dialog box will appear, asking you if you would like to archive the previous statistics. This allows you save the value in the item just overwritten.
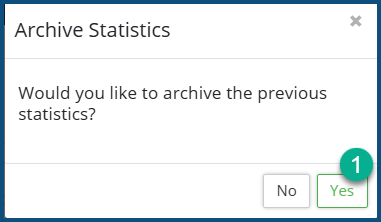
- Click Yes ❶ if you would like to have the previous value archived. It will appear in the Archived Values section of the page—in the above example, the just-changed number of Waste Water Customers from 153,000 ⓮ to 153,750 records records the earlier number to the list.


