
Overview
In addition to your Assets main database, you can create two additional databases. The purpose of having the ability to make copies of the database is for financial purposes and for activities such as year end balancing, having a backup copy of your financial information after making adjustments in the live database or having a safe place in which users can train and/or launch various types of tests and experiments. (Note: other Citywide modules cannot be enabled on additional copies of the Assets database.)
The Databases page is used to manage databases, as well as create copies of the Inventory.
Databases and their Properties
This is the database set for the municipality of "Citywide Demo" The "Live Database" is the database of record, "the real thing," the database where care must be taken, and training and experimentation avoided. The other two databases serve those other purposes:
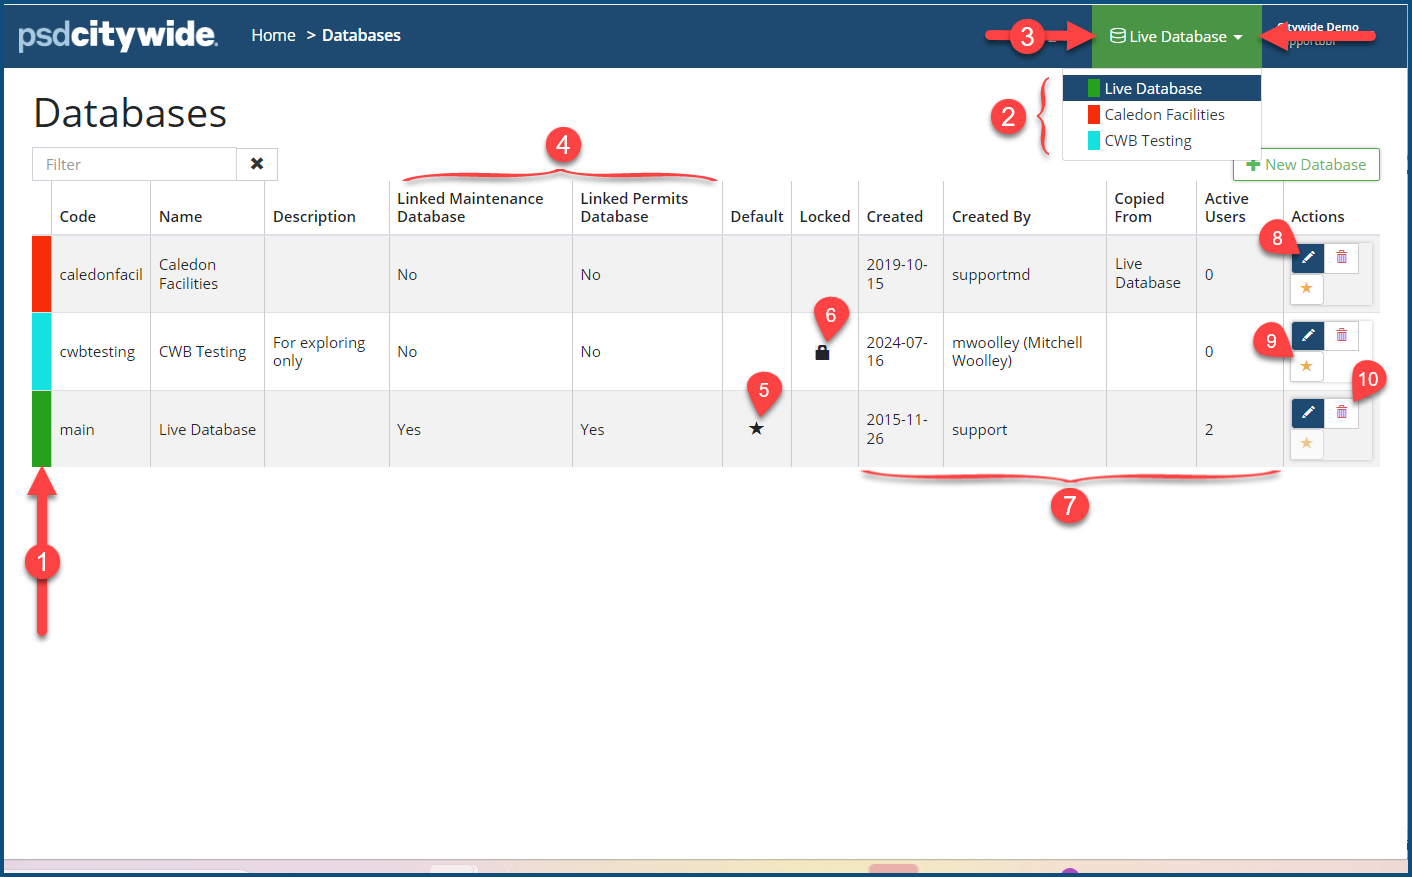
Each database is colour-coded when it is created ❶, and it accompanies the database selection from the database pull-down ❷, and then remains visible when the database is in use ❸. This colour-coding scheme is intended to make it at all times obvious which database you are currently using so that: 1) you don't waste you time entering "real" data into a secondary database, and more importantly 2) you don't enter "unreal" and experimental data in the database of record.
The linked module columns ❹ show whether the Maintenance and Permits data is linked to the dominant, core Assets module of the database.
A star icon ★ ❺ appearing in the Default column indicates the database has been set as the default, which is the database that the system will automatically revert to when the system is started.
A lock icon ![]() ❻ indicates that the database is temporarily locked and inaccessible to users. A permanently locked database will still have a lock in this column, but the entire row will be faded.
❻ indicates that the database is temporarily locked and inaccessible to users. A permanently locked database will still have a lock in this column, but the entire row will be faded.
Additional Columns ❼ show when the database was Created, who it was Created by, which database it was Copied From (if it in fact was copied), and how many Active Users are currently logged in and using the database.
Create a New Database
- Click +New Database ❽. The New Database dialog box appears:
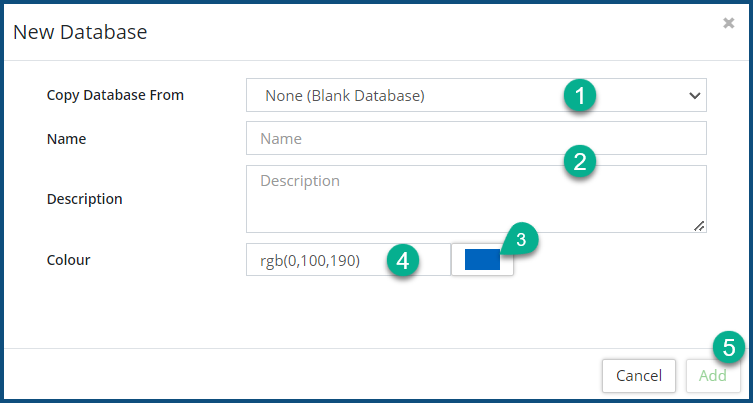
- Select a database to copy from the Copy Database From ❶ dropdown, or select "None" to create a blank database.
- Enter a Name and Description ❷ for the database.
- Click on the Colour block ❸ to select a colour from the palette, or enter the rgb values ❹ that define the colour. The colour you select will appear in the CW banner so that you can readily identify the database loaded on your screen (and not one that you don't want to be in!):
- Click Add ❺.
Edit a Database
- Click on the Edit icon
 ❾. The Edit Database dialog box appears:
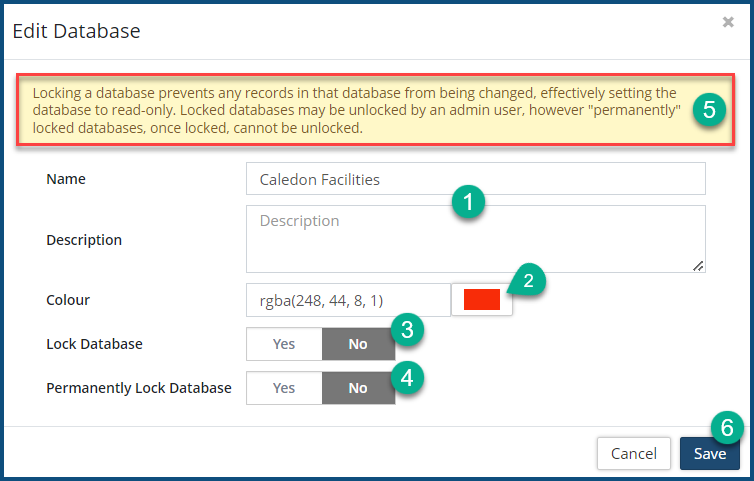
- Change the Name and/or Description ❶ if you wish to.
- You can assigned a different Colour ❷ scheme to the database by either entering an rgb value or by clicking on the colour block and selecting a colour from the palette.
- Locking the Database: Select Yes on to either temporarily ❸ or permanently lock ❹ the database. Take heed of the self-explanatory warning ❺ at the top of the dialog box.
- Click Save ❻.
Set a Default Database
- Click on the star icon
 ❿. The Set Default Database dialog box appears:
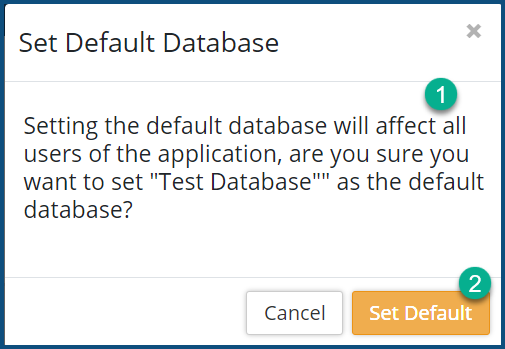
- Take heed of the the message ❶ before committing to this process. If you intend on setting a new default database, then you should probably advise users of the forthcoming change before making it.
- Click Set Default ❷.
Delete a Database
- Switch to another database using the databases dropdown ❸. and make sure there are no other Active Users ❼ in the database. (You cannot delete a database that has active users, including yourself.)
- Ensure that the database is not set as the Default. Set a new default database if it is the current default.
- Click the Delete icon
 ⓫.
⓫.


