
Overview
Users contains user accounts, each of which holds personal information (name, password, email address, etc.) and the access rights (roles and permissions) the user has been granted. It is also on this screen that the System Timeout and Password policies that affect all users are set.
Access to various features and functions are through the assignment of roles, which are defined in Roles / Permissions and then applied to each individual user account. Individual permissions cannot be set here at the user level - if a user requires an individual permission (or must be denied an existing permission), then an additional custom role needs to be defined and assigned to that user. See Roles / Permissions for a detailed discussion and how to create custom roles and permissions.
Users
- On the home page, navigate to 'Administration > Users'
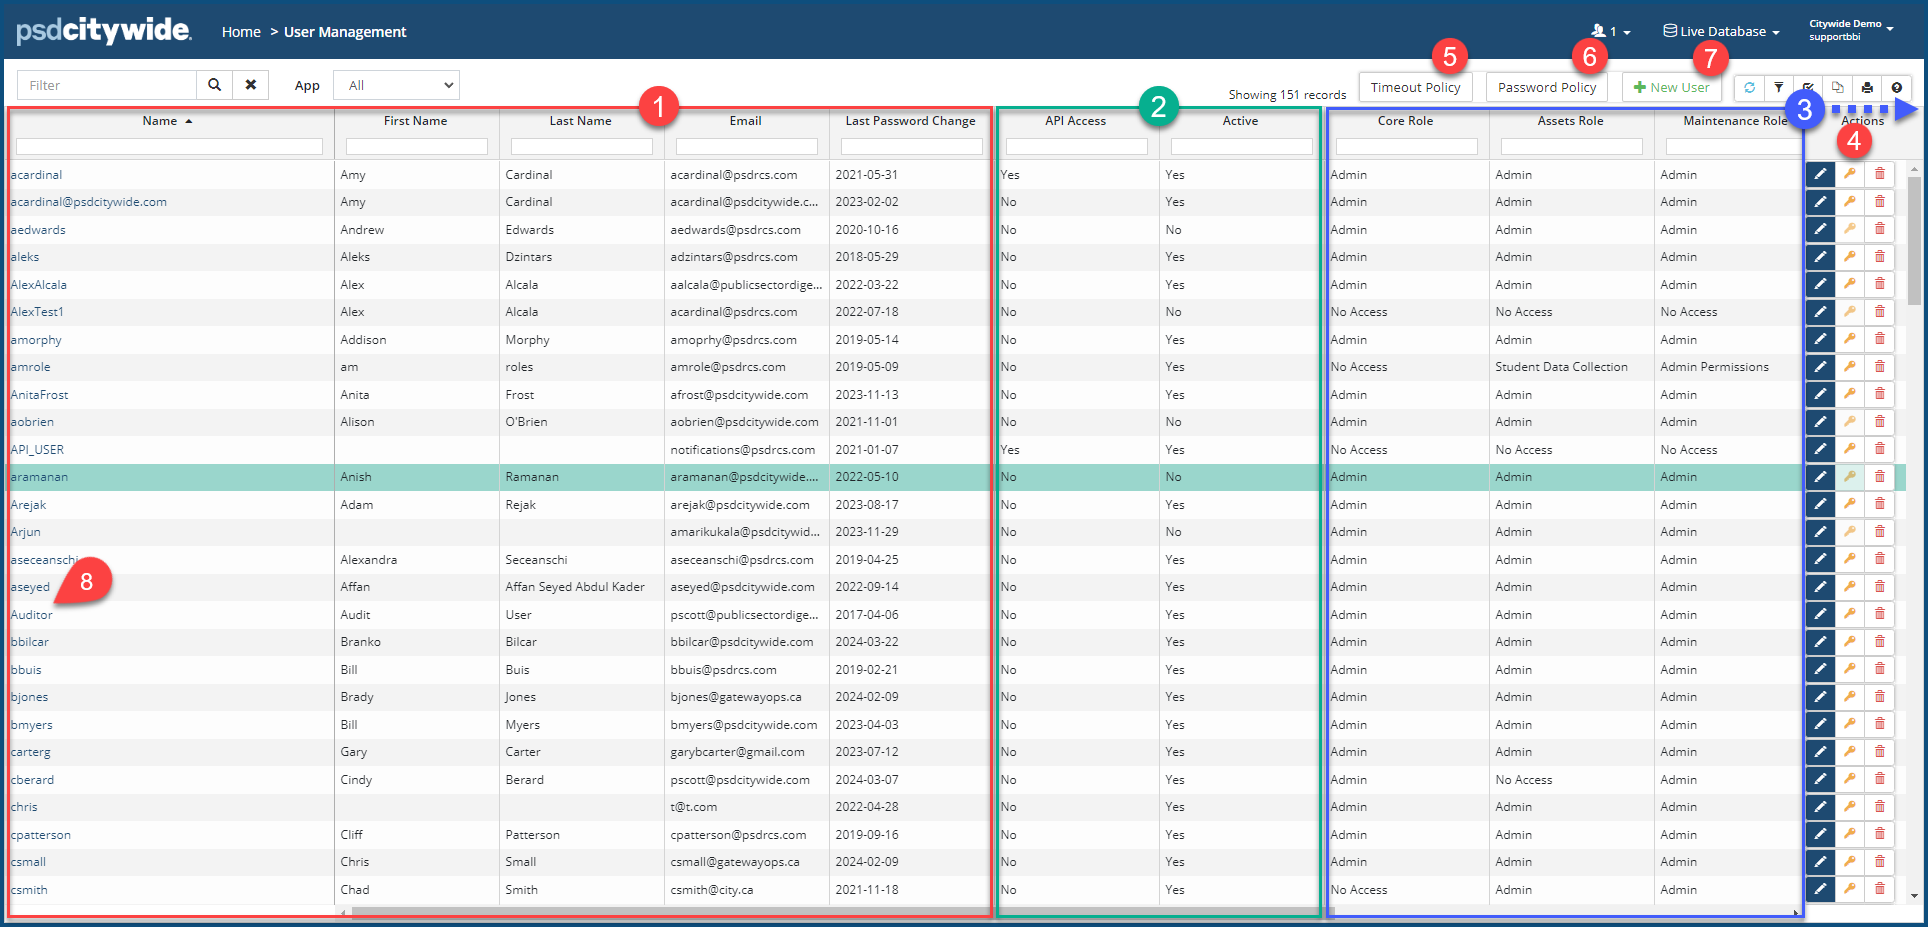 The User Management screen consists of the list of users and information across three sets of columns. The "default view" is shown above with all columns associated with this page.
- The first five columns ❶ contain personal information (the user name, first and last names, email address, and the date in which the user's password was last changed).
- The next two columns ❷ refer to enablement (API Access to whether the user has access the the Citywide API, and whether their account is Active).
- The remaining columns ❸ (whose number can vary according the the modules that are enabled for your organization) are each headed with user roles for the respective module.
The Actions ❹ tools allow you to:
- Edit
 an individual user account.
 - Assign an API key
 (for accounts in which API Access is enabled).
 - Delete
 a user account.
The organization-wide Policies that apply to all users:
- The Timeout Policy ❺, which governs how long after a user has stopped using Citywide they'll be required to log back into the system.
- The Password Policy ❻, which dictates the requirements constituting a valid password.
Add a New User Account
- Enter the Username, First and Last name, and the Email address of the user ❶.
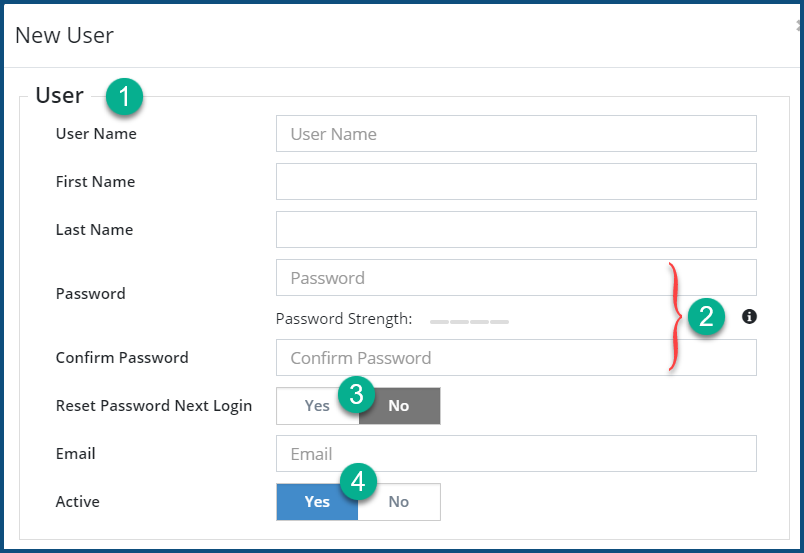
- Enter and confirm the Password ❷.
- For Reset Password Next Login, select Yes ❸ if you would like the user to set their own password during the next login; No if not. Selecting Yes ensures that their password is known to only the user.
- For Active, select Yes ❹ if the user is to have immediately access to the system; No if not.
- Set the User Permissions❺ (For further details on creating user Roles/Permissions, click here)
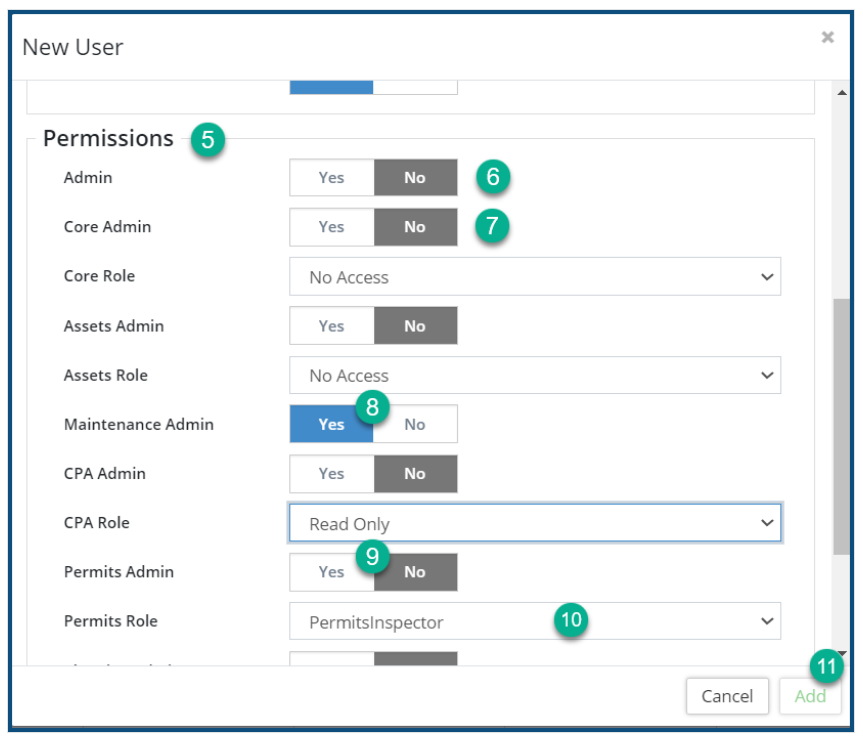
- Clicking Yes on Admin ❻ provides the user will unlimited access to all the functions and operations throughout the system; No does not.
- Clicking Yes on Core Admin ❼ provides the the user with unlimited access to all the Administration options on the Home page (Home: Administration).
- Clicking Yes on any one of the enabled "{module} Admin" options (e.g. Maintenance Admin ❽ or Permits Admin ❾) provides the user with unlimited access to every function and operation within that module.
- Clicking No excludes unlimited admin access and presents a drop down❿ from which a custom role (defined in Roles / Permissions) can be assigned to that user for that module.
- Click Add ⓫.
Edit an Account
- Locate the user from the list
- Click on the Actions ❹ Edit tool
 .
. - Make the required in accordance with the field properties discussed in the above section.
- Click Save.
Delete an Account
- Locate the user from the list
- Click on the Actions ❹ Delete tool
 . When prompted, click on Remove .
Assign an API Key to an Account
An API key should only be issued to users who have specific requirements for using the CW API and who have the technical wherewithal to make appropriate uses of it.
- Click on the Actions ❹ API Key icon . The API Access dialog box appears:
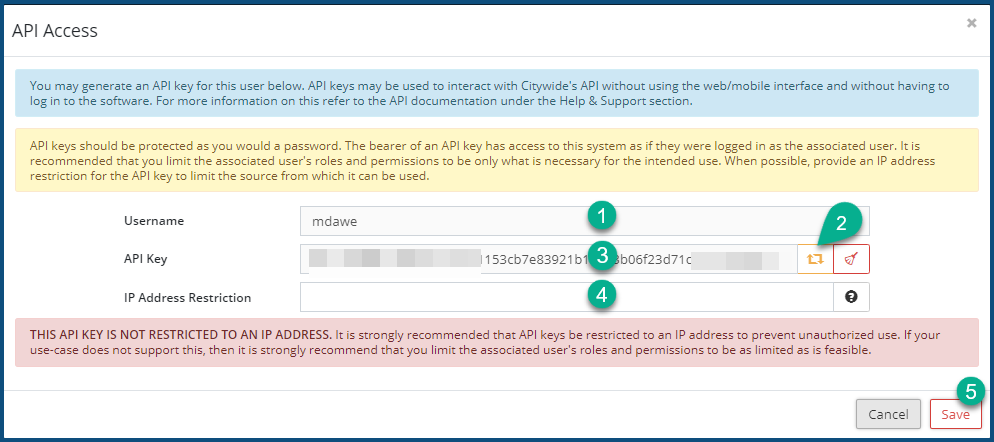
- The Username will appear in the Username field ❶.
- Click on the API Key generator icon
 ❷. The system will generate a long alphanumeric string (partially obscured in the above image) which will appear in the API Key field ❸.
 - Enter an IP Address Restriction ❹ IP address. You are warned against not providing this information, indicated by the red Save button. Once the IP address is added, the Save button turns blue.
- Click Save ❺.
Set the Timeout Policy
- Click on Timeout Policy ❺. The Set User Timeout Policy dialog box appears:
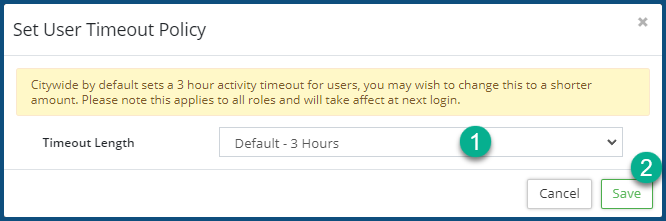
- Select timeout interval from the Timeout Length ❶ pull-down.
- Click Save ❷.
Set the Password Policy
- Click on Password Policy ❻.The Set Password Policy dialog box appears:
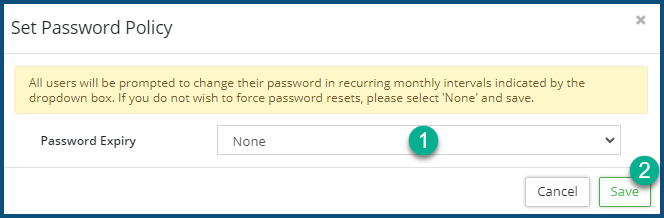
- Click on the Password Expiry ❶ pull-down to select the interval after which all users will have to change their password.
- Click Save ❷.


