
Overview
Development Charges (DCs) are listed in a matrix of ‘Development Services’ by ‘Development Classes’. The Development Services are listed in each row of the first column ❶ grouped by service type ❷, followed by the GL Code ❸ revenue accounts that will be credited by the charges in the second column, followed by the amounts for each service according to the class ❹ it belongs to. The headers in columns three and beyond ❺ name the Development Class.
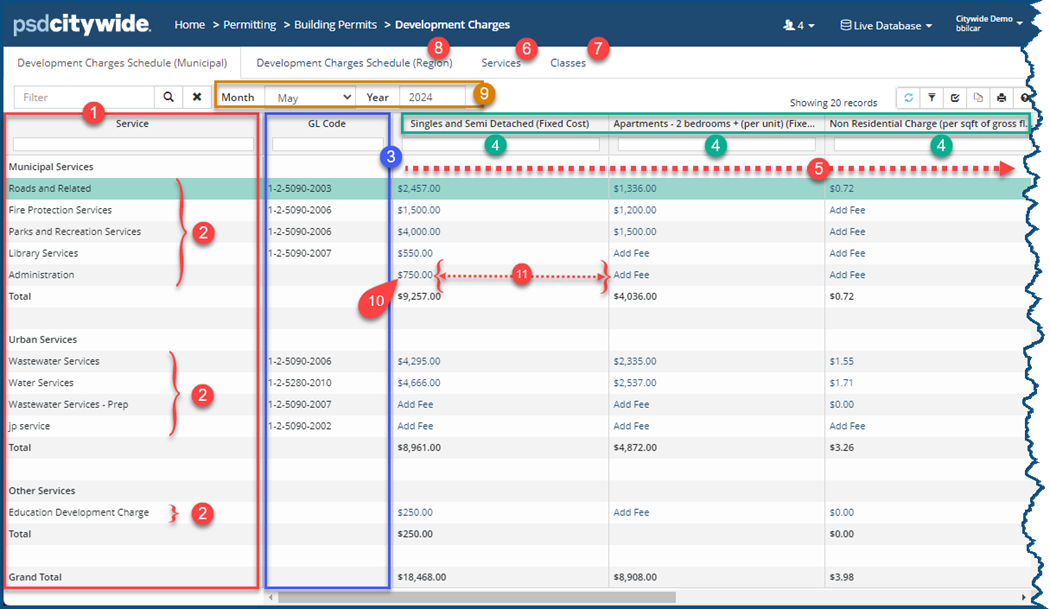
The Services are defined by accessing the Services tab ❻; the Classes are defined by accessing the Classes tab ❼.
Development Charges can be set up for an additional jurisdiction (in the above example involving a region ❽). See PPL (Permits, Planning, and Licenses 🢡 Manager 🢡 Preferences to add or edit an additional jurisdiction.)
The entire matrix can be different from one month to the next across any number of years ❾. Changing the month and year allows you to edit the amounts across the entire matrix for the selected month/year. Hence, the amounts of the charges that will be levied will depend on when they are being levied.
Change the Value of an Amount on the Grid
- Click directly on the number for the item you wish to change ❿ (Clicking on any other part of the cell ⓫ will do nothing.) The New Development Charge dialog box appears:
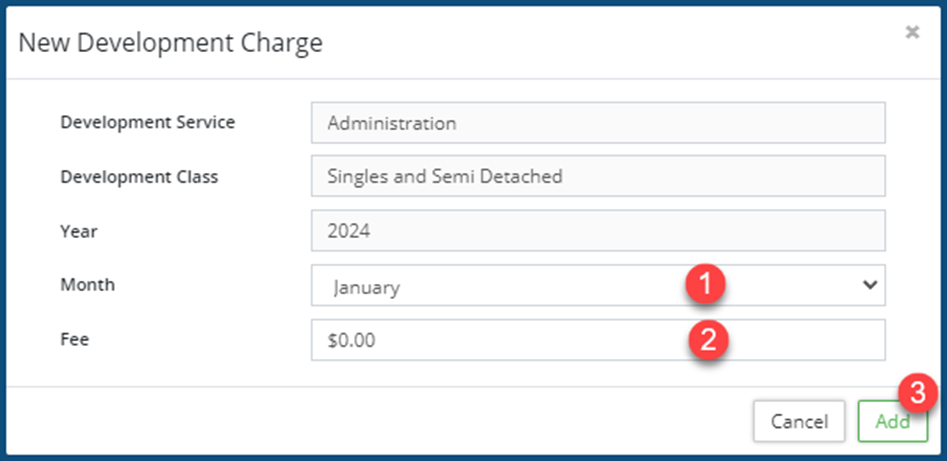
The first three fields are static and cannot be edited. - Select the Month ❶ that the charge will be applied in. It can be different from the currently selected Month on the grid.
Selecting a month that differs from the pre-selected Month on the grid will update the Fee for the selected Month ❶, and not the month on the current grid.
- Enter the ❷ Fee amount.
- Click Add ❸.
Add New Development Services
- Click on the Services tab ❶.
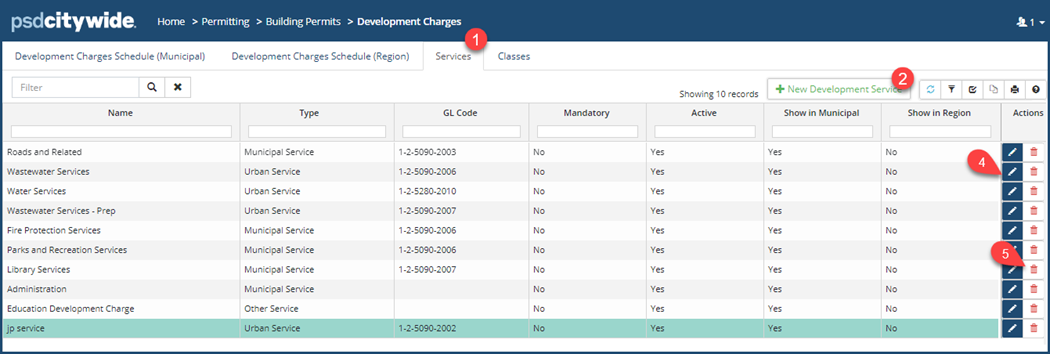
- Click on + New Development Service ❷. The New Development Service dialog box will appear:

- Enter a Name for the service.
- Select a service Type from the drop-down.
- Select a GL Code from the drop-down that revenues for this service will be written to.
- Click Yes if this is a Mandatory service.
- Click Yes for the jurisdictions where this service will appear (Municipal or Region in the above example).
- Click Yes on Active to make this service active.
- Click Add ❸.
Edit a Development Service
- Click on the Edit tool
 ❹.The Edit Development Service dialog box will appear with the above fields.
 - Make the required changes.
- Click on Edit.
Delete a Development Service
- Click on the Delete tool
 ❺. When prompted, click on Remove.
Add New Development Classes
- Click on the Classes tab ❶.
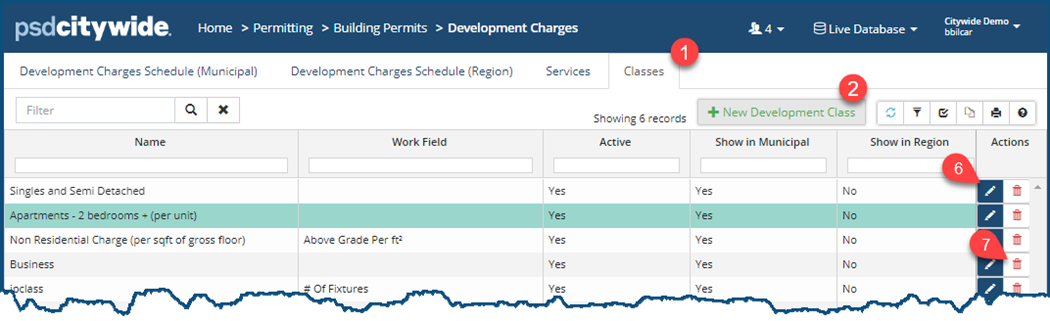
- Click on + New Development Class The New Development Class dialog box will appear:
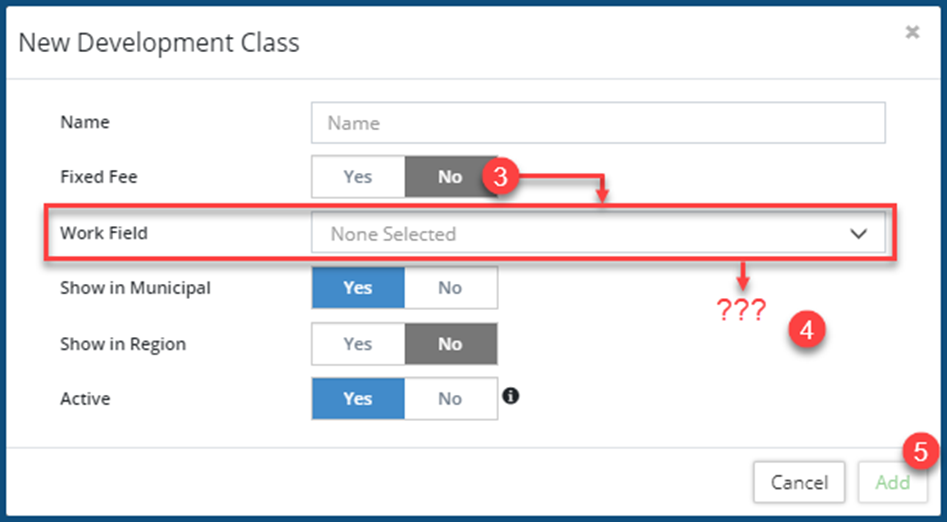
- Enter a Name for the service.
- Click Yes if this is a class with Fixed Fee; No ❸ if it is not.
- If No, then select the Work Field that the Fee will be based on. Depending on which Work Field you selected, additional options (all self-evident) may appear on the screen ❹. For example, if you choose a Work Field that involves an area (e.g. the area of a deck), you would be required to choose between ft2 (square feet) and m2 (square metre).
- Click Yes for the jurisdictions where this service will appear (Municipal or Region in the above example).
- Click Yes on Active to make this service active.
- Click Add ❺.
Edit a Development Class
- Click on the Edit tool ❹.The Edit Development Class dialog box will appear with the above fields.
- Make the required changes.
- Click on Edit.
Delete a Development Class
- Click on the Delete tool ❺. When prompted, click on Remove.


