
Overview
Selecting a route is mandatory for conducting a Route Patrol on the mobile app. A route can be created by assigning a name and optionally attaching the associated assets and deficiencies. Creating a Route Schedule is an additional feature, which helps generate a work order for patrolling the route.
Attaching assets to a Route is preferred only when the assets are linked to a GIS feature as it enables visualizing the route in the map and computing MMS asset compliance using Route Patrol Artificial Intelligence (AI). This is referred to as Full/Advanced Route Patrol functionality.

There are two ways of creating a Route for patrolling of roads: from the Routes grid and from the GIS.
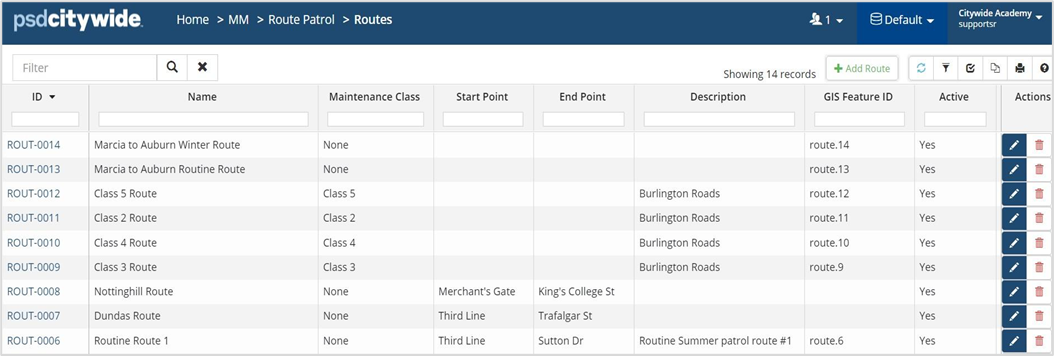
Create a Route from the Routes Grid
- Home 🢡 Maintenance 🢡 Route Patrol 🢡 Routes.
- Click +Add Route on the Route The New Route wizard opens.
- In the Details section, enter a name and description for the route. The GIS Feature ID is populated once GIS linked road assets are added to the Route. Maintenance Class may be assigned if all constituting road segments belong to the same Class.
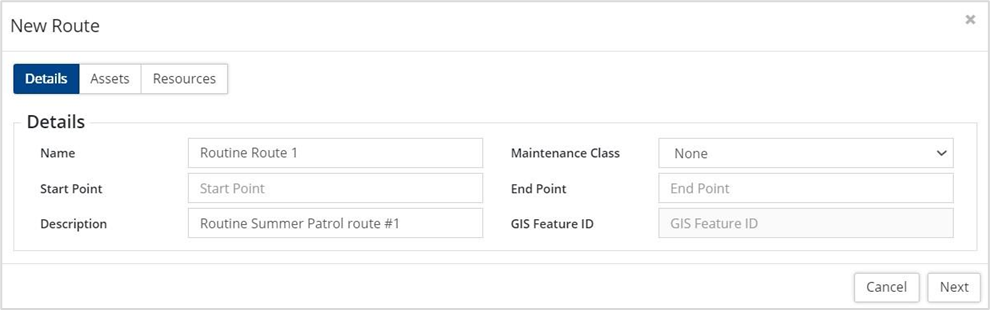
- Click Next.
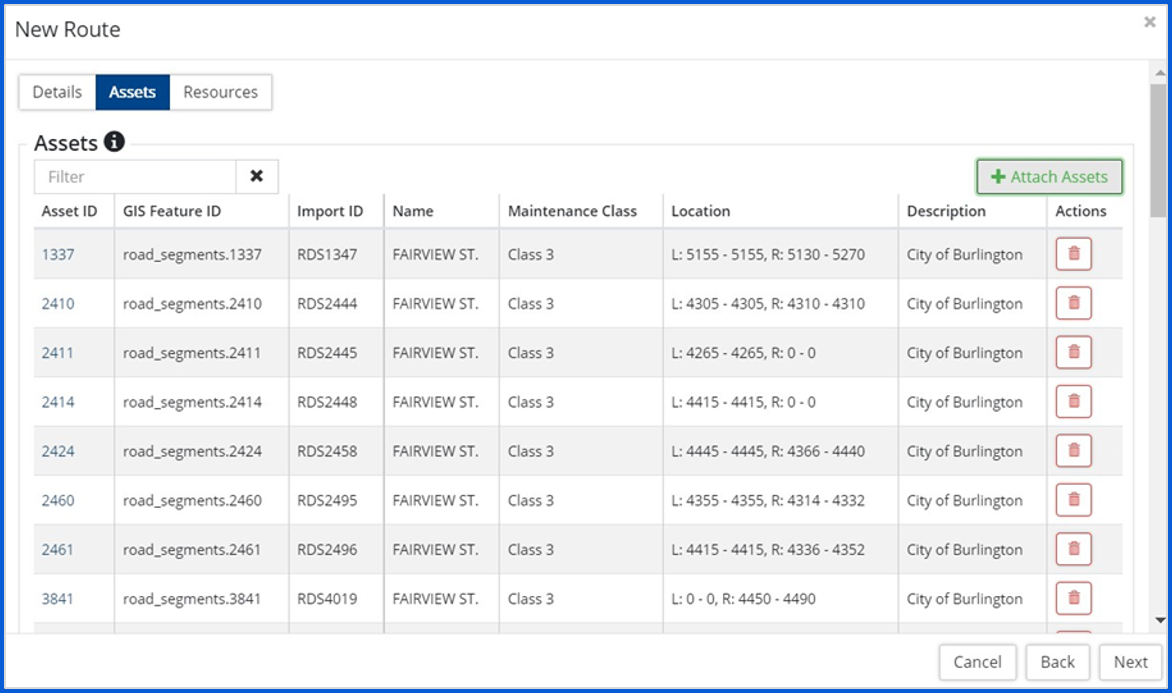
- Click +Attach Assets to attach road assets constituting the Route. If MMS compliance for patrolling needs to be determined (Advanced RP), then the assets must be linked in GIS.
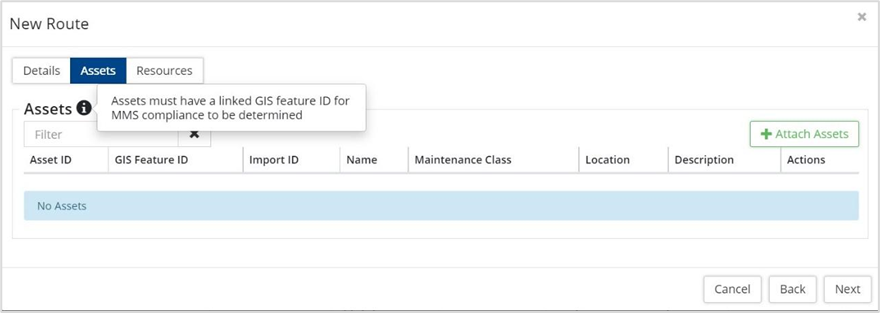
- There are five options available to search the AM inventory for the required road assets.
- Text Search: Search and select assets through a Text Search for the name of a road segment or Asset ID.
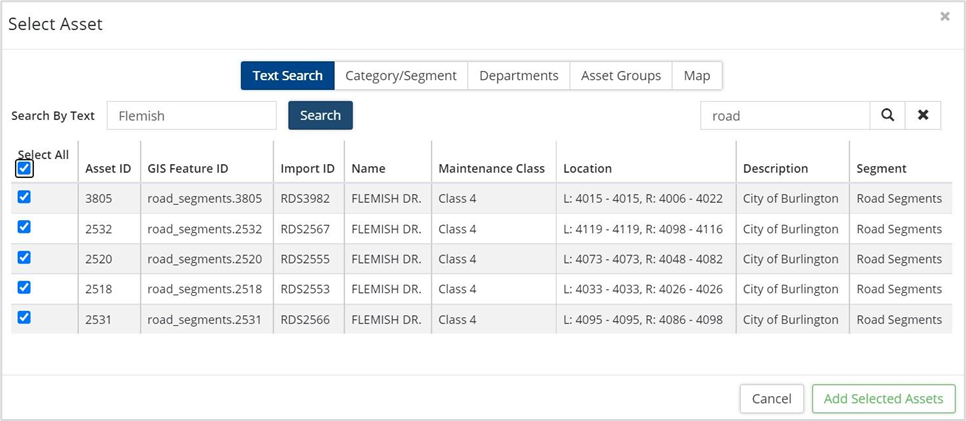
The search is conducted on the fields listed (Asset ID, GIS Feature ID, Import ID, Name, Maintenance Class, Location, Description and Segment) and may be further narrowed down by entering a keyword in the Filter field. - Category/Segment: Search and select assets by Asset Category and Segment. Refine search results using a keyword in the Filter field.

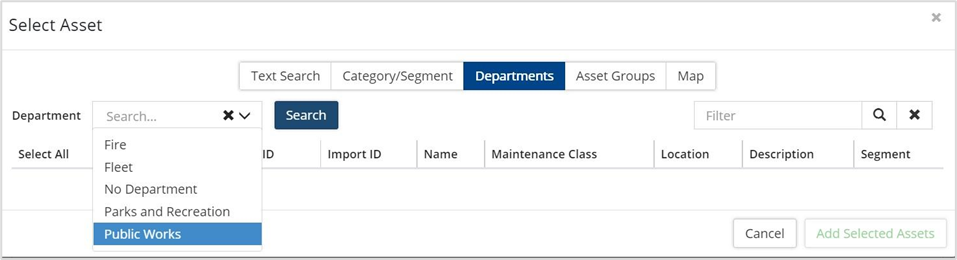
- Departments: Search and select assets by Department and refine results using the Filter.
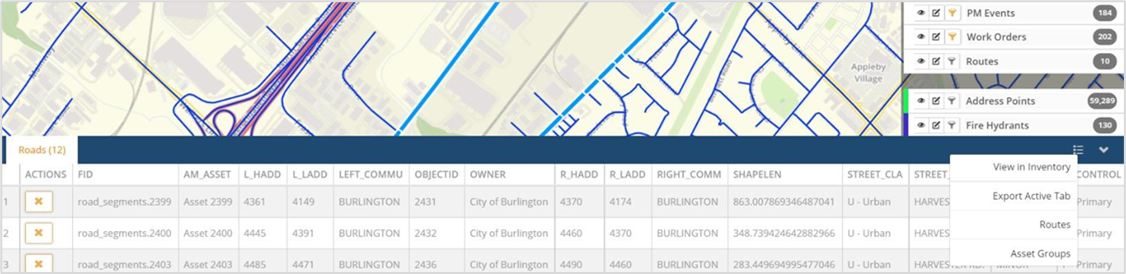
- Asset Groups: Asset groups of road assets belonging to a Route can be created separately, by manually selecting the road segments in the Maintenance-GIS map or doing a feature search on the Roads
Once the road assets have been selected, click the Context Menu in the Attributes table and select Asset Groups (see screenshot below). The New Asset Group wizard opens and the assets can be saved as a collection.
Select the desired Asset Group from the dropdown menu. Select assets by clicking Select All þ. Click Add Selected Assets to add the selected assets to the Route. - Map: Click Select from the Map to visually select the assets from the linked-road layer in GIS.

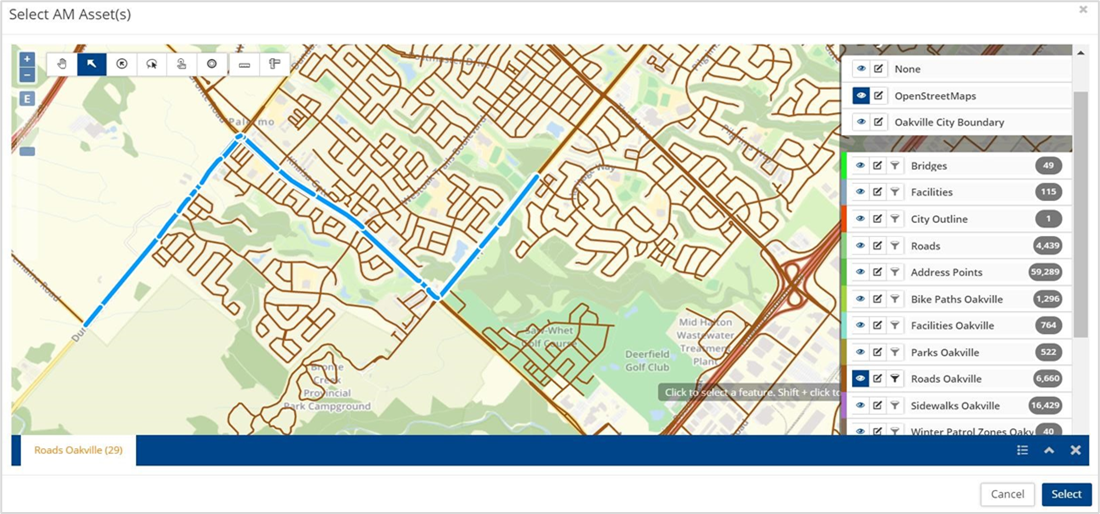
Click Select, and then click Add Selected Assets after adding some assets.
- Text Search: Search and select assets through a Text Search for the name of a road segment or Asset ID.
- Once assets have been added, click Next back on the New Route window.
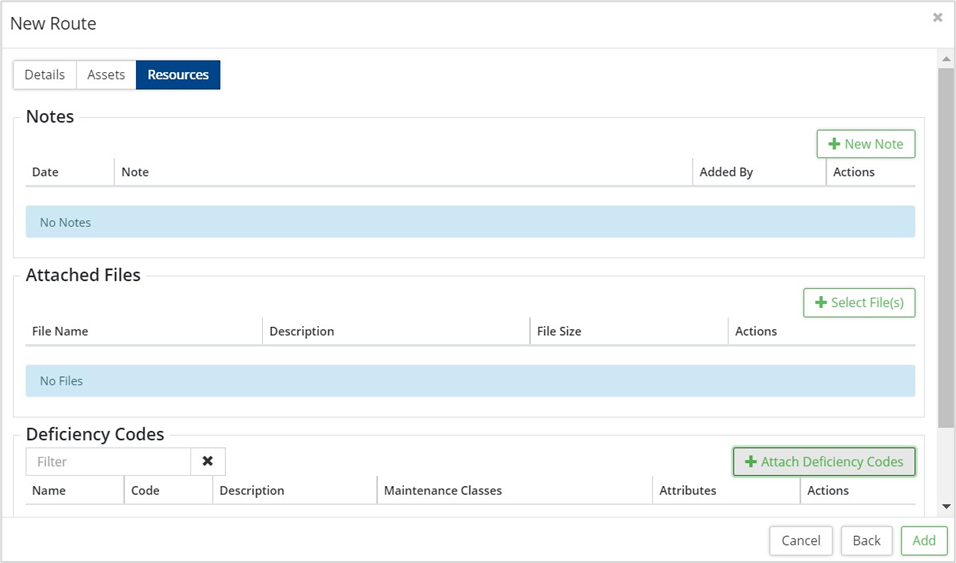
- In the Resources section, add notes, attach files and deficiency codes (from the predefined list of codes) to the Route.
- Click Add to create the route.
Create a Route from GIS
Routes can be created from the GIS Viewer or Maintenance-GIS.
- Start by selecting multiple road segments using the Select Tool highlighted below.
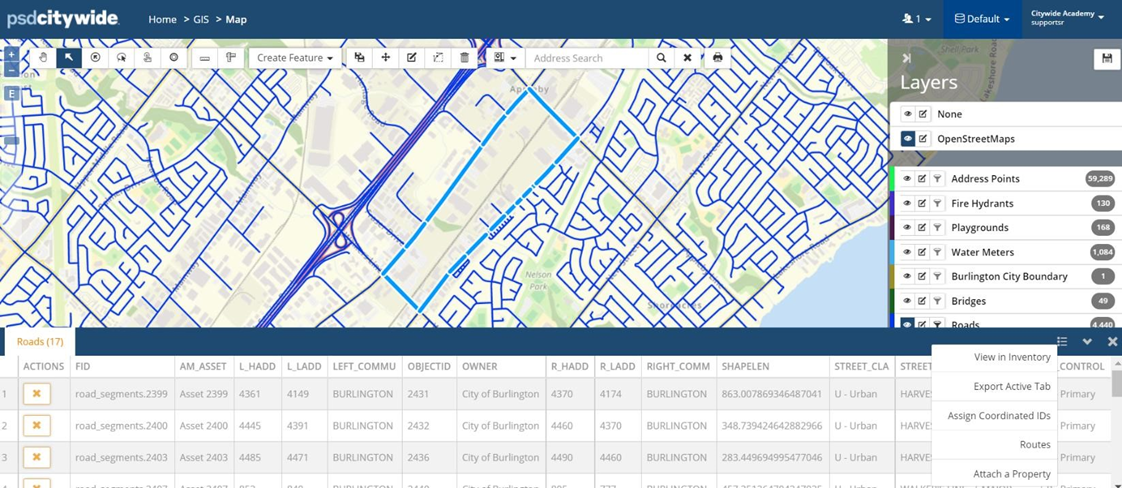
- Once the segments are selected, click Routes in the context menu on the attribute
- The Add to Route window provides an option to add the selected assets to an existing route or create a new route. Click on +New Route to launch the New Route wizard pop-up.
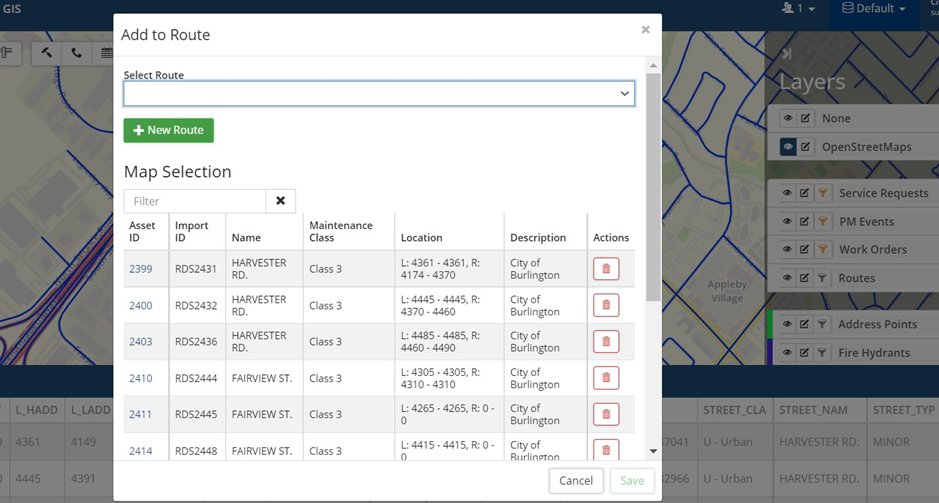
- Assets are pre-attached to the new route.
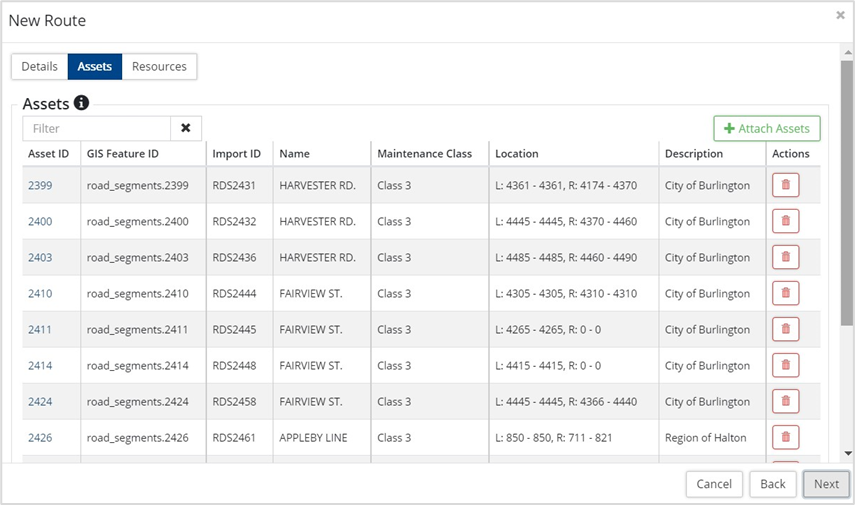
-
Road assets can be attached to multiple routes.
- Click Next.
- Select applicable Deficiency Codes in the Resources Click Add Selected Items.

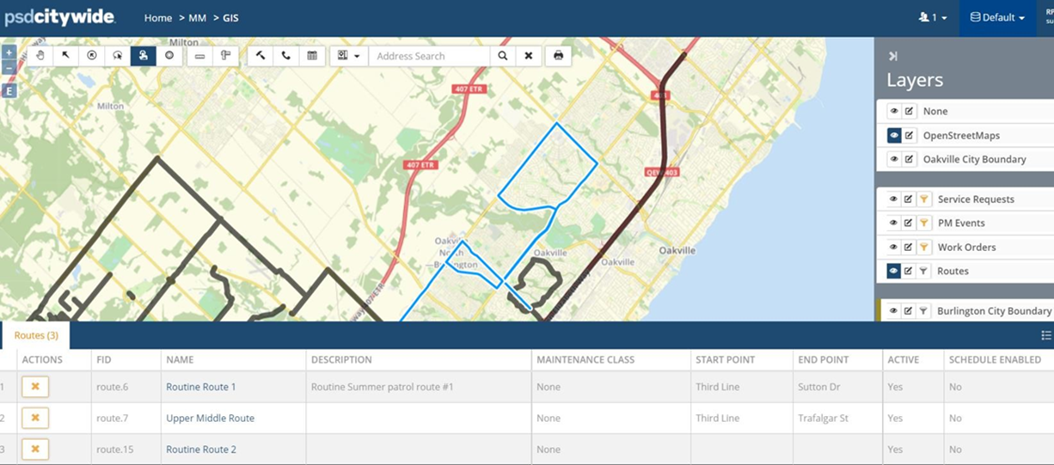
- The route is added to the Routes grid and all routes which have GIS-linked assets attached can be viewed on the Maintenance-GIS map.
- Click the Name of a route to open the Route details page.
Review Route Details
- Navigate to the Routes grid and select Routine Route 1 to view details of the route created.
- Since the assets are linked in GIS, a new multi-line spatial feature is created for the route and is linked to the route through a GIS Feature ID.
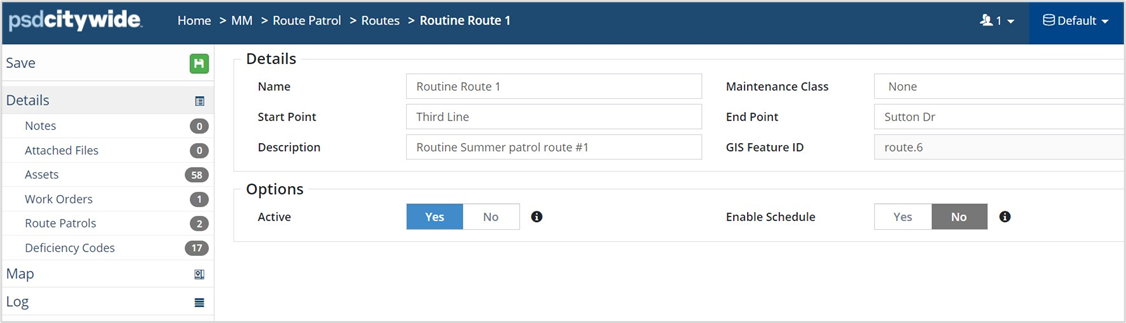
- Attached notes, files, assets, work orders, patrols and deficiency codes can be seen on the left side panel under Details.
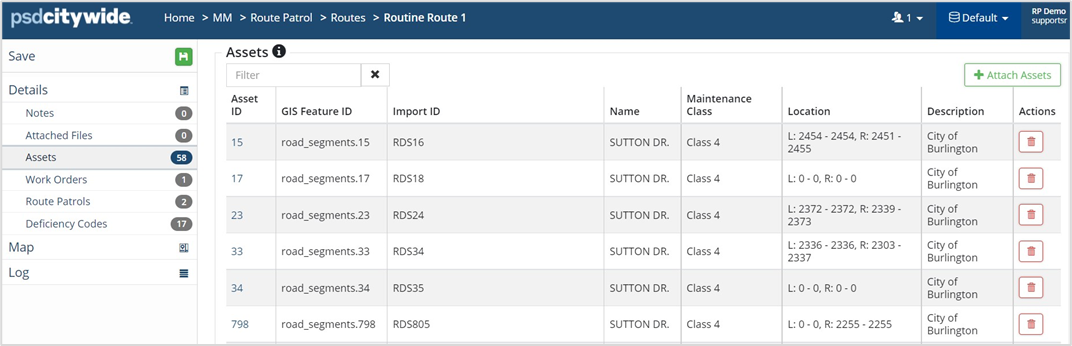
- Assets attached to the route can also be viewed and managed. A user with appropriate permissions can remove an asset from the route by clicking the Trashcan button and/or attach a new asset using +Attach Asset.
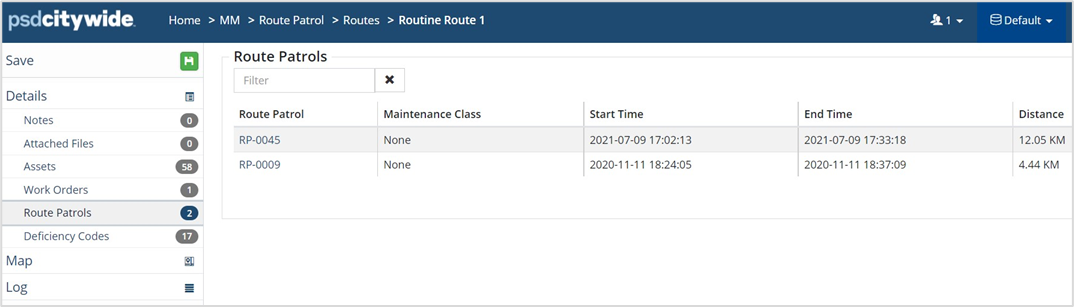
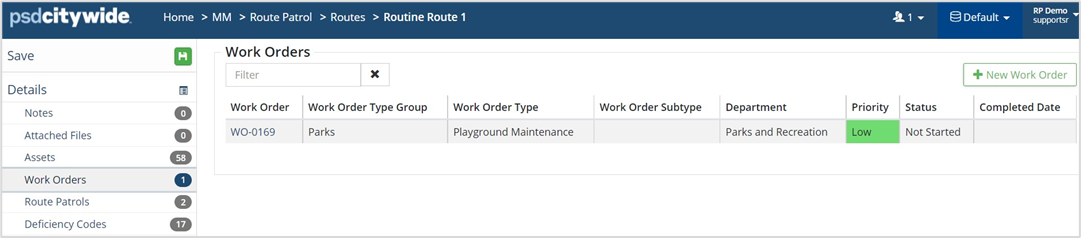
- Route Patrols conducted on the route, as well as Work Orders created during patrolling, are listed under their respective tabs.
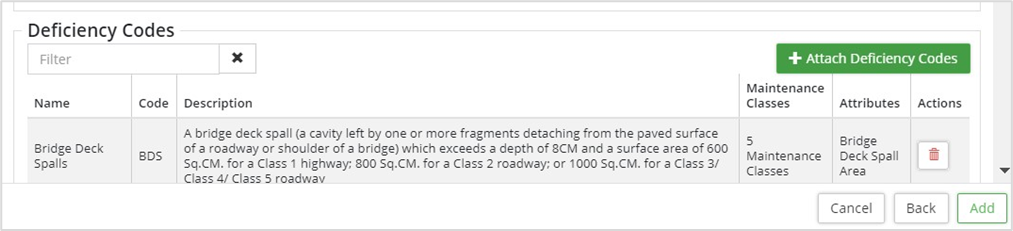
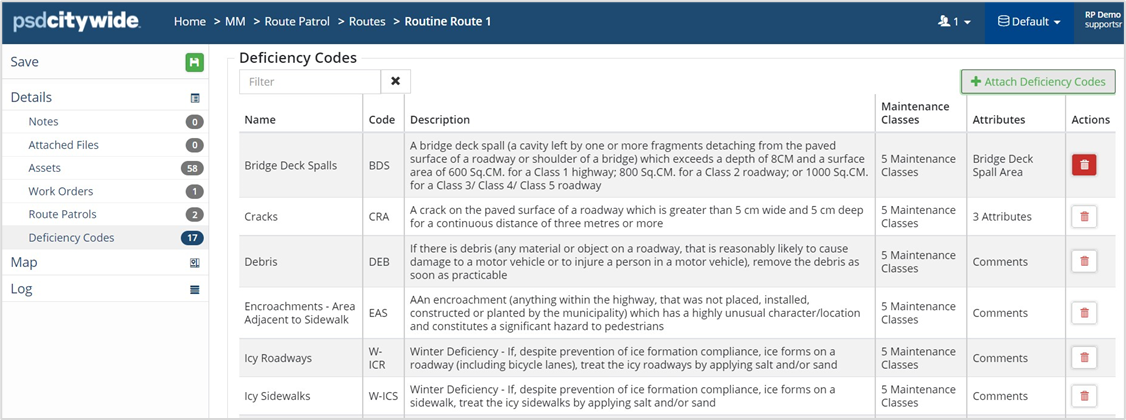
- Deficiency Codes attached to the route can be removed by clicking the Trashcan icon against it and other deficiencies can be added using +Attach Deficiency Codes.
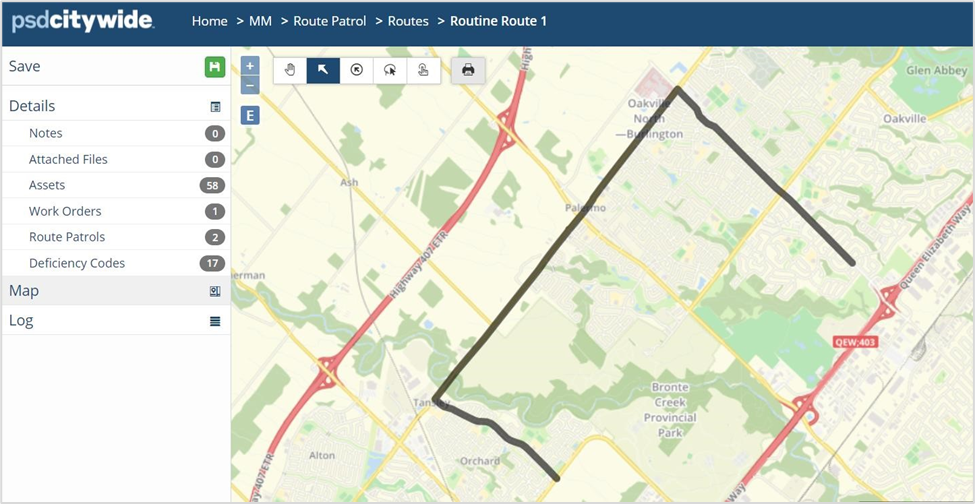
- Select Map to view the route in the GIS map.
- Click Print to print the route to PDF.
- Click Print to print the route to PDF.
Create a Route Schedule
Creating a Route Schedule will auto-generate Work Orders for conducting route patrols on the specified route. The MMS patrolling frequency can be set up in the schedule or can be modified to patrol roadways at intervals deemed necessary by the municipality as per weather conditions.
Create a Route-Work Order Type
To set up Route Schedules, a Work Order Type (WOT) must be created specific to each route, which will be used to generate WOs ahead of time for patrolling a Route, along with a notification.
- Home 🢡 Maintenance 🢡 Work Flow 🢡 Work Order Types.
- Click +Add on the WOT grid, to create a Route-WOT for scheduling patrols for Routine Route.

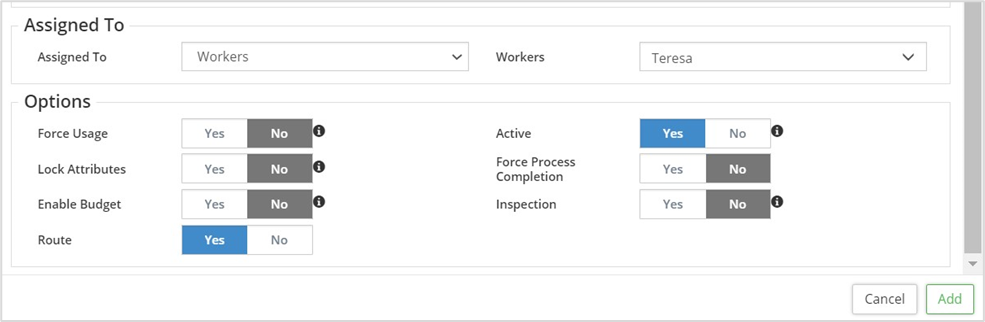
- Create the WOT under the WOT Group Route Patrol and select the Department, Classification and Priority. Set the Route toggle to Yes to mark it as a Route-WOT.
- A map of the route can be attached to the WOT.
- Assign to the Worker who will be conducting the patrol.
- Click Add.
Configure the Schedule
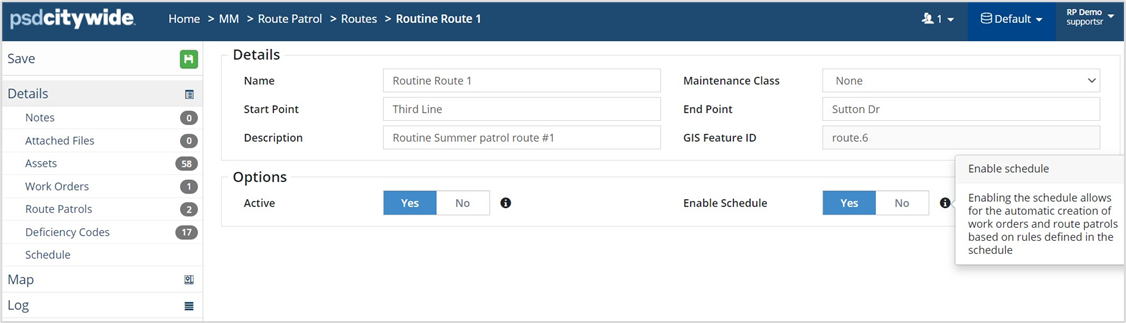
- Home 🢡 Maintenance 🢡 Route Patrol 🢡 Routes
- Navigate to the Route and switch the toggle Enable Schedule to Yes. A new tab Schedule appears on the side panel.
- Attach the Route-WOT created earlier by clicking Select. Apply a Filter to narrow down the WOT list.
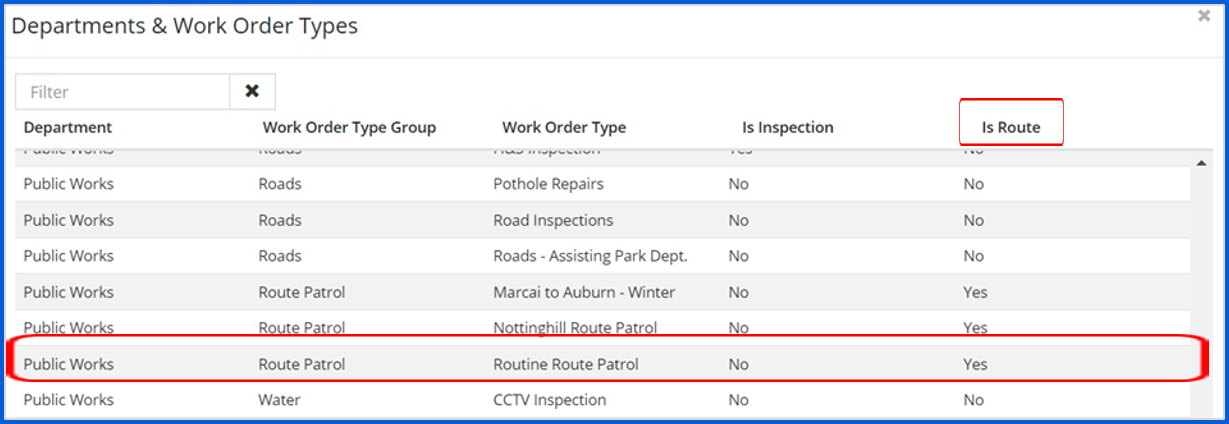
- A Route-WOT will have a Yes under the column Is Route as a result of the Route toggle turned on during the configuration of the WOT.
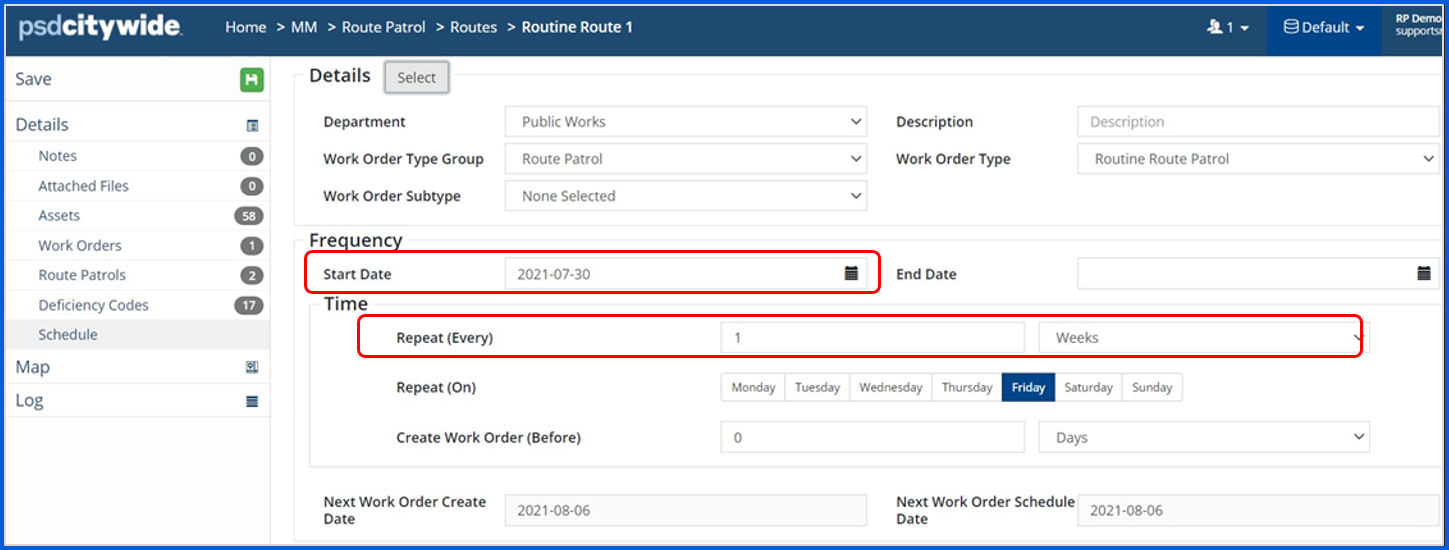
- Enter the Start Date and frequency of the route schedule and the time interval between the patrol due date and when the WO for the patrol will be created.
- The Next Work Order Create Date and Schedule Date will be calculated accordingly.
- The Scheduled-WOs for patrolling the Route will be periodically generated till the schedule is active. The WOs can be stopped by entering a Schedule End Date or by setting the Enable Schedule toggle to No.
Route Patrol Work Orders
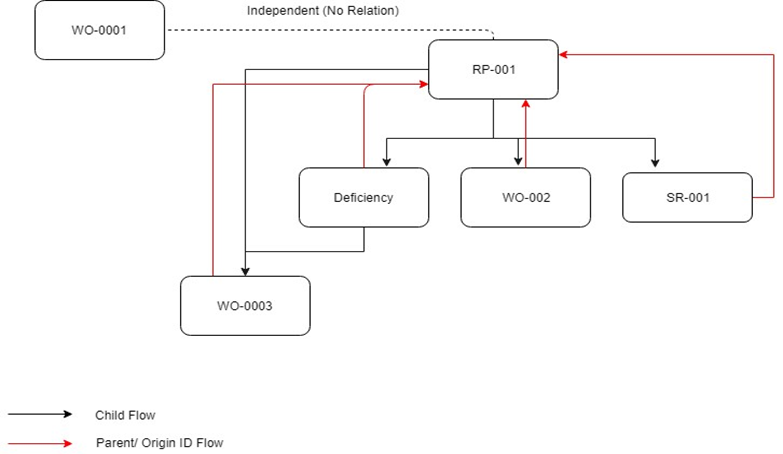
The different types of work orders related to Route Patrol can be differentiated based on the Origin ID of the WO as seen on the WO grid.
Scheduled WOs have an Origin ID that is prefixed with ROUT (i.e., ROUT-0000).

WOs generated from a deficiency, have Origin IDs prefixed with DF (i.e., DF-0000), and WOs created during an active patrol from a mobile device have Origin IDs prefixed with RP (RP-0000).

Work Order Origin ID flow
The table below provides a comparison of the three different WOs associated with route patrols:
|
# |
Route Scheduled Work Order (WO-001) |
Work Order created during an active patrol (WO-002) |
Work Order created from a deficiency identified during patrol (WO-003) |
|
1. |
Origin ID format is ROUT-000 |
Origin ID format is RP-000 |
Origin ID format is DF-000 |
|
2. |
WO-001 has the Route attached |
WO-002 has the Route Patrol attached |
WO-003 has the Deficiency Code and Route Patrol attached |
|
3. |
WO-001 does not have a location |
Work Order gets location from coordinates captured on mobile app |
Work Order gets location from the deficiency coordinates |
User Preferences
Mobile Profile Work Order Filter
The Mobile App preferences of the patrolling staff need to be customized so they can see the scheduled WOs as well as other MMS work orders related to route patrols.
To access the relevant work orders on the Mobile app:
- Navigate to Home 🢡 Maintenance 🢡 Preferences.
- In the User Preferences section, customize Mobile profile – Work Order Filter. These preference settings are specific to each User.
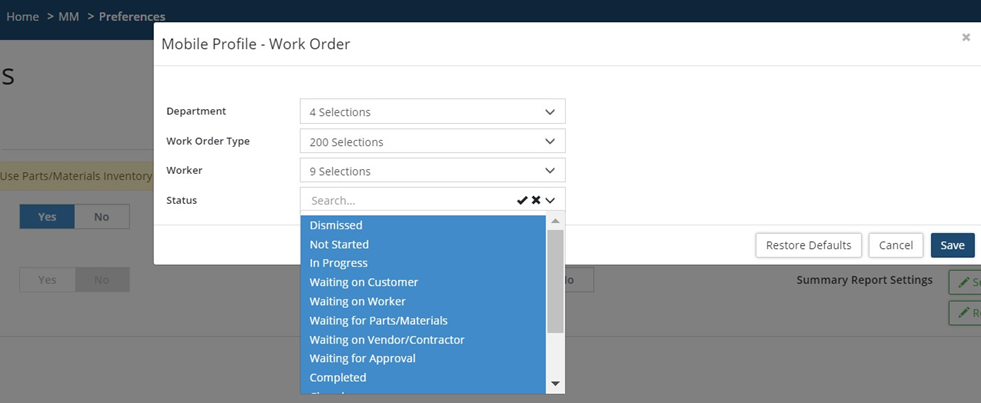
- Click Customize and select the Department and Route-Work Order (WO) Types, as well as the Worker(s) assigned, and the WO Status.
- Click Update Global Preferences to update your preferences.


