
Overview
All route patrols conducted, including all information collected (deficiencies, pictures, notes, etc.) during an active patrol and synced to the database, can be seen on the Route Patrol dashboard.

The Route Patrol dashboard is divided into two sections:
- The RP Grid view, where details of patrols and deficiency records are listed
- The RP Map view, where the GIS features for Routes, Route Patrols, deficiencies, notes, road condition updates, work orders and service requests can be seen:

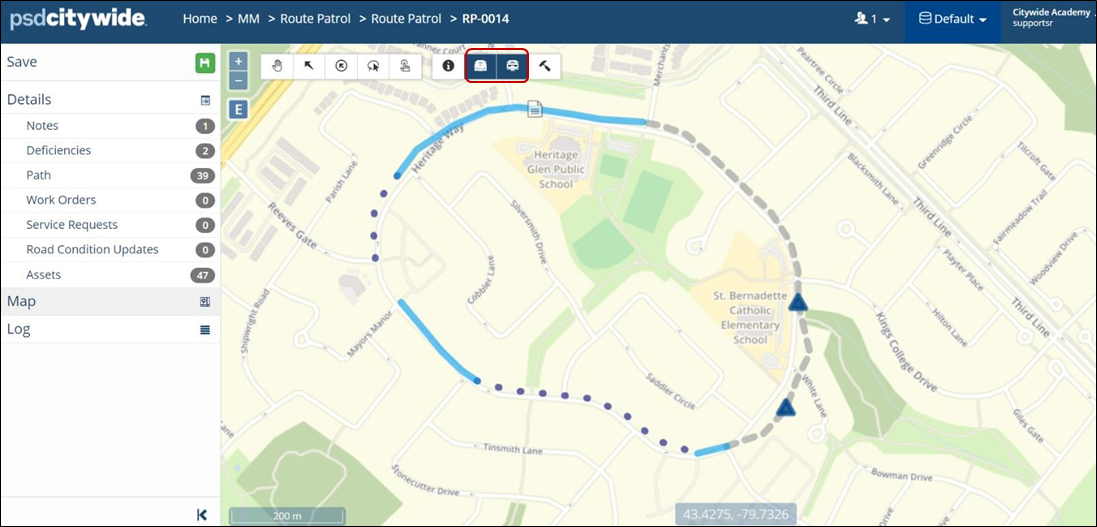
Click the Globe icon against a route patrol and the following displays in the map:
- The patrolled path or the Route Patrol (in blue)
- The expected path or defined Route (in black) for the Patrol
- The location of deficiencies, notes and WOs recorded during the patrol
Multiple Routes Patrols can be displayed by clicking on multiple Globe icons together.
The Grid can be scrolled laterally to see additional columns of information. Column sets can be customized to view desired information on the grid.
Navigation and Tools
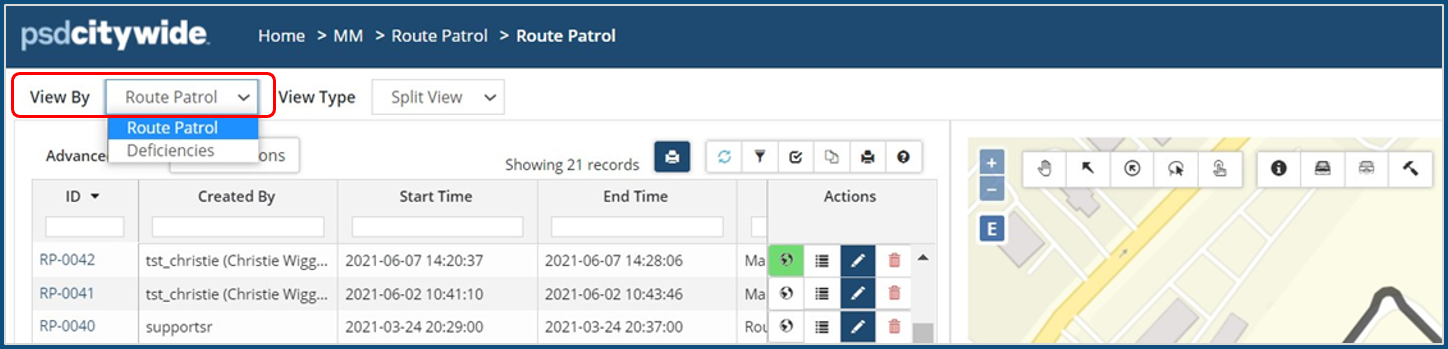
View By
The RP default grid view is set to Route Patrol and displays uploaded patrols in real-time. The grid view can be set to Deficiencies to display deficiency records.
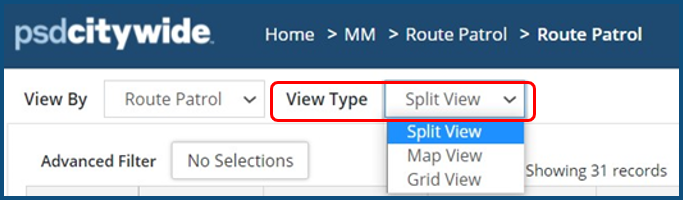
View Type
The screen view can be changed from the default Split View (shown above) to only Grid View or only Map View to allow better access to functionalities on the grid and the map.
Grid View
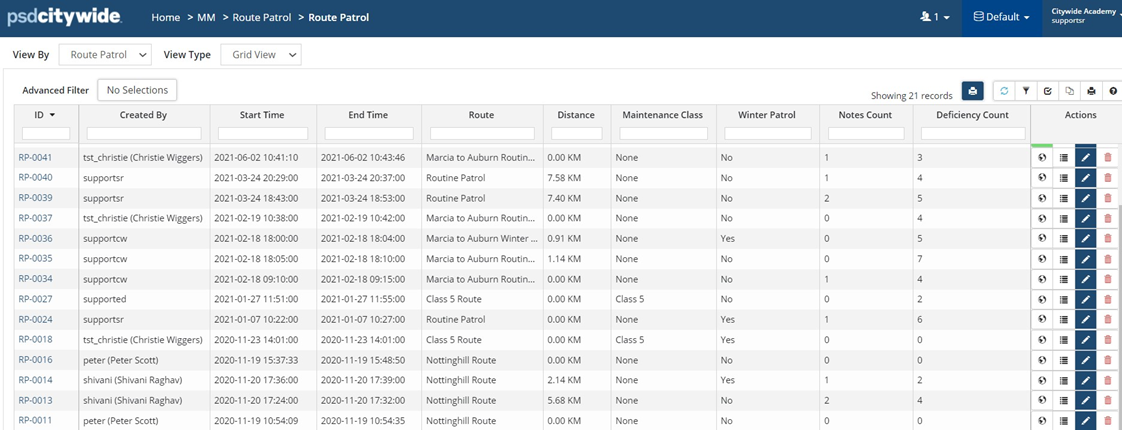
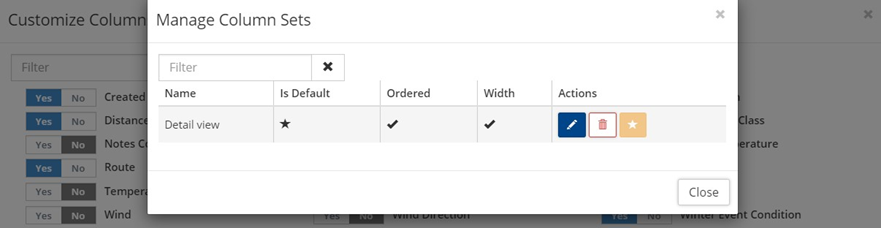
Additional information can be viewed in the grid and users can set a preferred column set as a default. To customize the columns visible on the grid click Customize Columns.

A preferred selection of column headers can be saved as a Column Set.
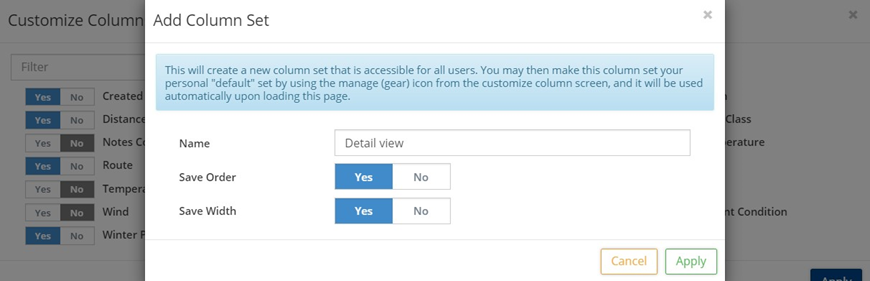
A preferred column set can be set as a default view for future logins by clicking the Star icon.
The grid as visible can be exported.
- Click Export to export as a .csv
- Click Print to export as a .pdf

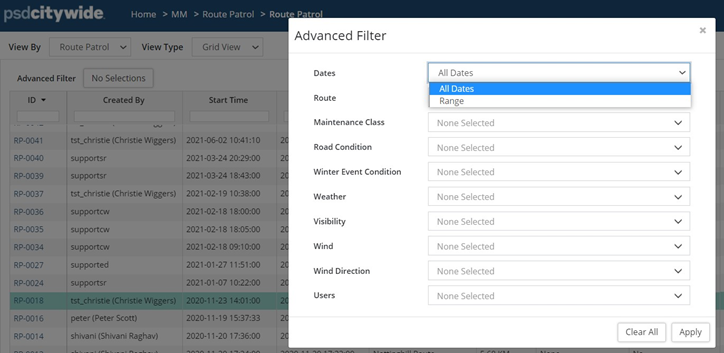
The Advanced Filter is used to filter records by a Date Range or User (Patroller).
Action tools are available for Route Patrol records:
- Click the Globe button to display the patrol on the map
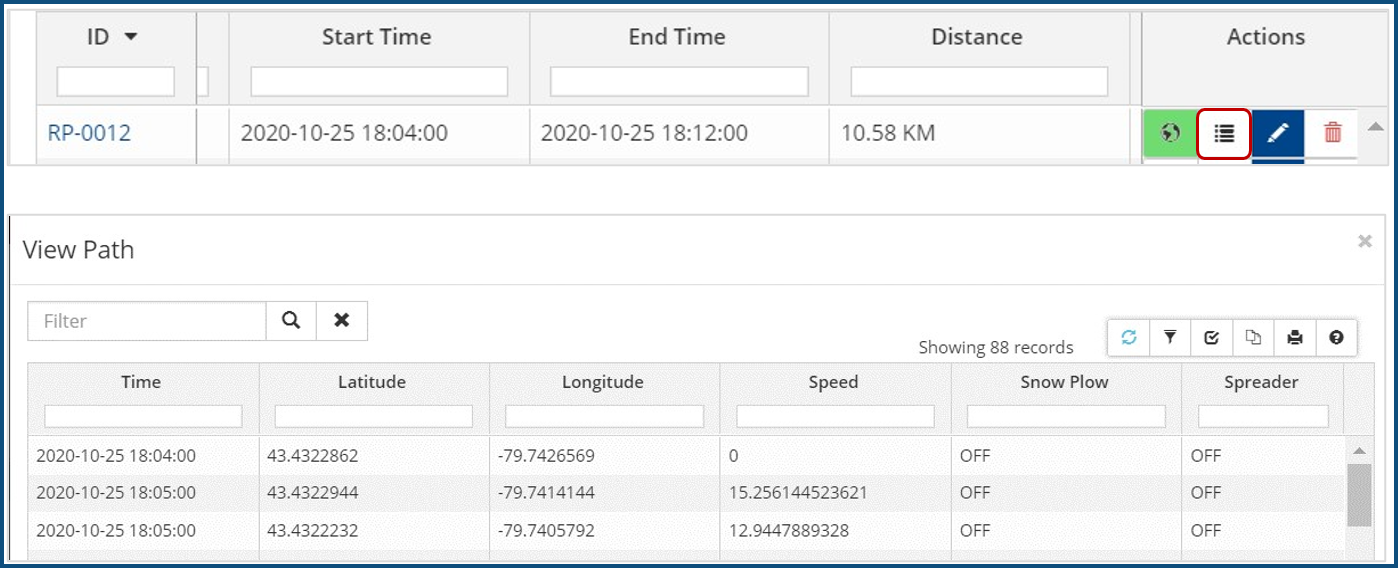
- To see the patrol Path Details click the below highlighted icon on the Route Patrol grid:
Map View
Map view displays a full view of the route patrol features, which can be selected to view details in the attribute table. Click here for detailed functionality of the RP Map.
Review a Route Patrol
To view the details of a patrol, click its Route Patrol ID.

Use the left side panel to view attached notes, deficiencies, work orders and service requests.
Click Summary Report on the Details screen to create a route patrol summary PDF.
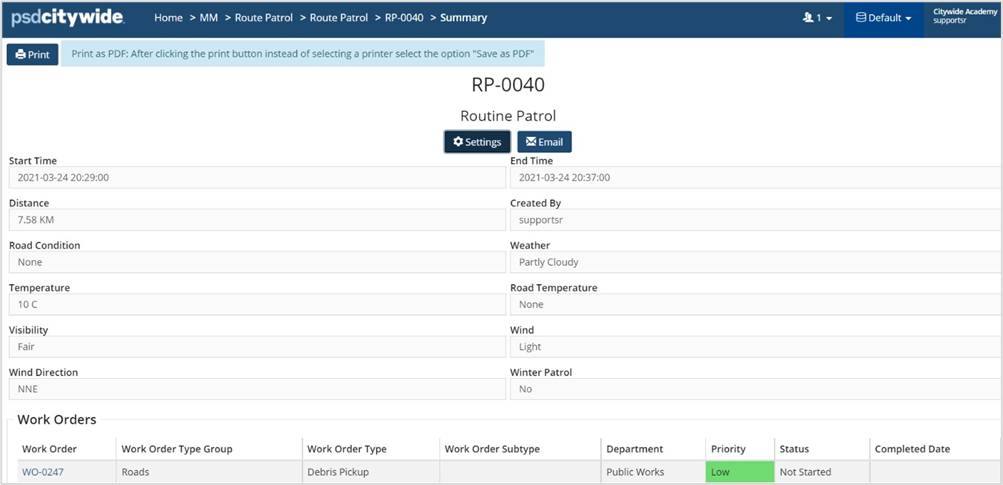
Options within the summary report window include:
- Print: Print a hard copy of the summary report.
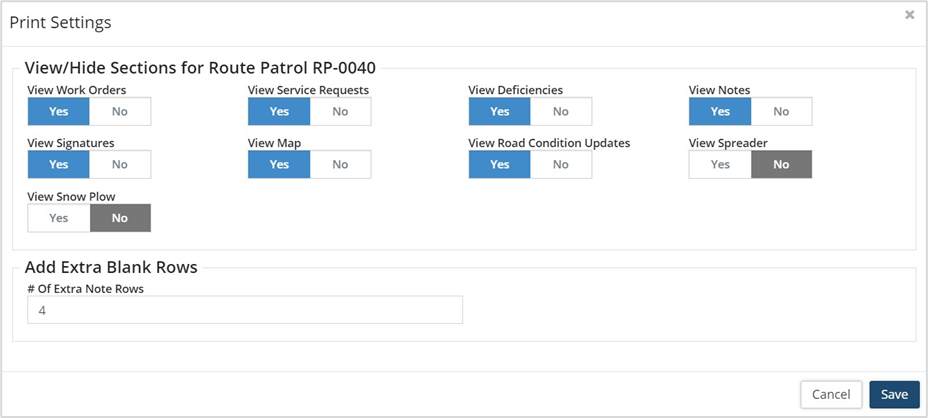
- Settings: Customize the report to include:
- Add extra rows for recording notes (enter a value in the # Of Extra Note Rows field)
- Print a winter patrol map with paths covered by the snow plow and spreader (toggle View Spreader and View Snow Plow to yes).
- Email: Send the summary report via email.
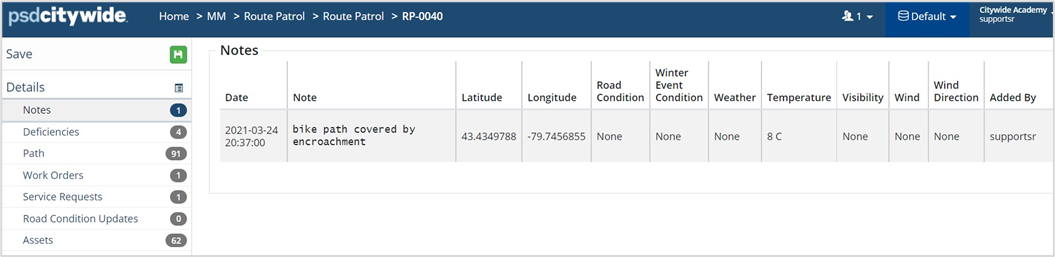
Notes
Notes saved on the patrol are date/time and author stamped. Location coordinates, road and weather conditions are also logged.
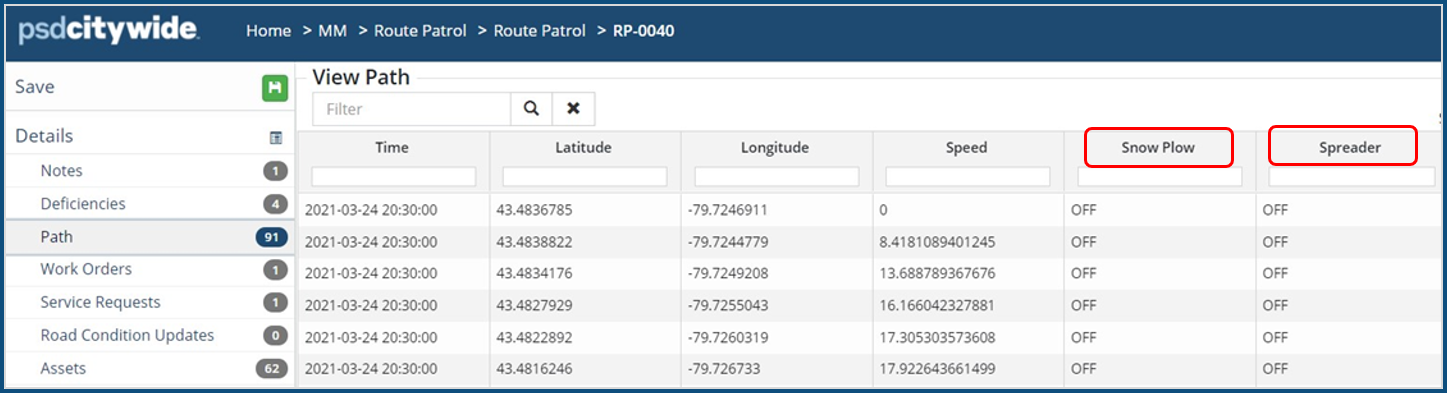
Path
The route patrol path lists Coordinates, Time and Speed at each point location (min. 5m apart), as well as the stretch where the Plow or SaltSpreader are used when performing a winter Patrol. The Snow Plow and Spreader display ON at the path coordinates where their application began and shows OFF, when stopped on the mobile app. Supervisors can thus review which road segments were treated for snow accumulation or ice formation by plowing/salting/sanding.
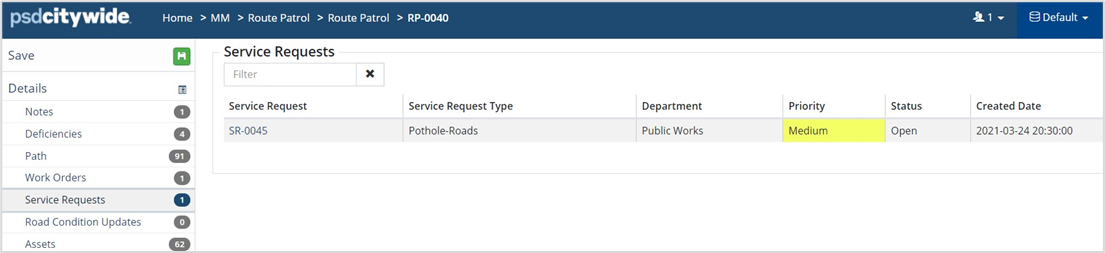
Work Orders/Service Requests
Work Orders/Service Requests created during the patrol can be viewed by clicking the appropriate option on the side panel.

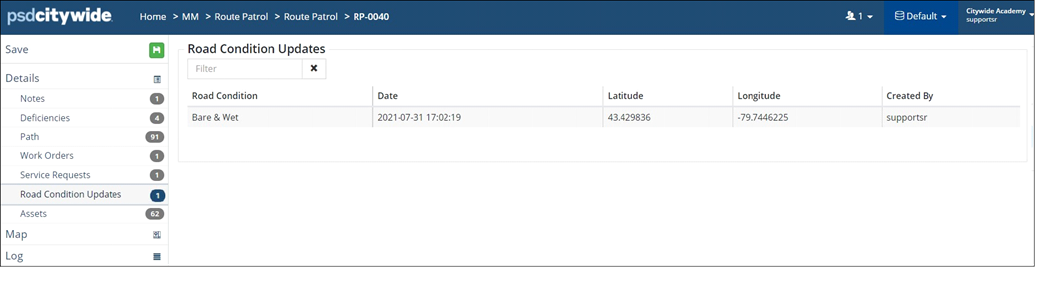
Road Condition Updates
Road conditions can change during a patrol, hence multiple road condition updates can be recorded on an active patrol and will be listed here.
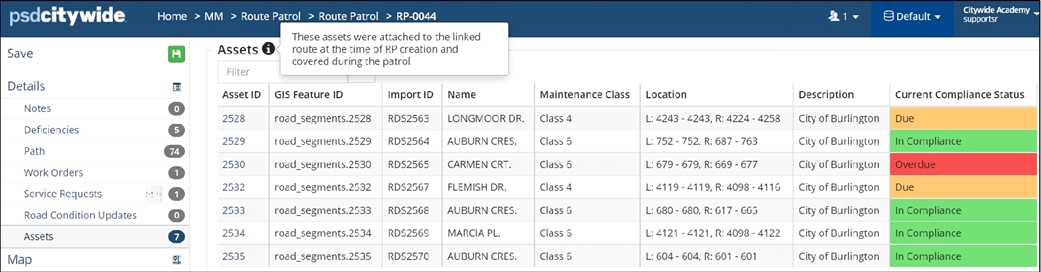
Assets
All the assets linked to the route and covered during the patrol (as verified by Citywide AI) are attached to the Route Patrol and displayed here. Citywide AI determines which assets were actually driven on during this patrol through an overnight query and the appropriate Current Compliance Status is assigned to the Asset.
If the patrol did not cover any of the assets that constituted the Route or an incorrect Route was selected for the patrol, there will be no assets listed on this page.
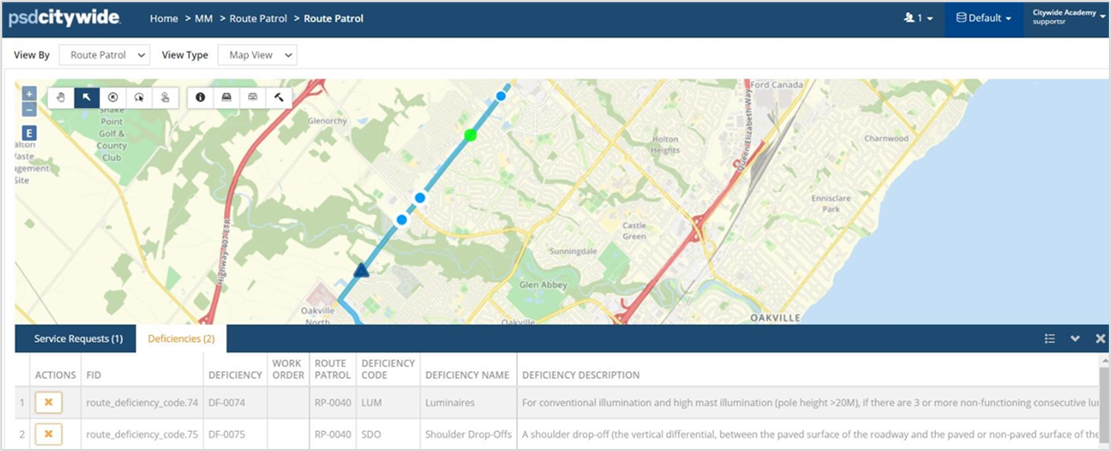
Map
The Map shows the Route Patrol and all attached features, with the ability to select any feature using the Select Tool (highlighted) and see high level details. It also allows actioning deficiencies and service requests into work orders using the Hammer tool.
The Info icon displays the legend for the map features.
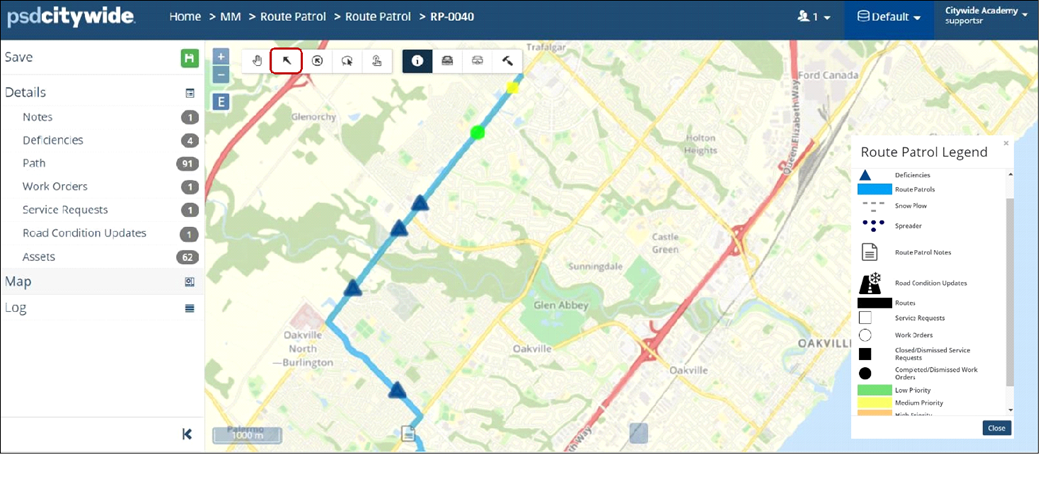
The Plow/Spreader buttons display the path snow-plowed and sanded respectively.
Deficiencies
The deficiencies recorded during the active patrol are listed on the Deficiencies page.
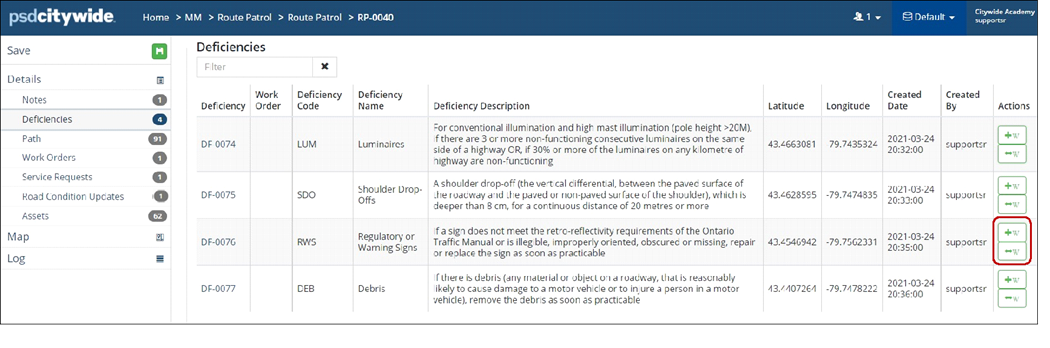
Create a Work Order from a Deficiency
Each deficiency can be converted into a work order by clicking the +W button or linked to an existing work order by clicking -W.
- Click +W to create a deficiency linked work order. The asset closest to the deficiency location can be attached to the WO.
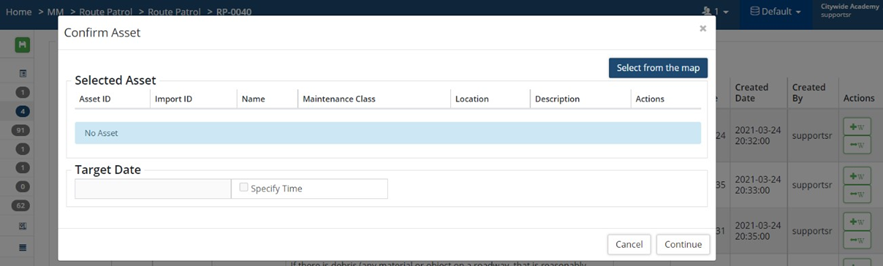

- Click Continue to confirm the selected asset and the target time to resolve the deficiency, which is based on the maintenance class of the asset.
- The New Work Order wizard opens. The WOT and Target Date are pre-populated, deficiency Attributes and pictures are carried over and the Asset is attached under Resources.
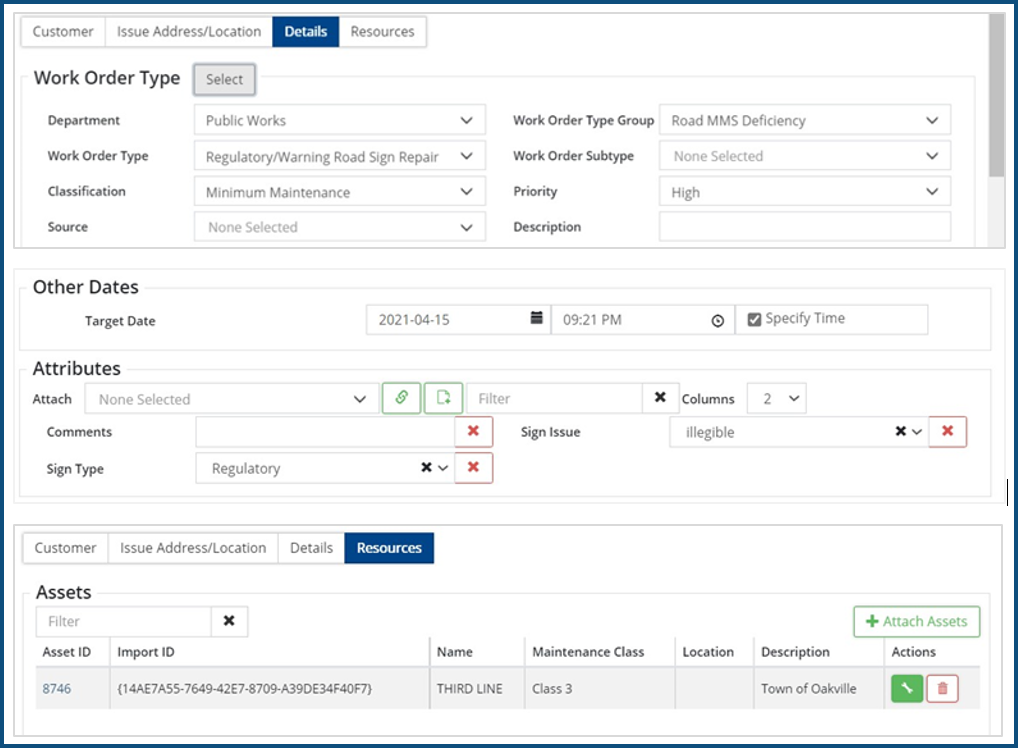
- Add the work order. The Work Order column is updated with the WO-ID of the linked WO created for the deficiency.


