Overview
Many Licence applications have a field in which the Inspection Type must be specified. This is the page in which you define the various Inspection Types for Licences. When a licence application is being created, either internally (by municipal staff) or externally (by customers and other types of clients using the the PSDCitywide PortalThe PSDCitywide Portal is an online customer-facing application used to submit Permitting applications. See the PSDCitywide Portal User Guide for details.)), the Inspection types created here will appear in a drop-down list attached to the Inspection Type field.
Inspection Types accessibility: Home 🢡 Permitting 🢡 Licences 🢡 Manage 🢡 Inspection Types
The Inspection Types Grid
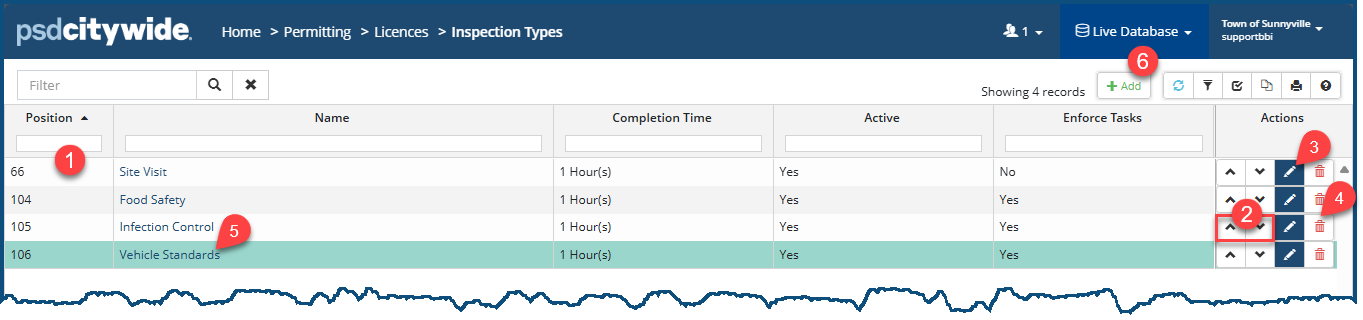
The Inspection Types grid is fairly simply, showing the key components of each inspection type. The Position ❶ field indicates the priority the inspection has over lower numbered inspections. The higher the position, the more commonly used inspection. The inspection's position can be moved up or down by clicking on the the up/down buttons ❷. The basic, key components of the inspection can be edited by clicking on the Edit icon ![]() ❸, and it can be deleted by clicking on the Delete icon
❸, and it can be deleted by clicking on the Delete icon ![]() ❹. Clicking on the Inspection Name ❺ will open the Inspection record.
❹. Clicking on the Inspection Name ❺ will open the Inspection record.
Add an Inspection Type
- Click on +Add ❻. The New Inspection Type dialog box appears:
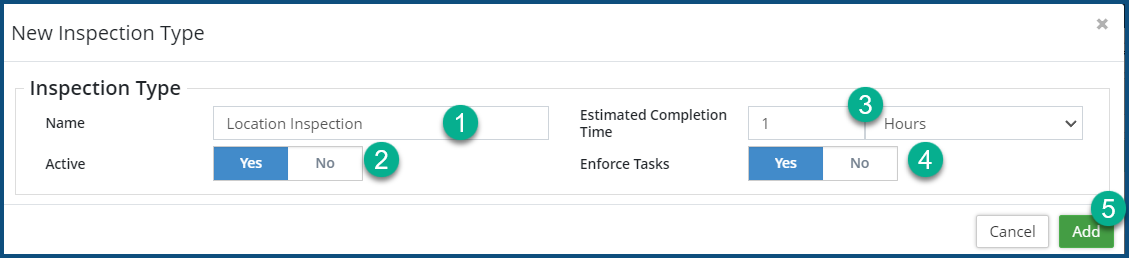
- Enter a Name ❶ for the Inspection Type.
- Ensure the Active ❷ flag is set to Yes.
- Set the Estimated Completion Time (how long the inspection is expected to take) ❸ in hours or minutes.
- Select Yes if the Tasks associated with the inspection are to be Enforced ❹; No if enforcement is not required. (See the discussion below on Inspection Tasks.)
- Click Add ❺.
- Click on the Edit tool
 ❸. The Edit Field dialog box will appear with the above fields.
 - Make the required changes.
- Click on Edit.
- Click on the Delete tool
 ❹.When prompted, click on Remove.
Set the Inspection Type Position
Various types of inspections are more common that others. Consequently, it makes sense to position that most common at the top of the list and the remained to follow accordingly. To reposition an Inspection Type:
- Click on the row for the inspection type to be repositioned.
- Use the up/down arrows ❷ to move the selected inspection type either up or down the list. The Position number associated with it will change as it is moved.
View/Set the Inspection Type Tasks and Other Details
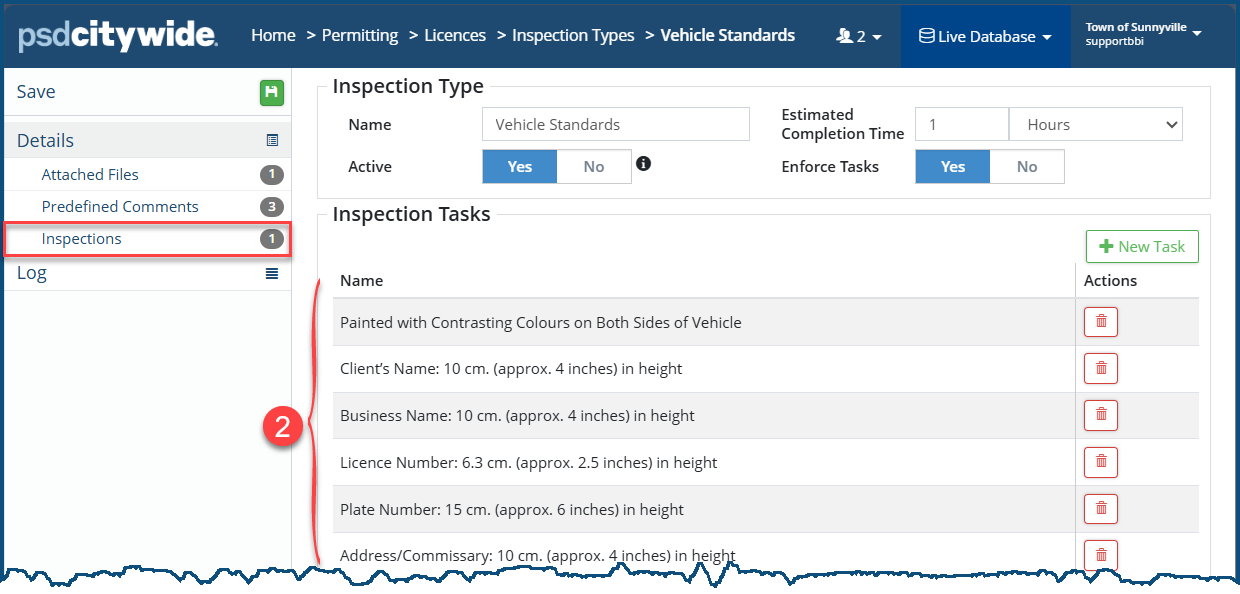
Clicking on an Inspection Type Name ❺ will open the following Details screen:
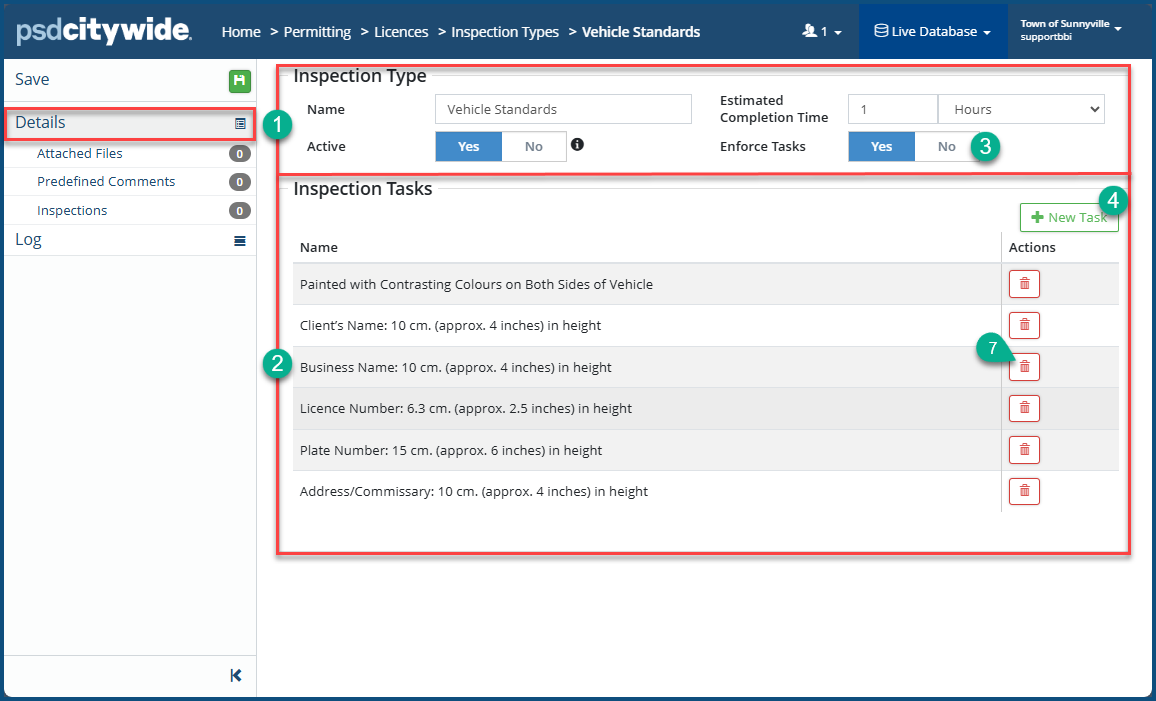
It includes the basic information already entered above pertaining to the Inspection Type ❶ (in this case "Vehicle Standards Inspection"), as well as a section in which a list of Inspection Tasks ❷ associated with the Inspection Type are enumerated. These are the tasks that can be Enforced ❸ (meaning an inspection must involve all of them) or not.
Add a New Task
- Click on +New Task ❹. The New Task dialog box appears:
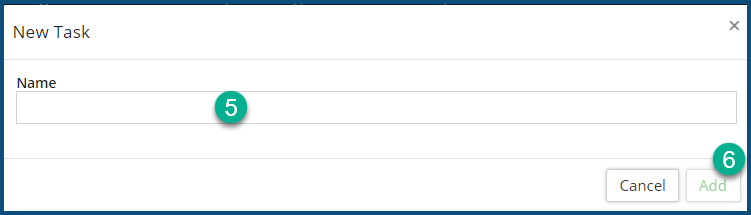
- Provide a Name ❺ for the Task.
- Click Add ❻.
Click on the Delete icon ![]() ❼ to delete the task.
❼ to delete the task.
Adding Additional Inspection Information
Attaching Files
Numerous attachments can be added to an Inspection Type record. These could involve municipal bylaw information, procedural steps in performing an inspection, various technical data sheets, etc.
Add an Attachment
- Attached Files shows a list (if any) of attached files in connection with the inspection, any one of which can be edited or deleted by clicking on the corresponding icon ❶.
- Click on +New File ❷. The Add Files dialog box appears:
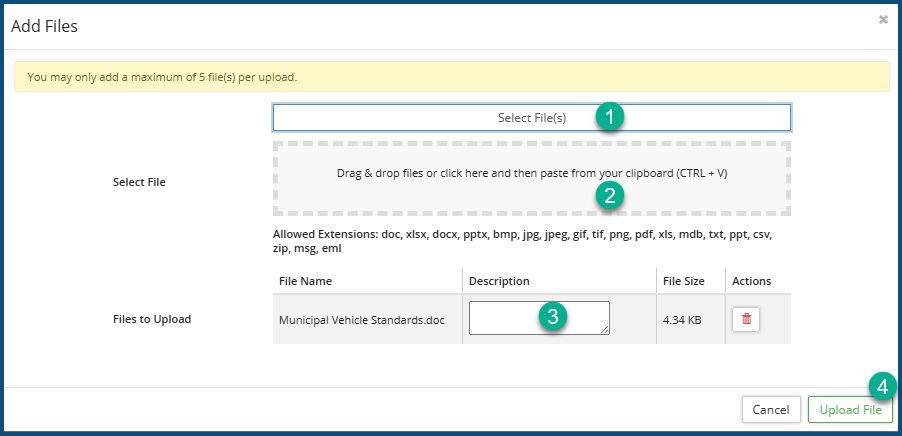
- Either Select File(s) ❶ or drag & drop the files(s) ❷ to be added. They will each appear in the Files to Upload list when added.
- Optionally, provide a Description for each added file ❸.
- Click Upload File ❹.
Predefined Comments
Predefined Comments can be added to an Inspection. They are intended as both time-saving elements and to create terminological consistency across all inspections.
Predefined Comments show a list (if any) of comments that can be recorded instantly in connection with an inspection (e.g., approval, conditional pass, or declining).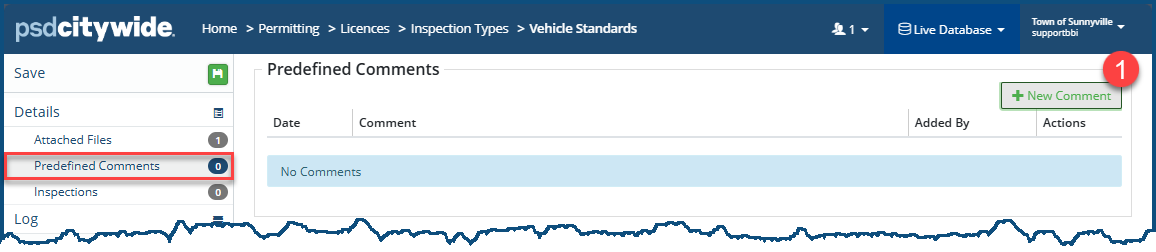
- Click +New Comment ❷. The Add Comment dialog box appears:
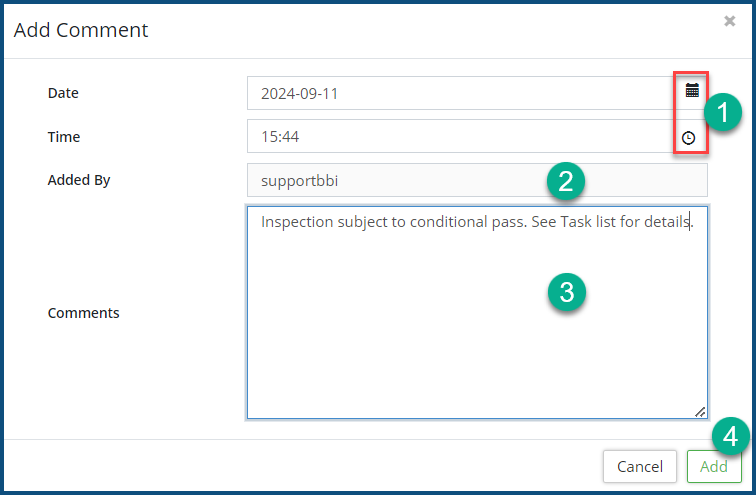
- The current Date and Time appear in their respective fields, but they can be changed by clicking on the icons within each of the fields ❶.
- The Added By ❷ field contains your Citywide login name. It cannot be changed; that is, you cannot attribute a comment you are writing to someone else.
- Enter Comments ❸.
- Click Add ❹.
Inspections
Inspections shows the number of inspections for the selected Inspection Type in the system, as well as the list of inspections corresponding to that number. The relevant details appear under each of the columns.
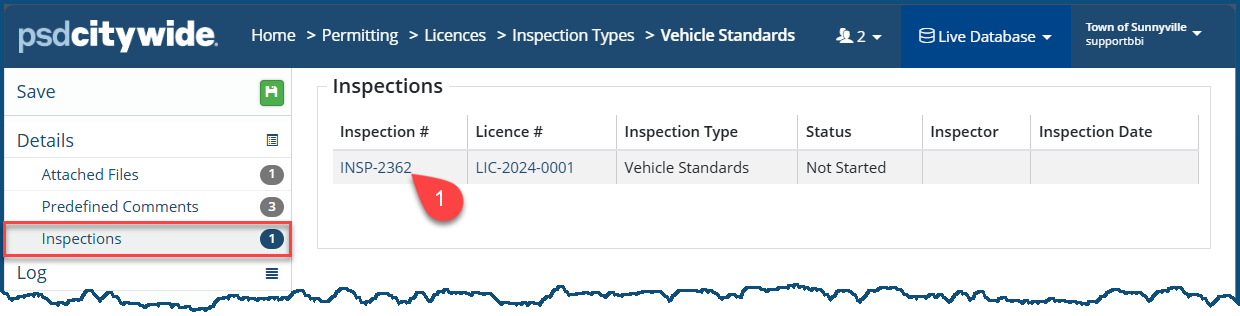
Clicking on the Inspection # link ❶ will open the Inspection record, revealing all the tasks associated with the inspection:
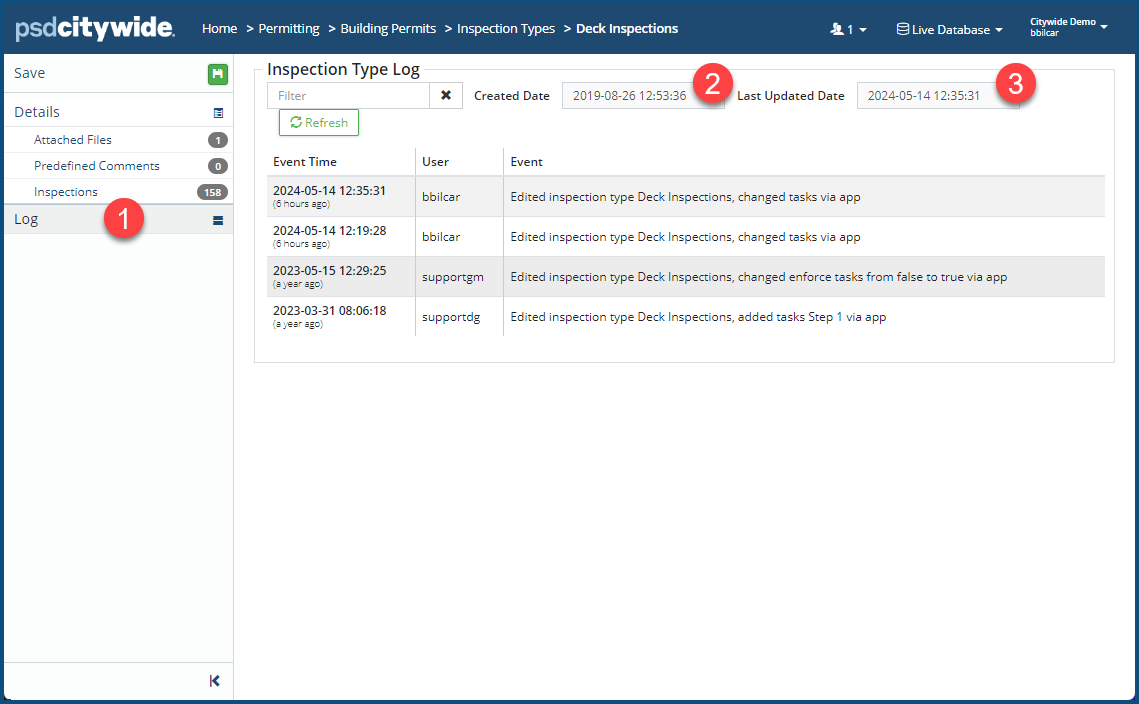
Log
Clicking on the Log ❶ option produces a log of all changes made to the Inspection Type spanning the date the Inspection Type was created ❷ to the Last Update ❸.