
The Upload Center is used for bulk uploading data into Citywide. Many of our modules have the Upload Center functionality - each have several different upload type templates based on the data you want to bulk upload. Use the appropriate template that meets the data requirements; examples such as, but not limited to: in Assets, use the upload center to bulk import new assets, condition assessments, asset adjustments (ie. additions, full/partial disposals, lifecycle quantities, ARO adjustments, etc.) into the Assets Inventory. In Maintenance, bulk import service request types, work flow processes and tasks as well as work order types and workers. In Permits, bulk import property data, customers, permit or document types, reviews and inspection tasks.
To view the various bulk upload type templates available per Citywide module, click here.
- Navigate to your desired Citywide module and click Upload Center.
- Click Upload Type and select the desired upload type from the drop down menu.
- Select Click to Export.

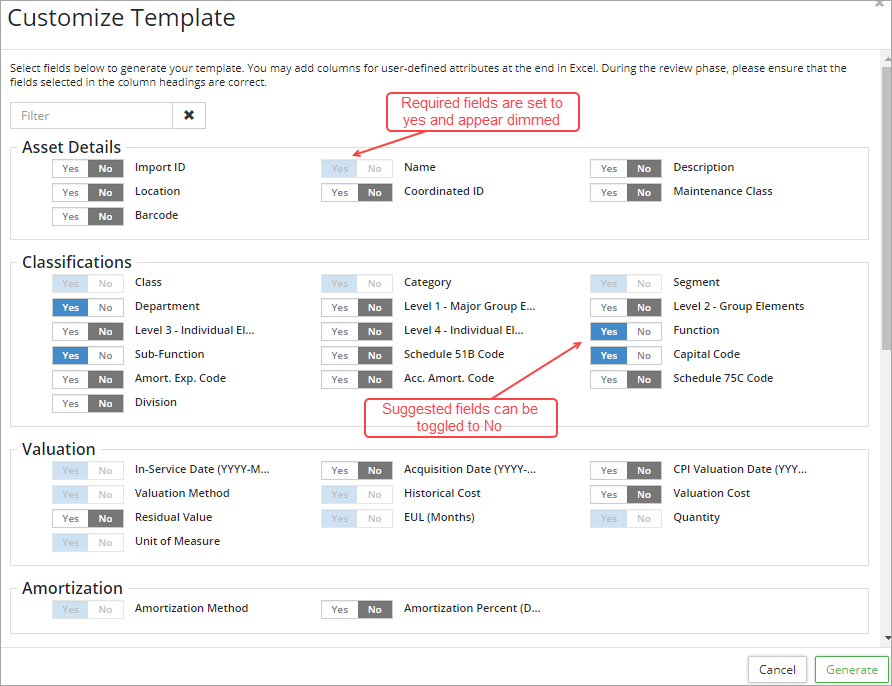
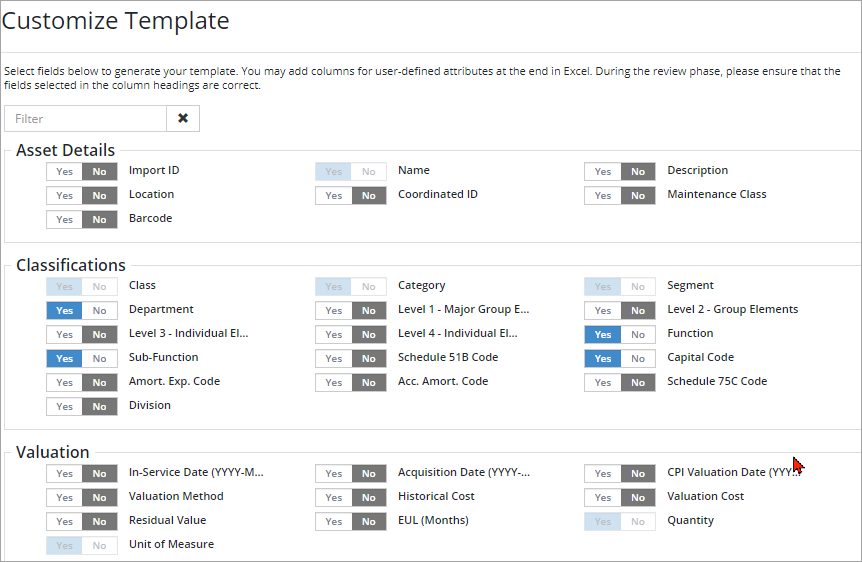
- If customize options exist, select fields in the Customized Template window that will make up the template to be used when bulk importing data. Required fields are set to Yes and appear dimmed. Suggested fields are also set to Yes (darker blue) but can be toggled off as needed.
- Once all fields are selected click Generate
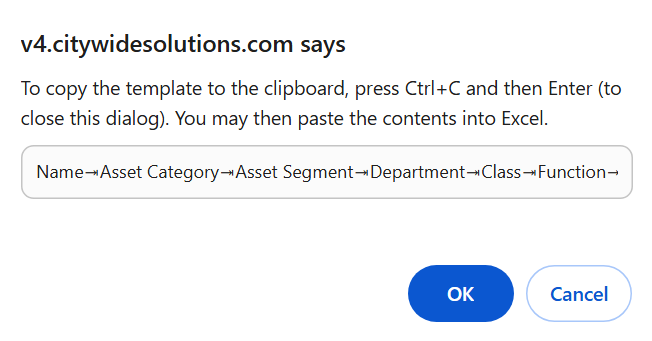 .
. - Copy and paste the string of template text as column headers into a blank worksheet. The string contains all the fields that will make up the template.
- In the worksheet, enter in the details for each record. All required fields must contain a value. Optional fields that are toggled on can have blanks if the information is unknown.
- To avoid duplicating data through the upload process make sure to enter them in exactly as they appear in the database (for example, Machinery & Equipment should not be entered in as Machinery and Equipment).
- When inputting any date information make sure to use the YYYY-MM-DD format otherwise the upload will fail. Any data that requires a specific format, it will be indicated in the customized template column headers you generate in parentheses.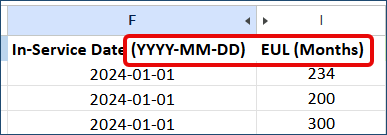
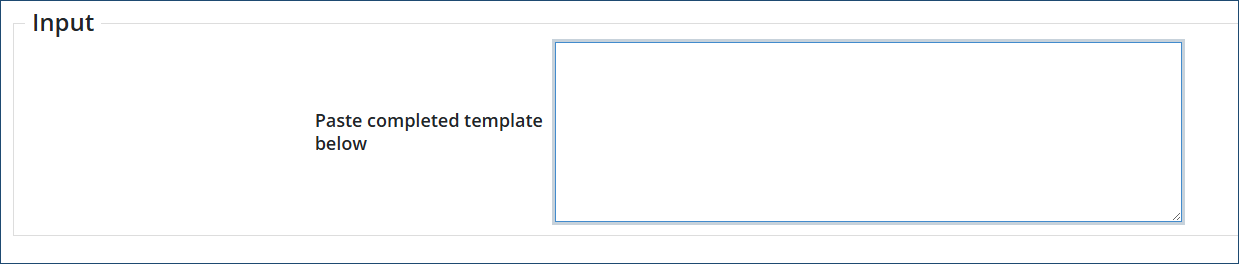
- Once all the data has been entered and reviewed in your worksheet, copy all rows with data including the header row and paste it in the Upload Center, Input/Paste completed template below field.
- Review and verify the information. Any errors within the data will need to be corrected in the worksheet itself. If a field in the header row is mapping incorrectly to the data field in Citywide, click the lower field within the column and select the correct match.

- Once reviewed click Submit Upload . If the upload fails, see further instructions for Unsuccessful Uploads.
- When the upload is successful, you will see a successful upload message.
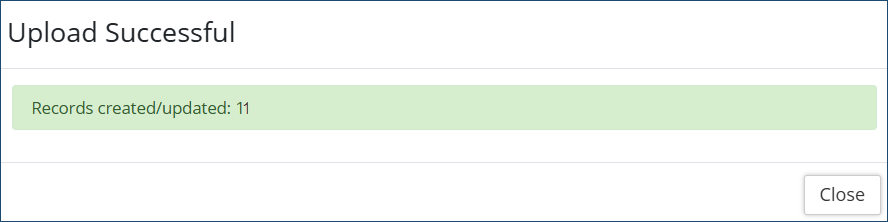
- Click Close.
- As some upload types require a verification step or approval process when uploading bulk data, Citywide will proceed to the verification step or the Pending Imports screen.
- Review and verify data as needed or if re-directed to the Pending Imports screen, then click the Approve Import
 icon. If unapproved, click the Reject Import
  icon.
icon. - Unverified or unapproved data in these steps will remain incomplete or in a pending state.
Upload Center - New Acquisitions (Assets)
Adding a single new asset can be performed using the Add Asset button in the inventory grid view. However, the New Acquisitions template in the Upload Center can be used to bulk import many new assets at once. Assets Admin permissions is required to to use the Upload Center.
Two templates are available to users when adding new groups of assets to the inventory:
- New Acquisition - Use this template when adding new TCA assets. Required fields include In-Service Date (YYYY-MM-DD), Historical Cost, Estimated Useful Life, Amortization Method, etc.
- New Acquisitions - Non PSAB - Use this template when adding new assets for asset management. These assets once imported will have the Exclude from PSAB flag set to Yes and will be excluded from financial reporting.
To add multiple assets using the Upload Center:
- Click Home ð Assets ð Upload Center. (Do not use the Upload Center found on the Home page. The templates available here are used to upload new information into the Core Administration.)
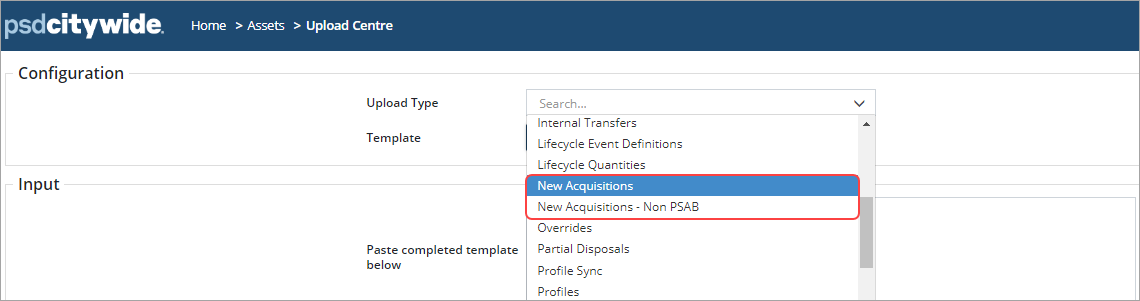
- Click Upload Type and select New Acquisitions.
- Select Click to Export.
- Select fields in the Customized Template window that will make up the template to be used when importing new assets. Required fields are set to Yes and appear dimmed. Suggested fields are also set to Yes (darker blue) but can be toggled off as needed.
- Once all fields are selected click Generate .
- Copy and paste the string of template text as column headers into a blank Excel worksheet. The string contains all the fields that will make up the template.
- In Excel enter in the details for each new acquisition. Name, Class, Category, Segment, In-Service Date (YYYY-MM-DD), Valuation Method, Historical Cost, EUL (Months), Quantity, Unit of Measure, and Amortization Method are all required fields and must contain a value. Optional fields such as Location or Department can have blanks if the information is unknown.

To avoid duplicating classifications through the upload process make sure to enter them in exactly as they appear in the database (for example, Machinery & Equipment should not be entered in as Machinery and Equipment).
When inputting the in-service date make sure to use the YYYY-MM-DD format otherwise the upload will fail. - User-defined Attributes can also be added to the template by entering the attribute name into the next blank column.
- Once all the new acquisitions have been entered and reviewed, copy all rows with data including the header row and paste it in the Upload Center, Input/Paste completed template below field.
- Review the information. Any errors within the data will need to be corrected in the Excel spreadsheet. If a field in the header row is mapping incorrectly, click the lower field within the column and select the correct match. New attributes can be created through the upload process.
- Once reviewed click Submit Upload . If the upload fails, see further instructions for Unsuccessful Uploads.
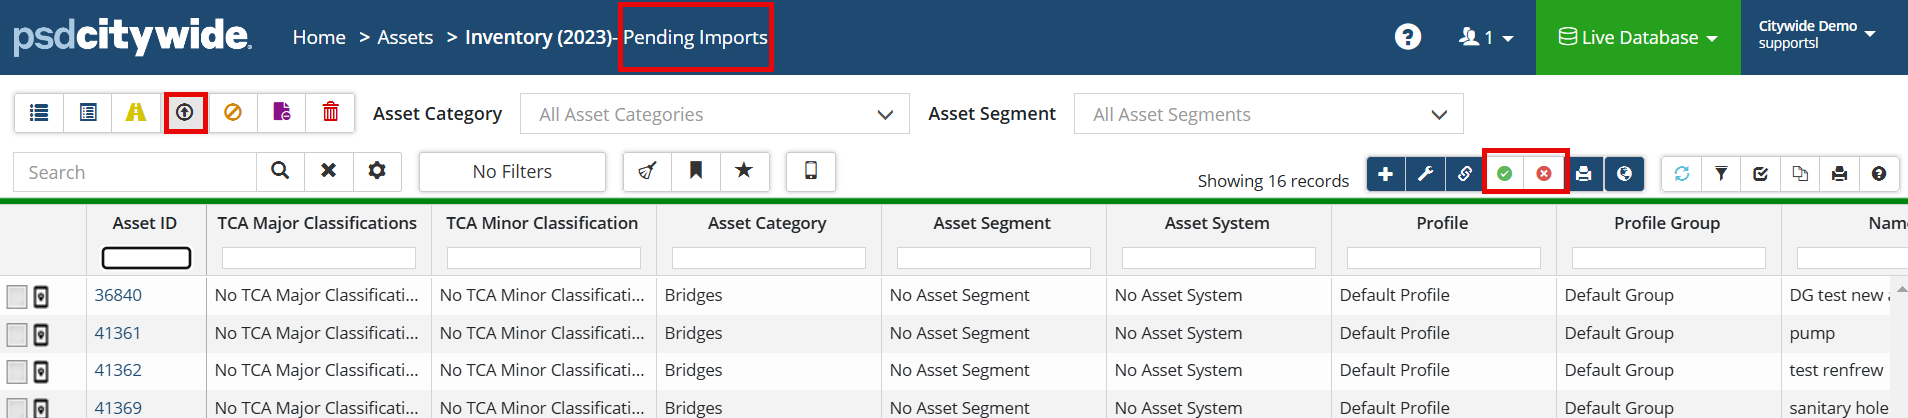
- When the upload is successful the new acquisitions will appear in the Pending Imports asset inventory view.
- Review and then click Approve Import icon on the right above the grid. If unapproved, click the Reject Import icon.
You must approve the imports otherwise the new assets will not be included in reporting. If you navigate away from this screen before approving the import, you can easily navigate back by clicking Pending Imports filter in the top left.
Upload Center - New Acquisitions - Non PSAB
Use this template to bulk import non-TCA assets. These assets may be part of an asset management plan.
- Click Upload Center on the Assets landing page.
- Click Upload Type and select New Acquisitions - Non PSAB.
- Select Click to Export.
- Select fields in the Customize Template window that will make up the template to be used when importing new assets. Required fields are set to Yes and appear dimmed. Suggested fields are also set to Yes (darker blue) but can be toggled off as needed. Scroll down for Condition Assessment, Replacement Cost, and Lifecycle specific fields.
- Once all fields are selected, click Generate.
- Copy and paste the string of column headers text to a blank Excel worksheet. The string contains all the fields that will make up the template.
- In Excel enter the details for each new acquisition. Name, Class, Category, Segment, Quantity, and Unit of Measure are required fields and must contain a value.
- If importing condition assessment information be sure to select all four condition fields.
- If importing user-defined replacement cost be sure to select Replacement Cost Method, Replacement Cost Date (YYYY-MM-DD), and Replacement Cost.
- User-defined Attributes can also be added to the template by entering the attribute name into the next blank column.
- Once all the new assets have been entered and reviewed, copy all rows with data including the header row and paste it in the Upload Center, Input/Paste completed template below field.
- Review the information. Any errors within the data will need to be corrected in the Excel spreadsheet. If a field in the header row is mapping incorrectly, click the lower field within the column and select the correct match. New attributes can be created through the upload process.
- Once reviewed click Submit Upload. If the upload fails, see further instructions for Unsuccessful Uploads.
- When the upload is successful the new acquisitions will appear in the Pending Imports asset inventory view.
- Review and then click the Approve Import icon on the right above the grid. If unapproved, click the Reject Import icon.
To make bulk edits to existing assets, use the 'Asset Sync' upload type template.
|
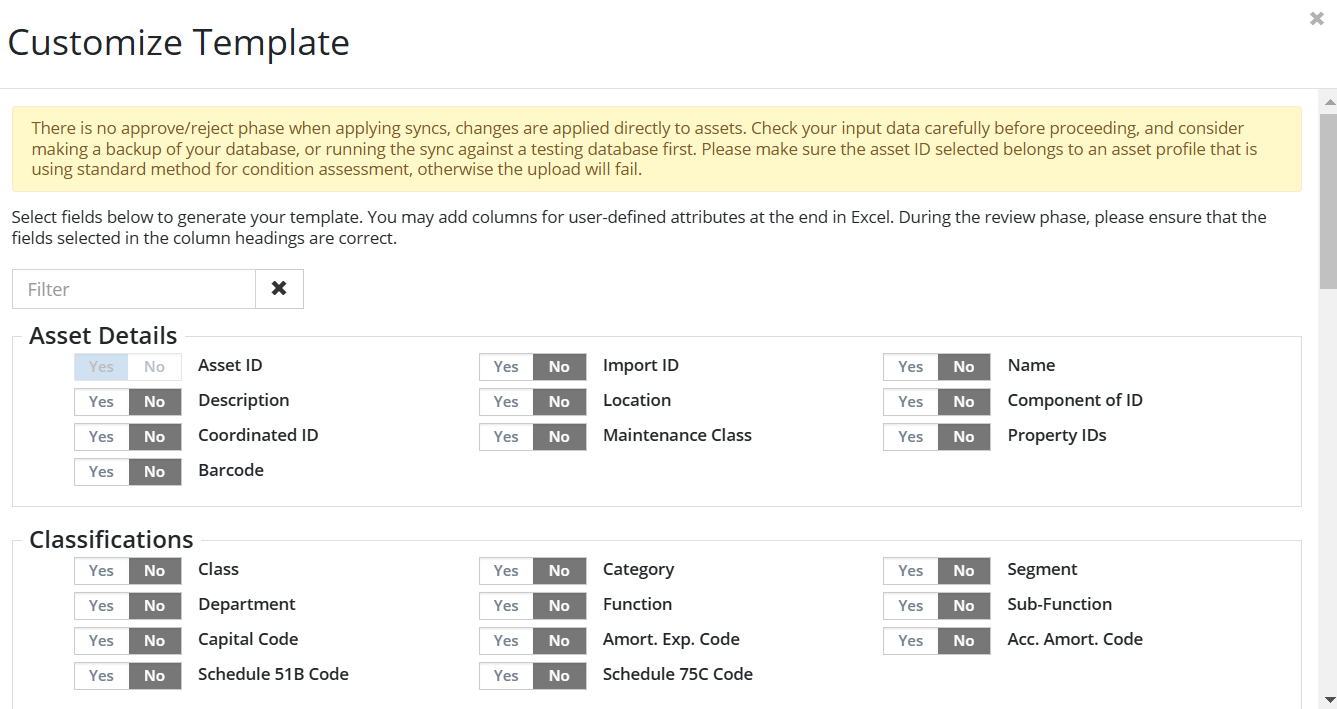
NOTE: When using the Asset Sync template, there is NO additional step to 'Approve' or 'Reject' imported changes in the Asset Inventory pending imports grid view. Therefore, please ensure you review all changes/edits before clicking 'Submit Upload' |
To edit multiple assets using the Upload Center:
- Click Home ð Assets ð Upload Center.
- Click Upload Type and select Asset Sync
- Select Click to Export.
- Select fields in the Customize Template window that will make up the template to be used when editing existing assets. Required fields are set to Yes and appear dimmed.
- Once all fields are selected for your template, click Generate
 .
. - Copy and paste the string of column headers text shown into a blank Excel worksheet. The string contains all the fields that will make up the template.
- In Excel enter in the details for each existing asset you want to edit as defined by your custom template.
To avoid duplicating classifications through the upload process make sure to enter them in exactly as they appear in the database (for example, Machinery & Equipment should not be entered in as Machinery and Equipment). - Once all the edited details have been entered and reviewed in Excel, copy all rows with data including the header row and paste it in the Upload Center, Input/Paste completed template below field.
- Review the information. Any errors within the data will need to be corrected in the Excel spreadsheet. If a field in the header row is mapping incorrectly, click the lower field within the column and select the correct match. New attributes can be created through the upload process.
- Once all edits are reviewed click Submit Upload . If the upload fails, see further instructions for Unsuccessful Uploads.
Unsuccessful Uploads
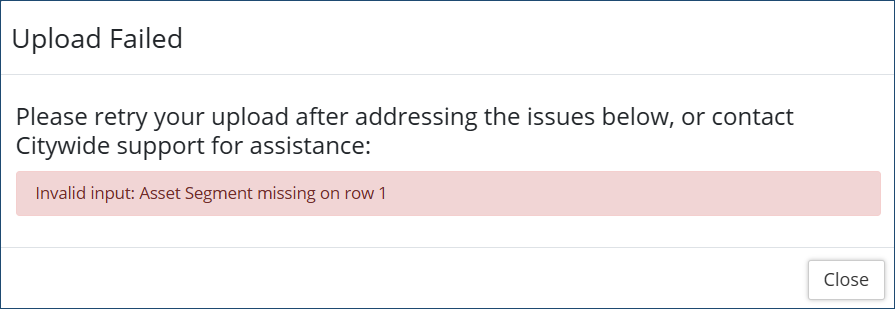
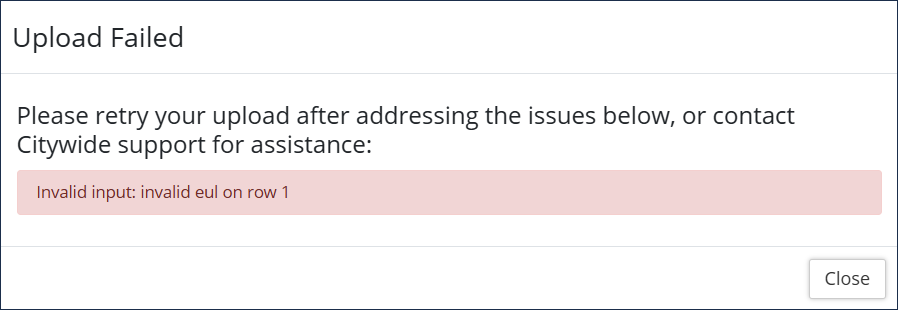
If the upload fails and results in errors (screenshot example below), you must edit and resolve the data issues in your own worksheet template that you copied the information from. You cannot edit any incorrect data in Citywide from the upload box itself.
Once you have resolved the errors in your own worksheet template:
- Click Reset in the Upload Center
- Re-select the upload template type
- Copy and paste the corrected data from your worksheet template into the upload box
- Review the data to confirm it is correct
- Click Submit Upload
Continue with any remaining steps if applicable for the applicable upload type.


