
Overview
All Citywide modules have various grids to view a list of data. Organizing data in a grid format can make it much easier to interpret and use, especially when dealing with large amounts of information. Using the grid features and tools below will help to efficiently search and navigate through the information.
Rows and Columns: The grid consists of rows and columns. Each row represents a record, while each column represents a field or attribute of that record.
Cells: Each cell in the grid contains specific data of a specific record. 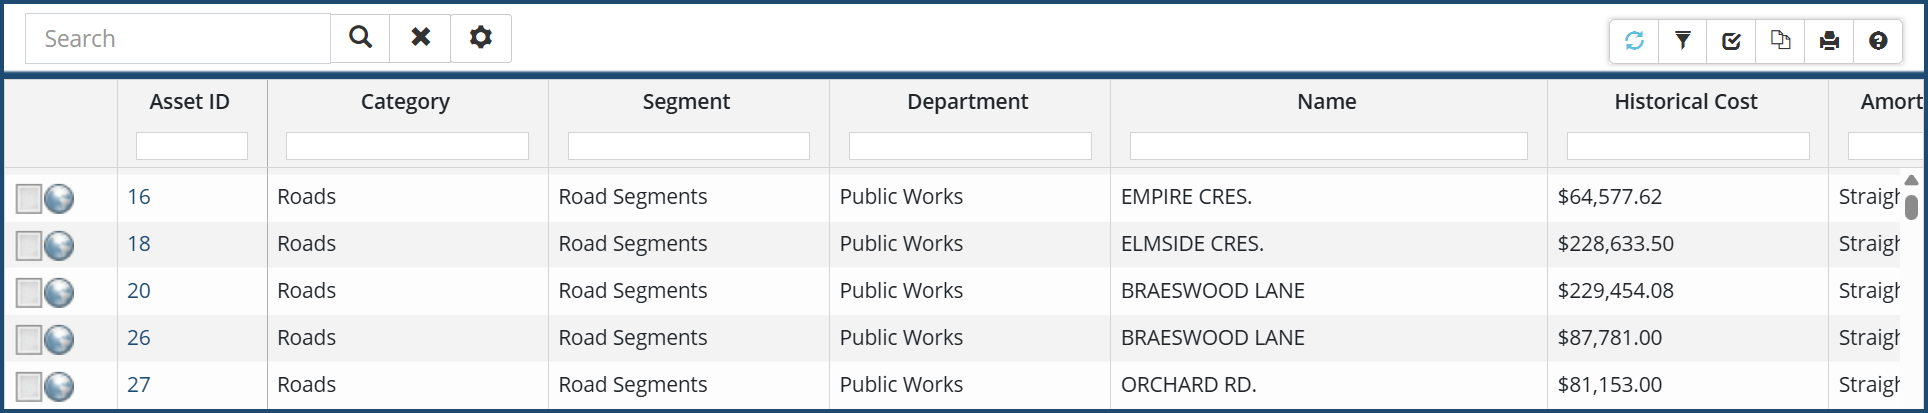
Grid Search, Filters & Sort
When viewing grid data, each column at the top has its own search function to filter and sort data.

Column Filters and Sort

To filter by column(s):
- Click in the field below the column header.
- Enter keyword(s), numbers or operational characters. (Tip: click the
 icon in the grid tools for help)
 - Press Enter on your keyboard.
- Further refine the search by repeating the above steps in multiple columns.
To clear a column filter:
- Click the X within the column header field or click the Clear Filters
 icon.
icon.
To sort data in a column:
- Click a column header (ie. Name)
- 1st click will sort by Ascending
- 2nd click will sort by Descending
- 3rd click will resume original data sort
- Optional: To apply a secondary column sort, hold Shift + single click another column header (ie. Date). A triangle with a number appears to the lower right of the colum header indicating a secondary sort.

Grid Tools
Several grid tool options are available on the top right corner of the grid. Use these tools to filter, customize and print data. For efficiency, users can save their grid and column preferences as the default which will display each time they log in.

|
|
|
|
|
|
|
|
|
|
|
|
|
|
|
|
|
|
|
|
|
Customize columns with the desired data as well as resize and reorder any of the columns within the grid or Citywide reports. Once columns are customized, create and save custom column sets as the default that will display the customized data every time.
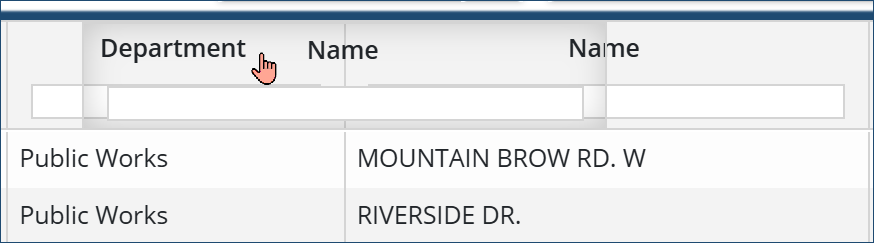
To resize and reorder columns:
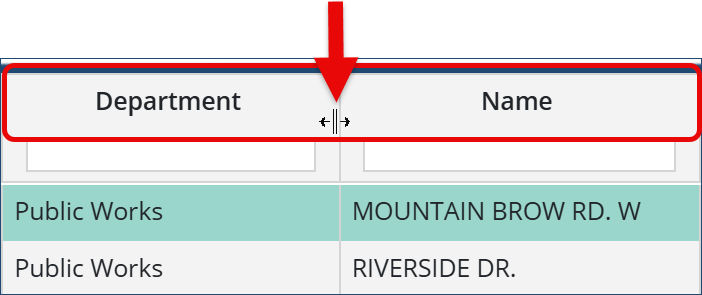
- Resize: Hover over the right border of the column header. When the mouse pointer changes to a double headed arrow click and drag left/right to decrease/increase the column with.
- Reorder: Click + drag the column header to the new location on the grid. When dragging, a shadow appears attached to the mouse pointer.
- Click Customize Columns
 .
. - In the Customize Columns window, columns that are currently displayed in the grid are set to Yes.
- Navigate through the sections and click Yes/No to display/hide the column in the view.
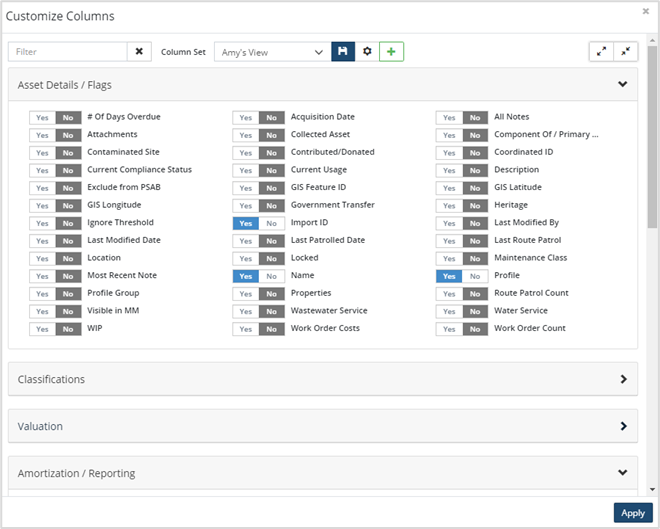
- Click Expand All/Collapse All icon
 in the top right to show/hide all options.
 - Click Create New Column Set
 to save the column set.
 - Enter a name, set the save order and save width flags to yes if columns have been reordered and/or resized within the grid.
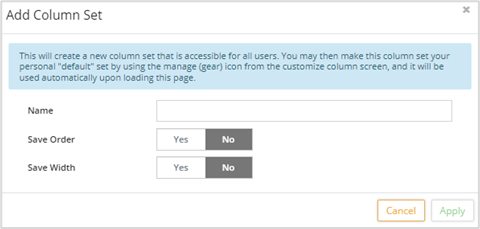
- Click Apply.
- Click the Column Set dropdown and select the name that was just added.
Modify an Existing Column Set
- Click Customize Columns .
- Set additional columns to Yes.
- Click Save
 at the top of the popup to update the column set.
 - Click Apply to load the new column set.
Set a Default Column Set
- Click Customize Columns .
- Click
 to manage saved column sets.
- Click
 on the right to set a column set as the default view.
 - Click
 to delete an existing column set.
- Click
- Click Close.
Export to Excel
- Filter the Inventory list as needed.
- Click Export Data
 .
. - Click the citywide_export.csv file from the download tray or navigate to your downloads folder to open the file.
Print Grid
This will print the grid in PDF format with the columns and customizations you have selected.
-
Click Print Grid icon

-
Choose the desired Layout options: Paper Size and Font size
-
Type the Report Title and choose if the filter criteria are to be included
-
-
Choose the desired Formatting options: Colour and Header
-
Choose the desired Column/Structure

- Then click Print
- Click the citywide_print file from the browser download list or navigate to your downloads folder on your computer to open the file.
This will provide helpful tips and tricks when using the column search, sort and filter functions under the column headers of the grid.
- Click the Help icon
 at the top right corner above the grid.
 - Click the Close button to close the grid usage box.


