
Overview
Geographic Information Systems Viewer (GIS Viewer), a tool built into Citywide and accessible from multiple modules and sub-modules, connects data to maps, drawing a connection between location and the types of things that are found at the mapped locations. These include the customary items that pertain to most all municipalities, such as water hydrants, storm basins, etc., all of which appear in the Layers ❶ panel of the GIS Viewer and all of which can be mapped to the GIS map. The location of Citywide geolocated planning applications can also be represented on the GIS map, and those same locations can be selected to view permitting information. Finally, the GIS map can be used to locate a property and then create a new planning application for a project on that property. (See GIS Viewer for a full discussion on the features and uses of the GIS Viewer.)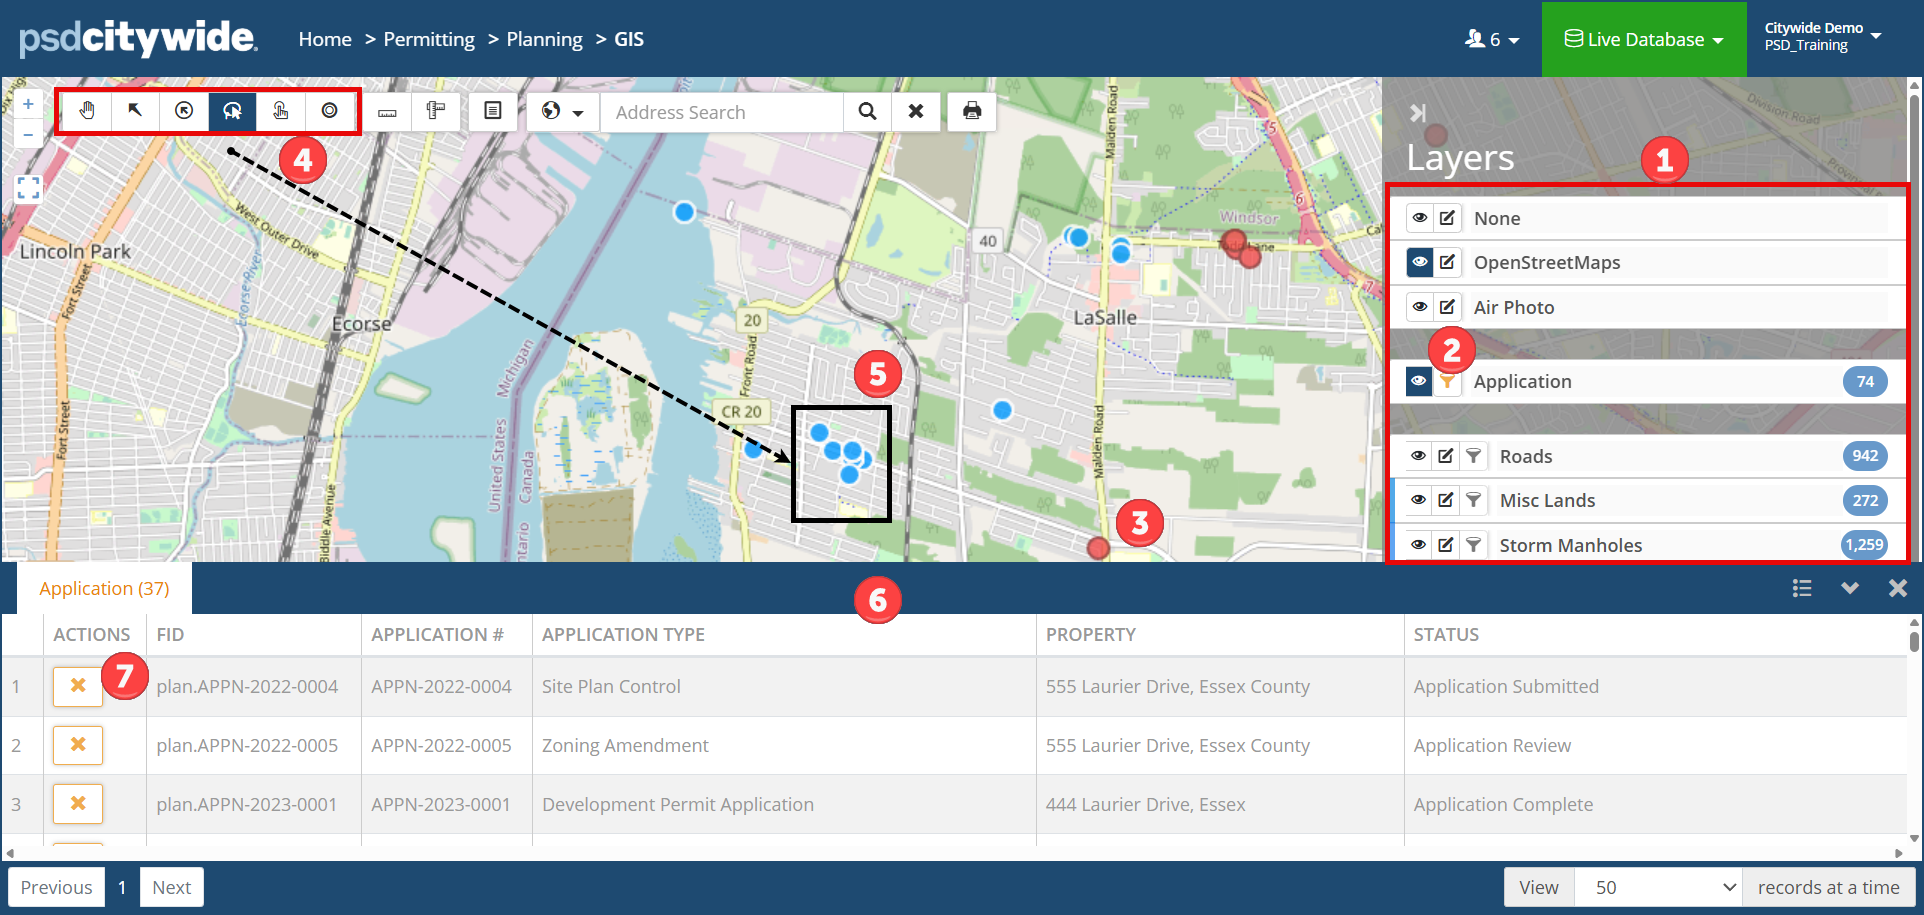
Working with Planning Application Data
Mapping Planning Application Properties
Planning application properties will be pinpointed on the map only after their visibility has been enabled by clicking on the Layer 🢡 Permits 🢡 Visibility icon ![]() ❷. The location of all the application properties appear with red dots ❸.
❷. The location of all the application properties appear with red dots ❸.
Viewing Permitting Data
To view permit data associated with a select property or group of properties:
- Click on the Selection tool ❹ you wish to use. (See GIS Viewer concerning each).
- Use the selection tool to select the application properties. (In the above screenshot, the Box Select tool was used to select six properties ❺ whose dots are now blue.) The Applications table ❻ containing data for the selected properties appears, showing the various applications for the selected properties.
- Click on
 to remove an application from the table.
Create a New Planning Application
A new Planning application record can be created by selecting a property from the map.
- Locate the property on the map. It may be helpful for this purpose to enable Parcels visibility ❶.
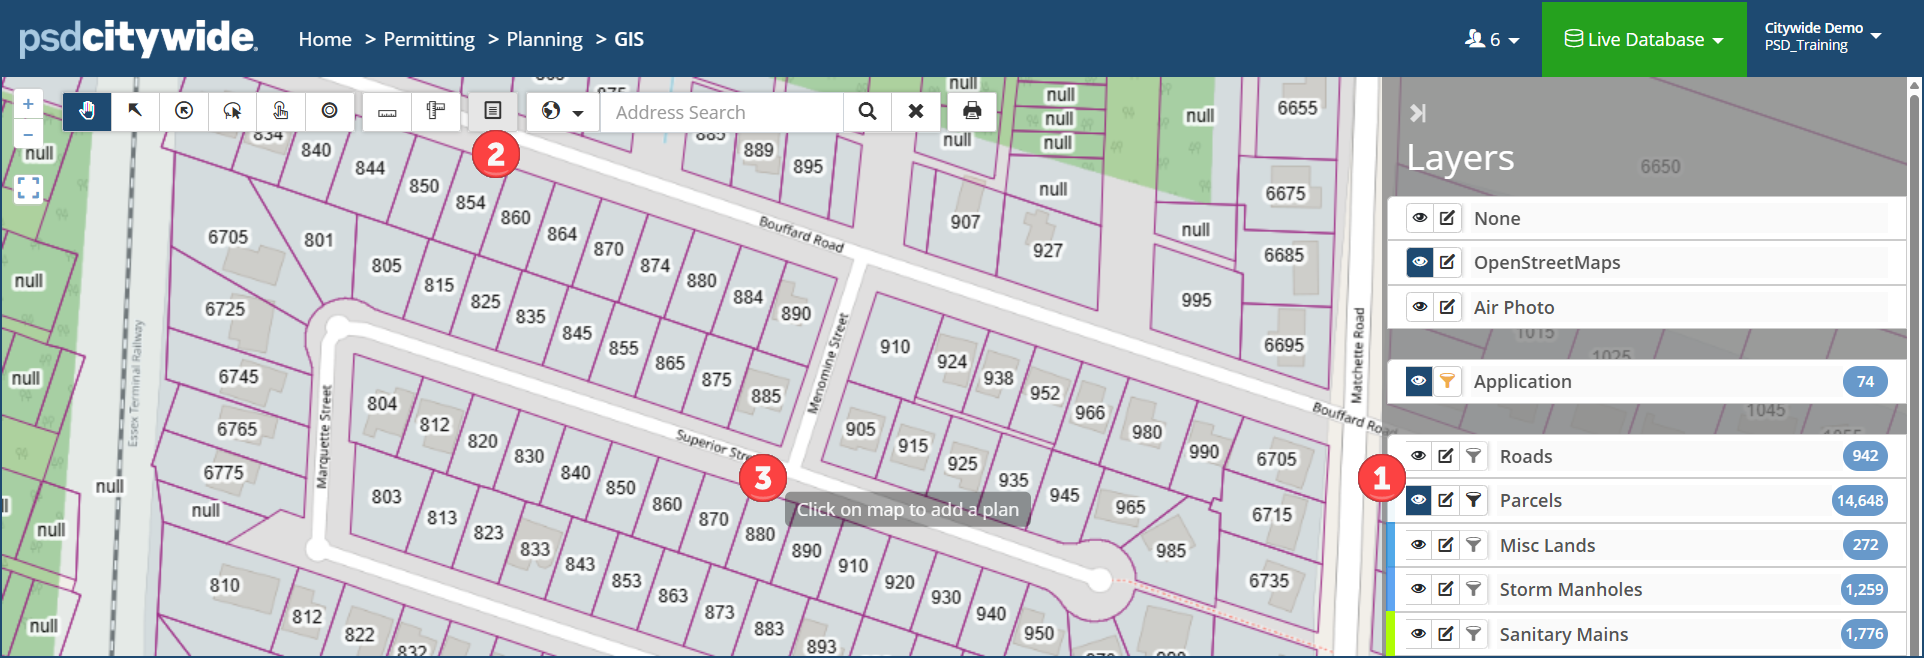
- Click on the Add Plan icon
 ❷.
❷. - Click on the Property parcel address ❸ on the map. The Add Planning Application wizard appears:
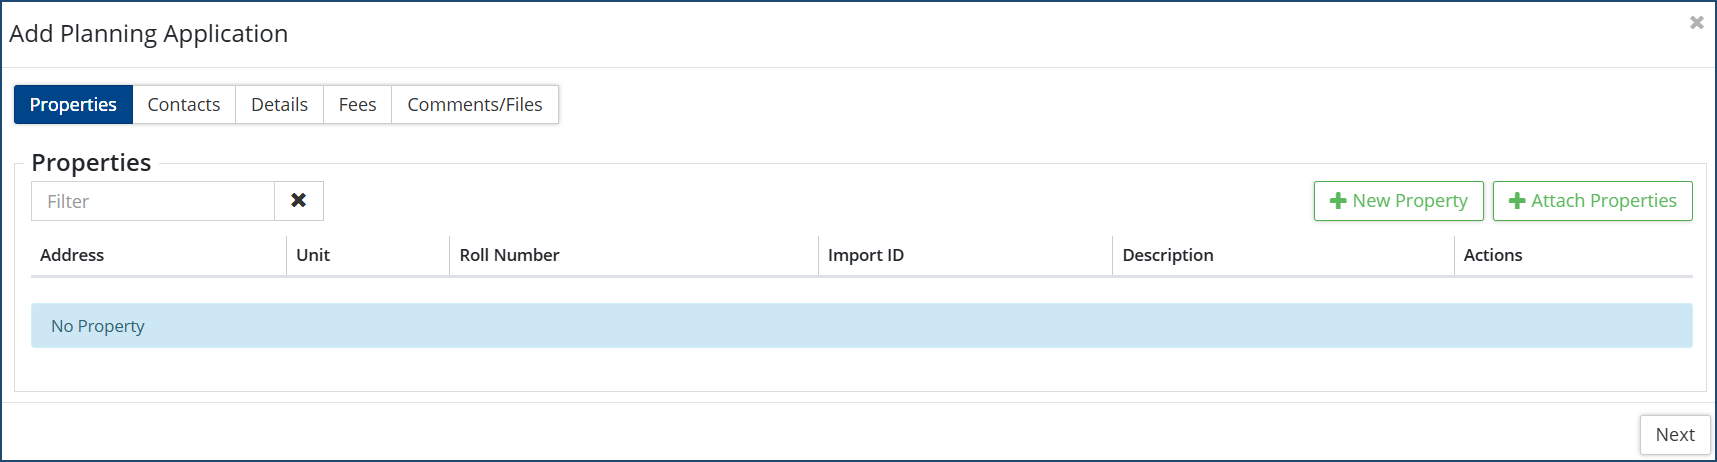
- Complete all the required information across all the tabs in the wizard. Click here for further instructions.


