Equipment

Jan 22, 2026
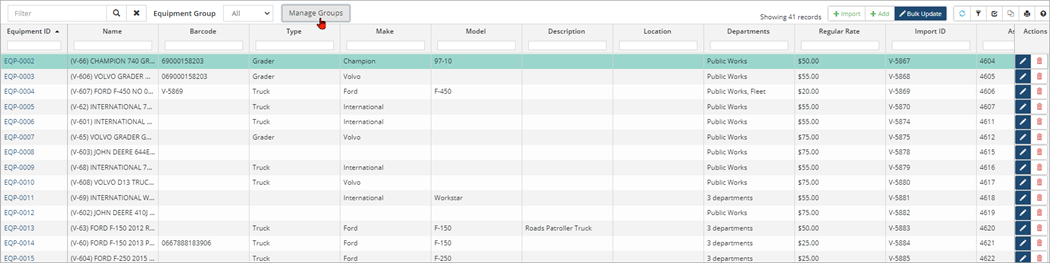
The Equipment section is used to manage the list of equipment assigned at the Resource level on WOs. Users can also set up Equipment Groups to organize and filter equipment on the grid.
Citywide provides several methods to add new equipment:
- Add new equipment using +Add on the Equipment This method can be used when a new piece of equipment does not exist in the asset inventory.
- Import equipment from the Asset
- Bulk import equipment using the Upload Centre, Equipment Import
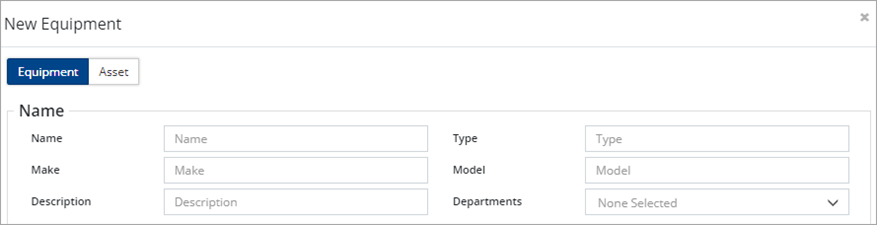
- Click +Add on the Equipment grid.
- Enter a Name and complete the section as needed. Select a department(s) to limit the WOs and SRs that can have this equipment assigned.
- Complete the Details The Asset ID field is read-only. An asset can be assigned in the next step of the dialogue box and once assigned the field will auto-populate.

- Enter a barcode for the equipment if required. Supported barcodes include UPC-E, CODE39, EAN13, EAN8, CODE93, CODE128, PDF417, QR, AZTEC, ITF and DATAMATRIX barcode types. The barcode code must be unique and the system will run a check once the new equipment is saved. If the barcode is a duplicate, Citywide will return a notification and clear the barcode field.
- In the Options section, the Active flag is set to yes. Deactivate equipment when the equipment is no longer available as a resource. All historical data will be kept intact but the item is no longer available to be assigned.
- Enter Regular Rate
- Click +Add Rate to assign additional rate types. (Rate types are created under Home 🢡Maintenance 🢡Resources 🢡Equipment Rate Types.)

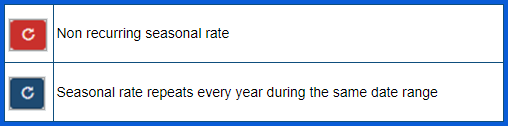
- Enter a Start/End Date to assign a seasonal rate. Click to set the rate to repeat every year during the same date range.
- Click Next. An asset can be linked to the equipment. Search for the asset and once located, select it from the retuned list of assets.
- Click Add. An Equipment ID is assigned and the item is added to the grid.
To Import Equipment from the Asset Inventory:
- Click +Import.
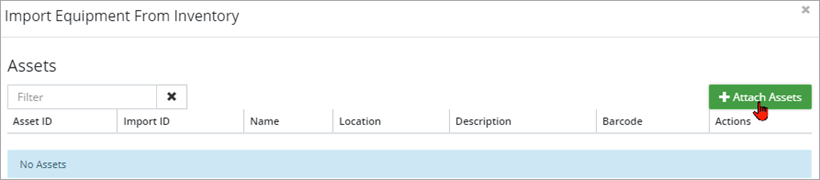
- Click +Attach Assets. Search for assets by text, category/segment, department, asset groups, or on the map.
- Select assets and click Add Selected Assets.
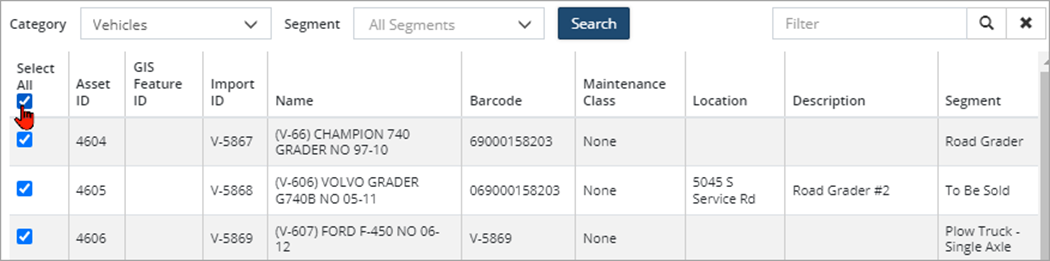
- Review the attached assets and then click Add.
- During the import process, Citywide will display an Existing Equipment notification if an asset has already been imported. Only those assets that don’t already exist within the Equipment list are imported.
To bulk import equipment using the Upload Center:
- Navigate to Home 🢡 Maintenance 🢡 Upload Center.
- Select the Upload Type dropdown and select Equipment Import.
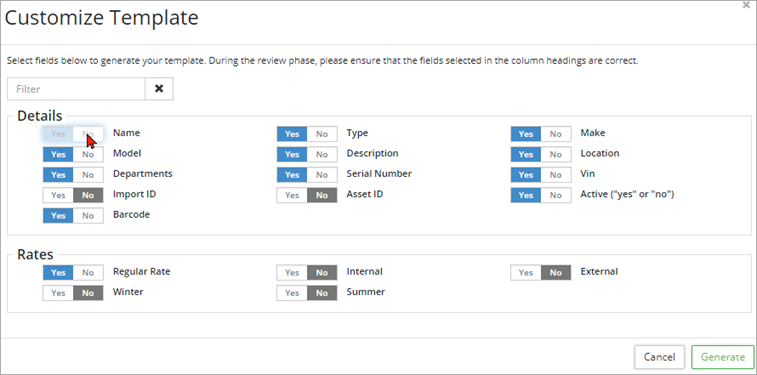
- Customize the template as needed by toggling fields on/off. The Name field is mandatory.
- Click Generate. Citywide displays a string of text to be copied into an Excel workbook.
- Once all equipment information has been entered into Excel and reviewed, copy and paste the data including the header row into the Upload Centre. Review the information and ensure the headers are mapping correctly.
- Click Submit.
- Click the Equipment Name or Edit
 . Update the details. Click Save.
 - To remove equipment, click Delete
 .
.
Equipment groups are created to organize equipment into groups for filtering on the grid.
- Click Manage Groups. Existing groups can be edited/deleted and new groups can be created using the button.
- To add a new Group, click +New Equipment Group, enter a Name and then click +Attach Equipment.
- Make your selection(s) þ and click Add Selected Item(s).
- Click Add.


