
The Imports operation provides a tool for importing budget and actuals data into CWBC.
A PSD Advisor will provide an Import Template in Excel format to support the data import process. The template columns, order and headers should not be modified in any way. Each column must be accurately populated to ensure a successful import. Consult your advisor if additional support is required.
Note: Creation of Attribute Item relationships and Tree relationships with COA Class Key Items is not automated through the Import Operation. Unrelated and unallocated COA Class Key Items must be manually allocated by the Administrator after import or they will not appear in views and reports that reference the Attribute and/or Tree relationship.
Import Template
The template contains the following data columns:
- Col A | Class = Operating (for Operating data) or Capital (for Capital data)
- Col B | Dataset = Actuals (for balance imports), Actuals Transactions (for transaction imports) or the Budget Dataset (i.e. 5. Approved Budget) as applicable - refer to the Dataset list in Model Administration for the specific Dataset names
- Col C | Year = The fiscal year of the data being imported
- Col D | Level_no = 0 for balances or 1 for transactions
- Col F | Column_no = the target Class Column name in your database for the data being imported (i.e. could be January – December for Actuals/Actuals Transactions or a budget Class Column such as Base Budget for budget data)
- Col G | Segment_1 = the COA Class Key name for the Class of data being imported (i.e. Account Number for Operating; Capital Project Number for Capital)
- Col H | Code_Segment_1 = the full GL account number for the balance or transaction being imported. Ensure that there are no dashes/spaces or other special characters in the code segment. Typically, this is simply a string of digits matching the set up of the component Key Segments in Model Administration. Dashes and spaces and other characters can be added with a system mask in CWBC to make the information more readable and meaningful to the users.
- Col I | Description_segment_1 = the GL account description for the GL Account in column H
- Col J – Col AJ | Leave all blank
- Col AK | Natural Account = Asset, Liability, Equity, Revenue or Expense as applicable for the row item
- Col AL | Amount = the monetary value of the balance or transaction being imported. Must be in Number format in Excel.
- Col AM | Transaction_description = the transaction description for a transaction level item (identified as a 1 in column D); leave blank when importing balances
Populating the Template
Preparing Data for Import
Users will usually populate the Import Template using a trial balance export from their ERP system.
CWBC is typically configured using fixed field lengths to reduce the risk of data corruption. As a result, ERP data may need to be adjusted to match the format required by CWBC. For example, users may need to combine segments or add or remove leading zeros to ensure the field lengths match the system configuration.
It is important to complete every column in the Import Template according to the template specifications described above.
If a user attempts to import records that do not conform to the COA Class Key configuration defined in Model Administration > COA (Chart of Accounts), the system will display error messages.
To resolve these errors, correct the data in the Excel file and run the import again.
When importing data for Items that already exist in the system, use caution.
Ensure that the account descriptions and natural account types in the import file match those already defined in CWBC.
These fields must not be left blank, as CWBC will overwrite the existing account information with the values in the import file, including blank values.
Importing Files into CWBC
1. From the CWBC Home page go to Operations > Imports and click the Imports button.
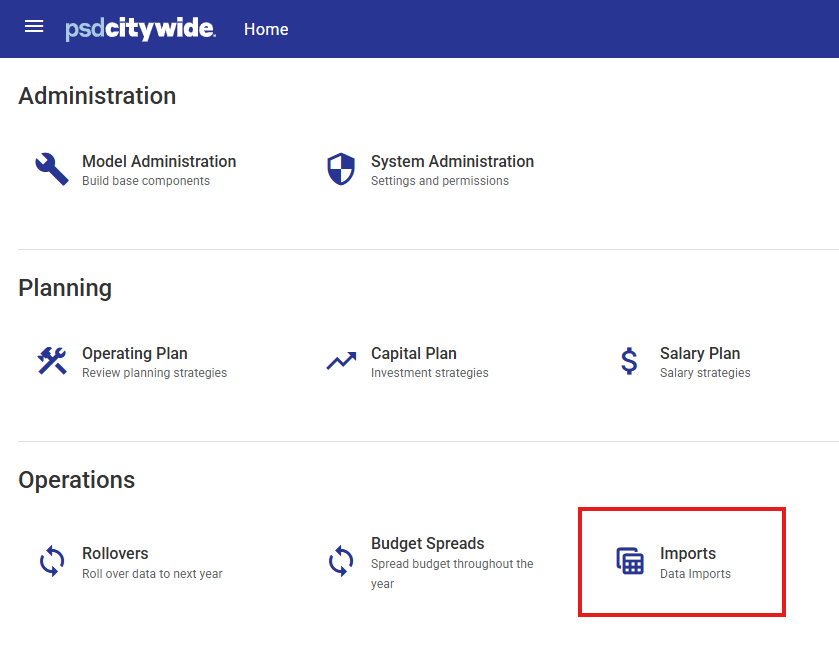
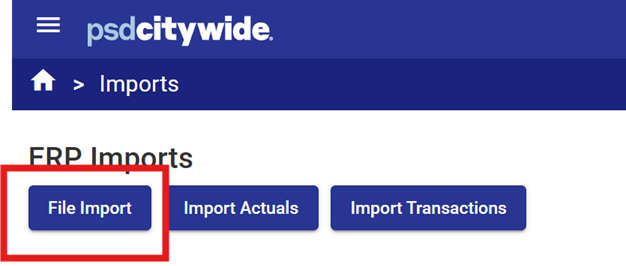
2. Click the File Imports button. (Note that the Import Actuals and Import Transactions tools are only used in the ERP integration process - they are not used for manual file uploads).
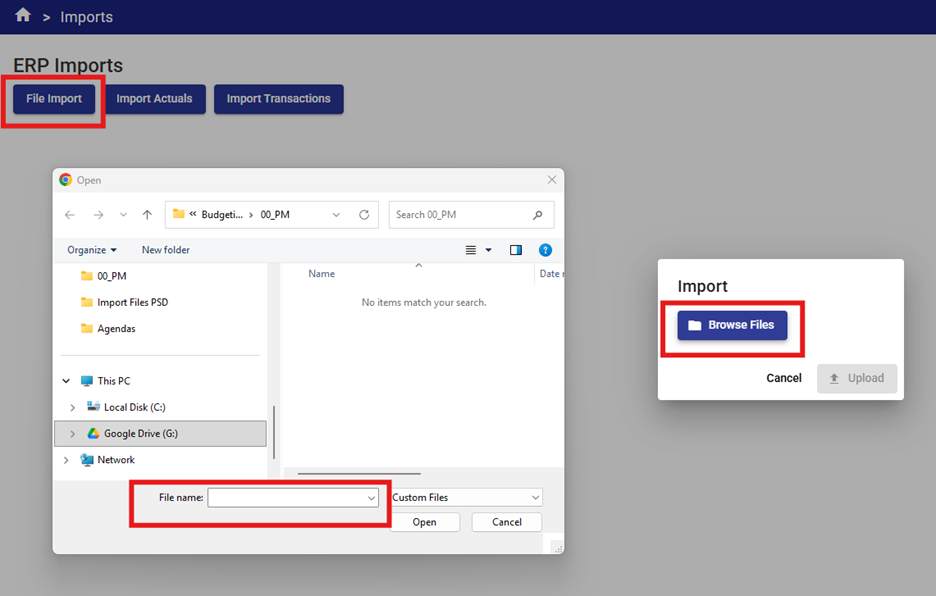
3. Select the Browse Files button to select the file. Note the first tab of the file is always imported by default.
Note: The worksheet containing the data to be imported must be on the first tab of the workbook. Remove all other tabs and resave the file before attempting to import.
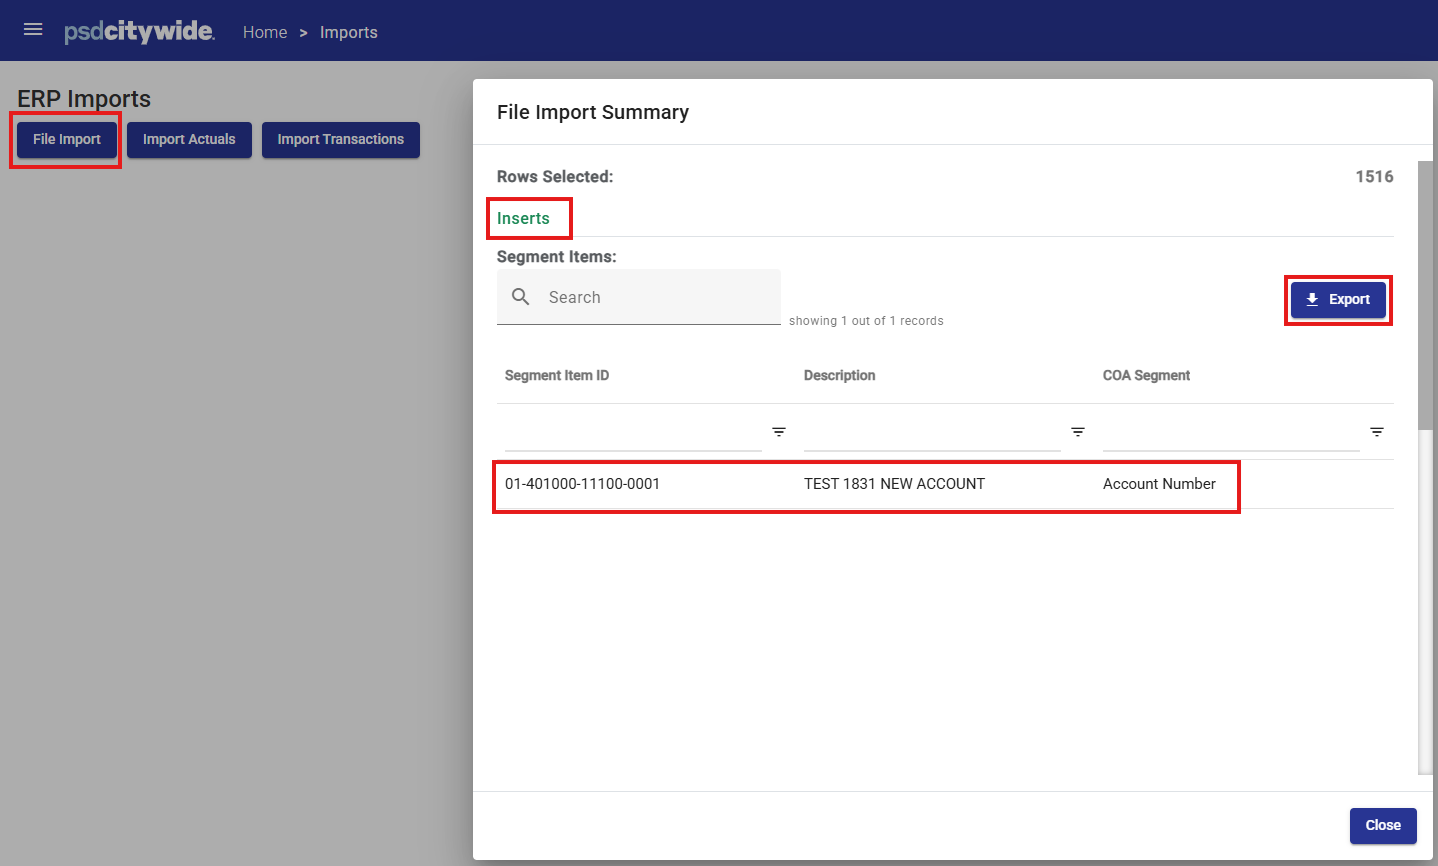
If a COA Class Key Segment Items is included in the import, but is not in the items list, a new account with the properties included in the import file will be inserted into the items list automatically.
A File Import Summary dialogue box will be displayed providing the details of any inserted items.
This list can be exported to and excel, .csv or .pdf file for reference if required using the ![]() button.
button.
4. After import:
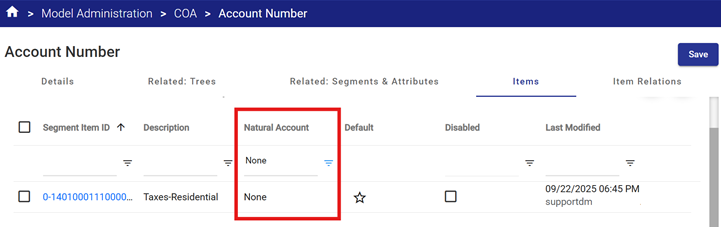
a. Natural Account types drive several reports and views in CWBC. It is essential that all accounts have a Natural Account Type assigned.
To verify that all accounts have a Natural Account assigned in the COA Class Key Items, enter “none” in the Natural Account filter and Apply.
A list of Items with missing Natural Account Types will be displayed.
Add the Natural Account Type from the drop down list and click the Save button.
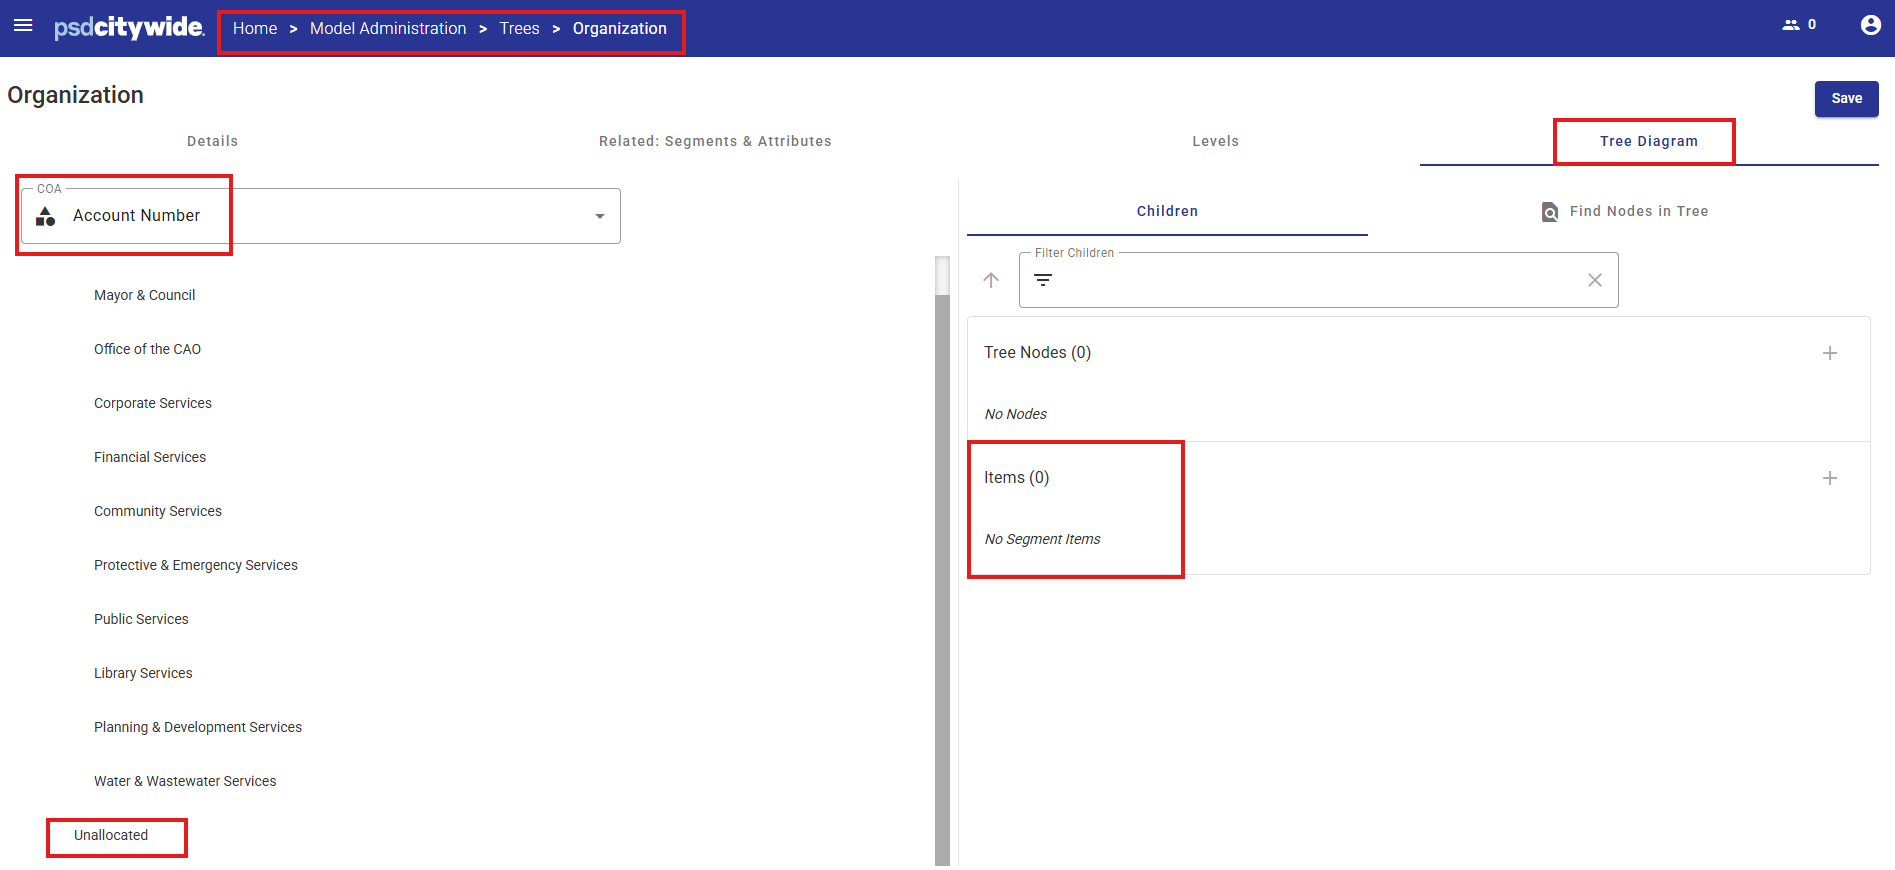
b. Verify that all accounts have been allocated to all applicable Trees by checking for Unallocated items in each Tree.
5. Verify that the imported information appears complete using an Actuals or Budget view in Operating or Capital Plan and by running / testing a sample of reports:
- All Columns or Budget Export view for whole organization
- Budget Worksheet by selection or for whole organization (will take a while to load)
- Actuals views for whole organization.
Common import issues:
- Duplicates COA Key Segment Items be added to the Items list. This may be caused by special characters in the Account Number (e.g. " - " and " . " ), or mismatched account descriptions or Natural Account Type selections.
- Missing Item Relations. Addition of Item Relations is automated with the Import Operation, however, if a required Key Segment Item has not been created in the Key Segment list, then the Item Relations will not be created and COA Items will not to appear in any views or reports that reference a Related Segment. Missing Item Relations can be added manually or imported.


