The Projects component in the Capital Plan is where Users can input and update non-financial information associated with Capital Projects.
Details
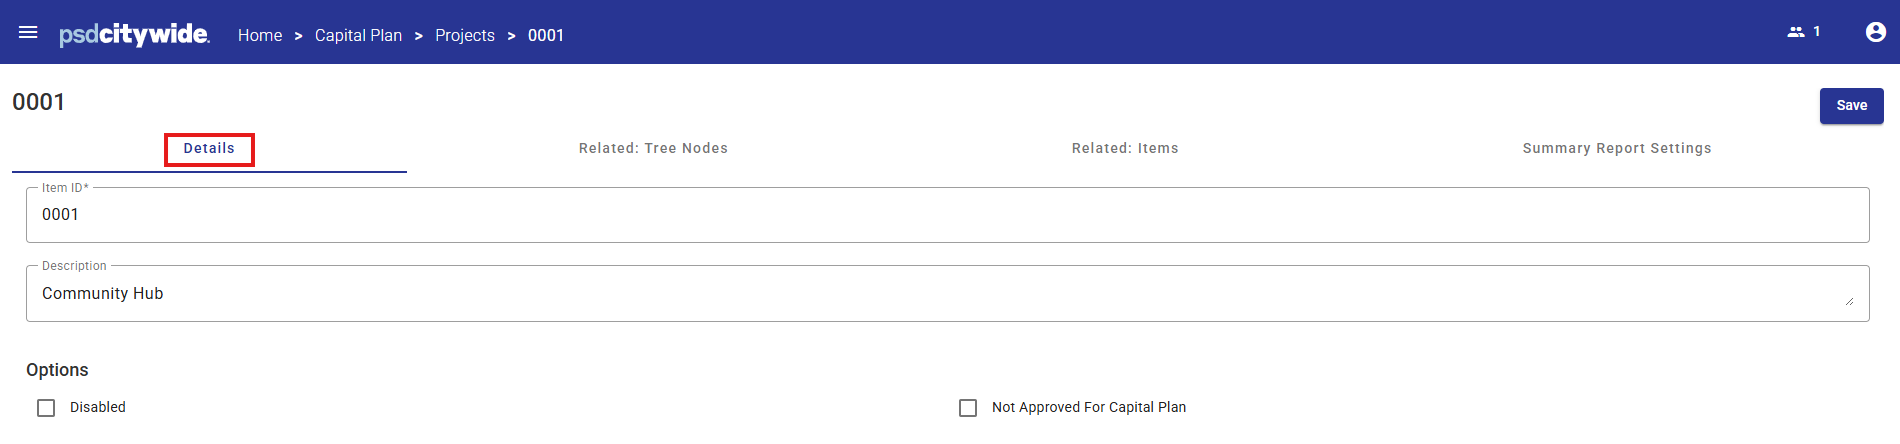
Project properties include:
- Project number / Item ID
- Project Description
- Option - Disabled - disabled projects will not appear in any reports and data selection lists for reporting and Worksheets.
Typically closed or archived capital projects could be flagged as disabled to prevent future use of the project. - Option - Not Approved for Capital Plan - allows projects to be filtered in Project Reports. The default setting for new projects is Approved.
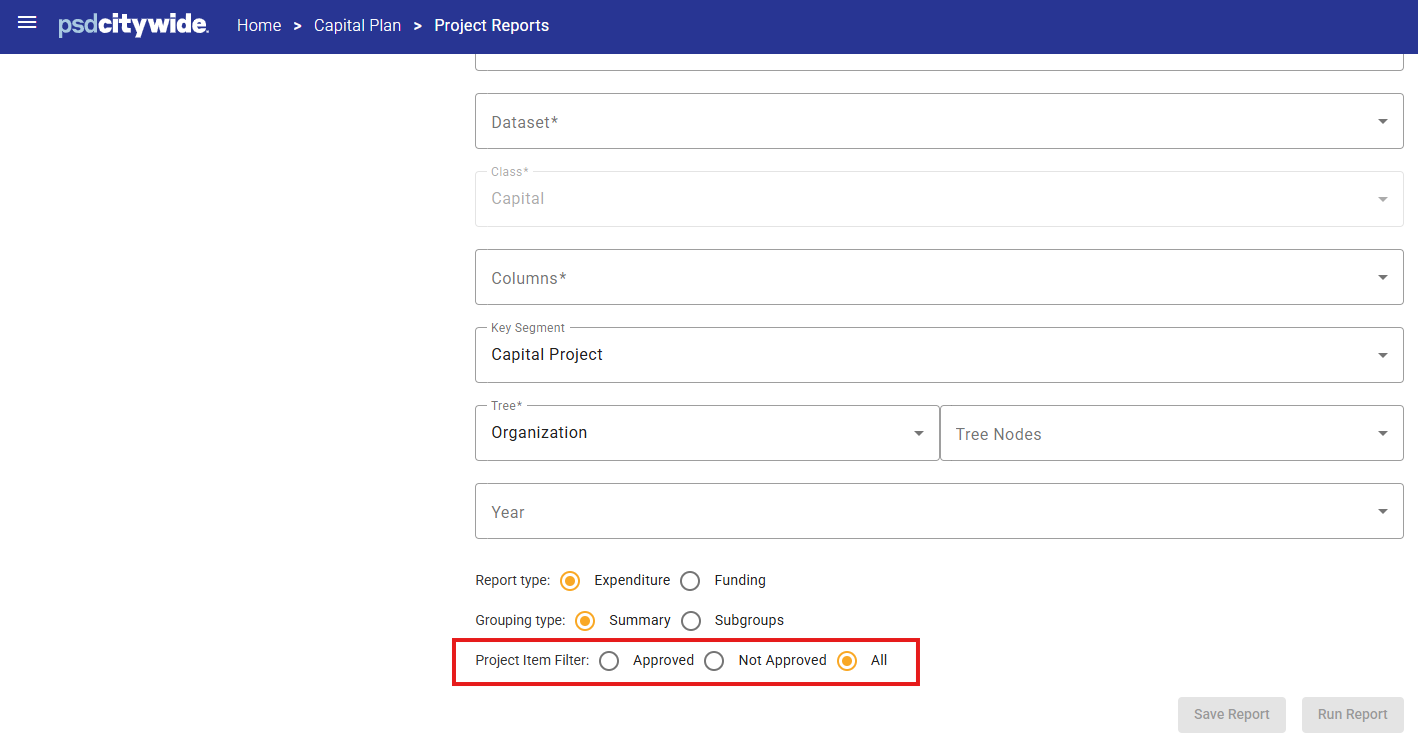
- To update the Project ID or description, enter the new data in each respective fields.
- To change the project status, select the appropriate checkbox.
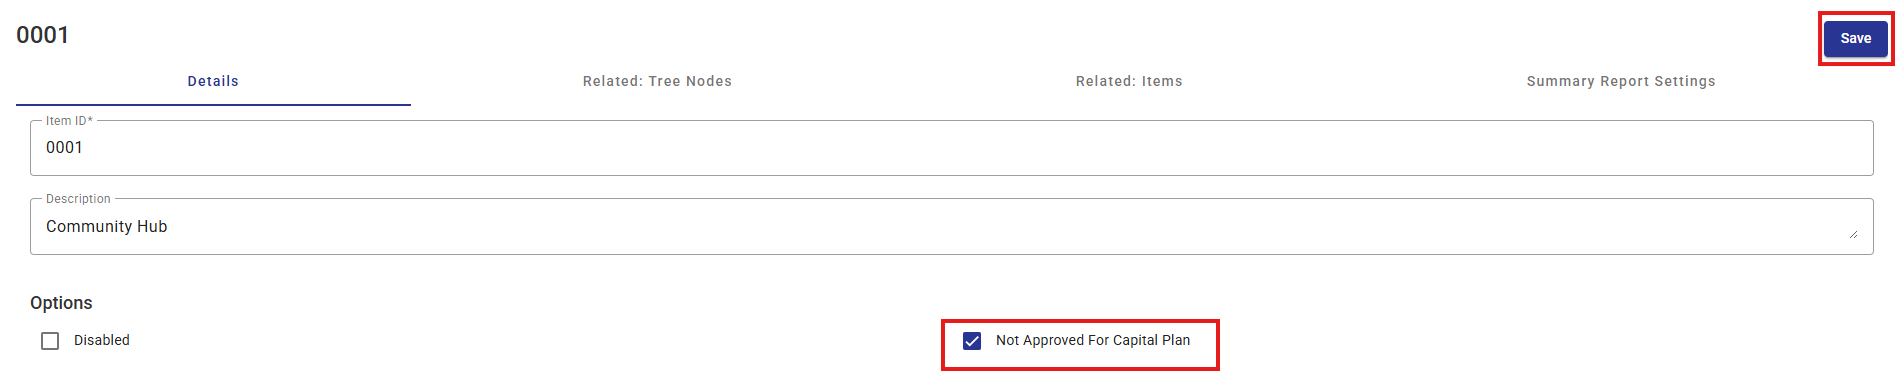
- Click Save.
Related: Tree Nodes
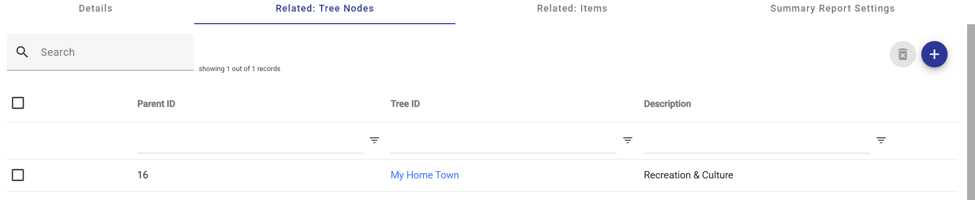
If a capital project is related to any Tree Nodes, these relationships will be displayed on this screen. Relationships cannot be updated here.
Related : Tree Nodes nodes are updated on the Summary Report Setting tab.
Related: Items
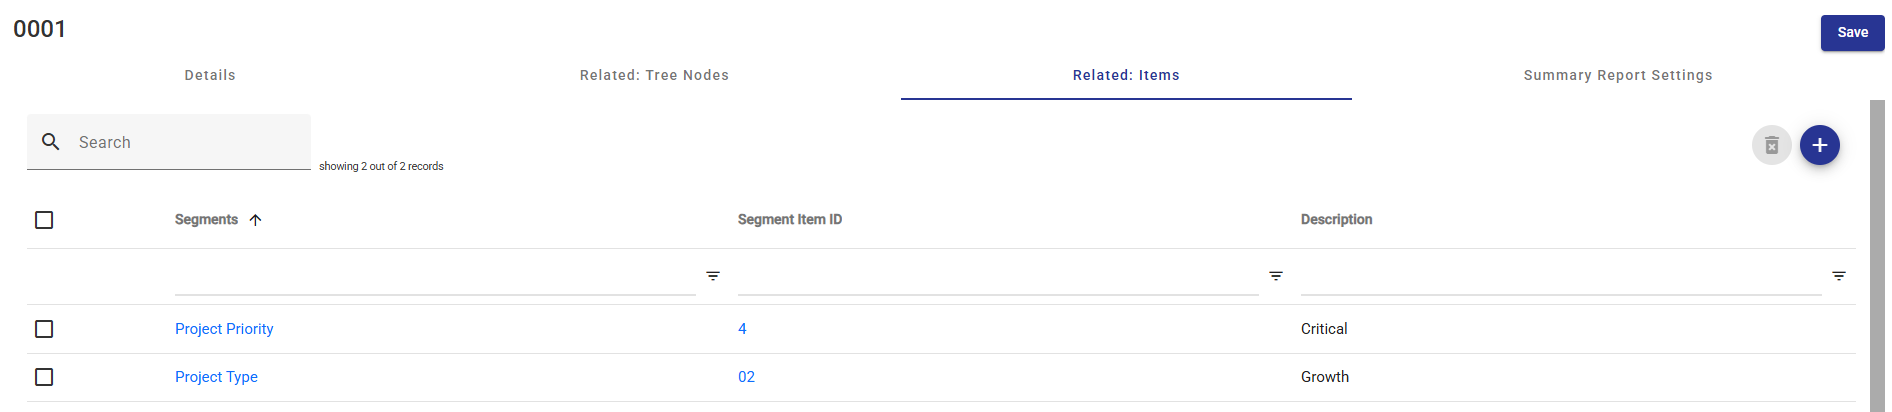
If a capital project is related to any Key Segment or Attribute Items, these relationships will be displayed on this screen. Relationships cannot be updated here.
Related : Items are updated on the Summary Report Setting tab.
Summary Report Settings
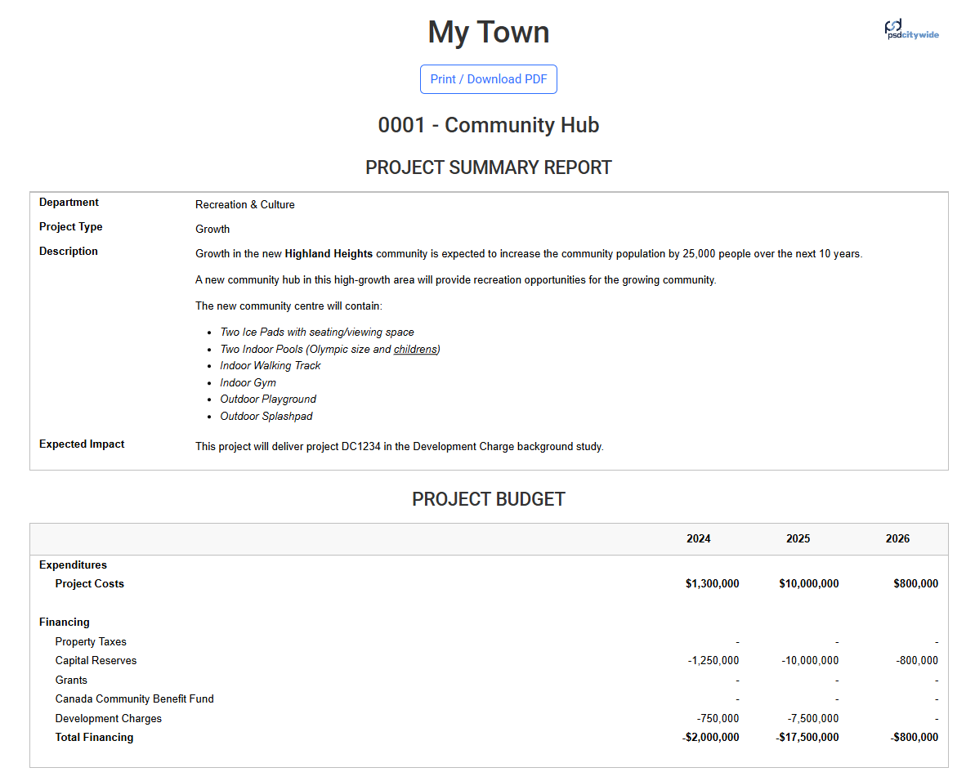
The Summary Report provides detailed financial and non-financial data related to an individual capital project.
The System Administrator configures the Summary Template that defines both the content of the Project Summary Report and how that content will be displayed, in Model Administration. See Working with the Summary Template.
The User enters detailed, project-specific information to complete the Project Summary Report in the Capital Plan module's Project component.
Sample Project Summary Report
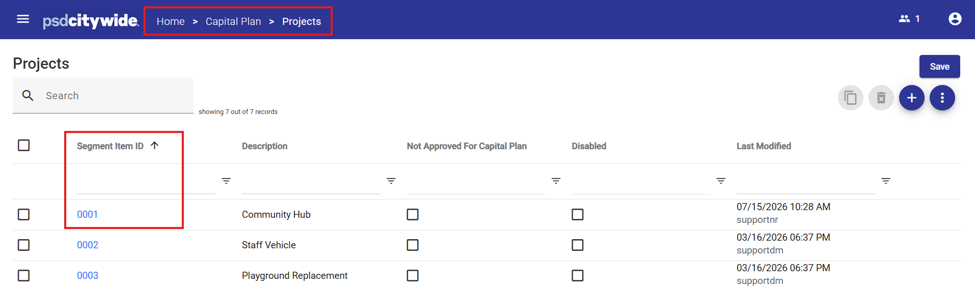
- To update the Summary Report Settings for an existing project, click the Segment Item ID hyperlink.
- Click on the Summary Report Settings tab.
The Project Summary Report fields configured by the System Administrator will be displayed.
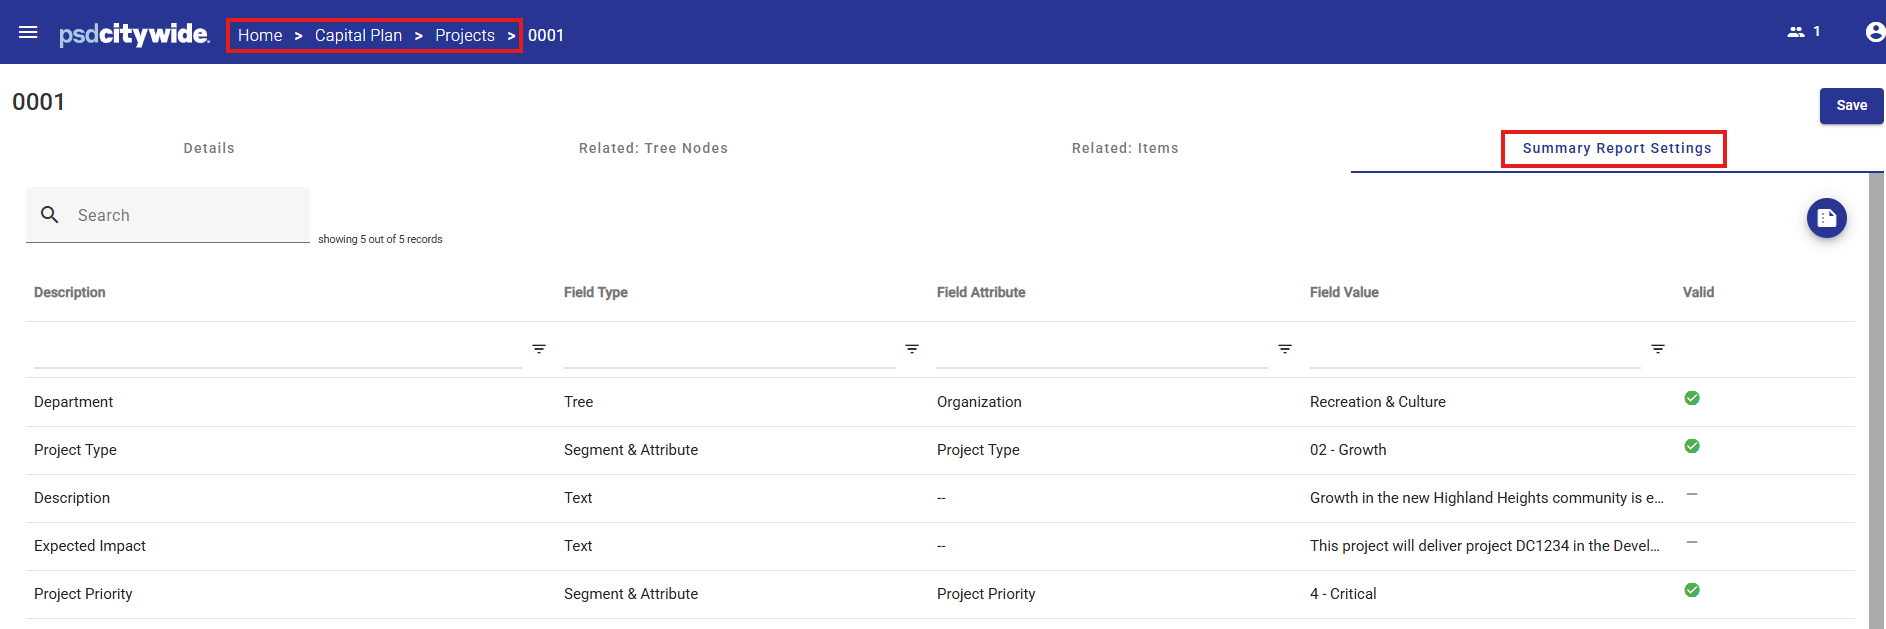
- Enter or update the project details for each field type.
- When all required information has been entered, the system will display a green validation checkmark
 in the Valid column.
Adding a New Project
- Go to Capital Plan and click the Projects icon.
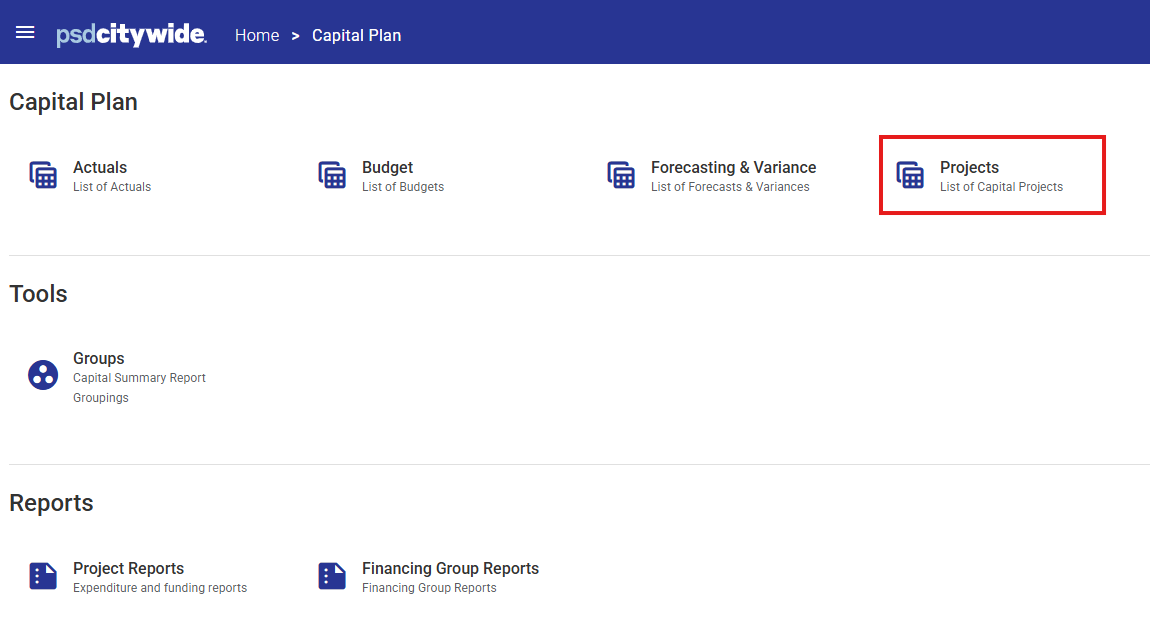
A list of existing Capital Projects will be displayed. This list returns all Project including ones that have been checked as Disabled or Not Approved in Capital Plan.
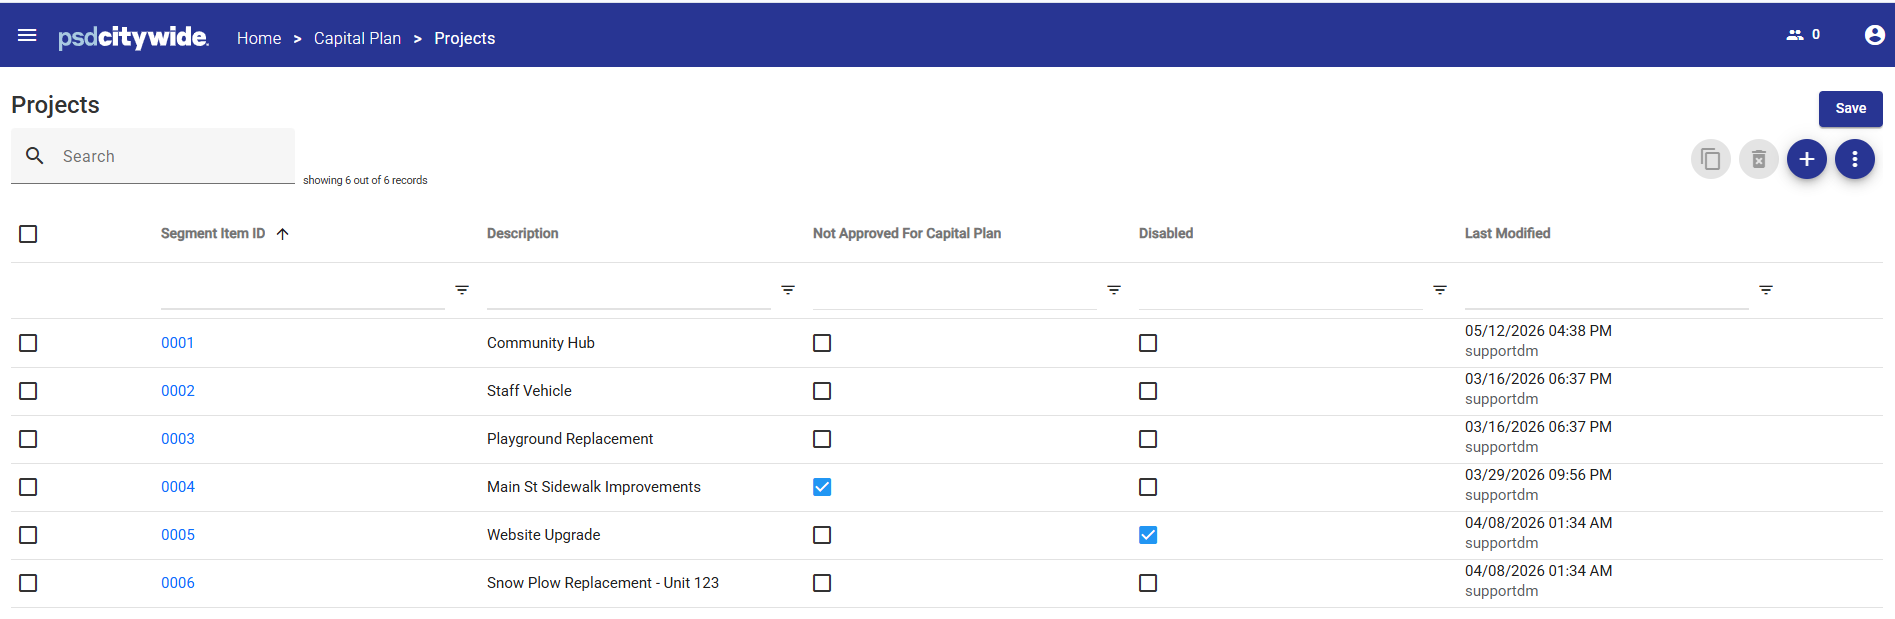
- Click the Add button
 to add a new Project.

- The system will assign the next available project number by default. Enter or update the Item ID (if required).
- Enter a concise project description. This description will appear in all capital reports and Worksheets.
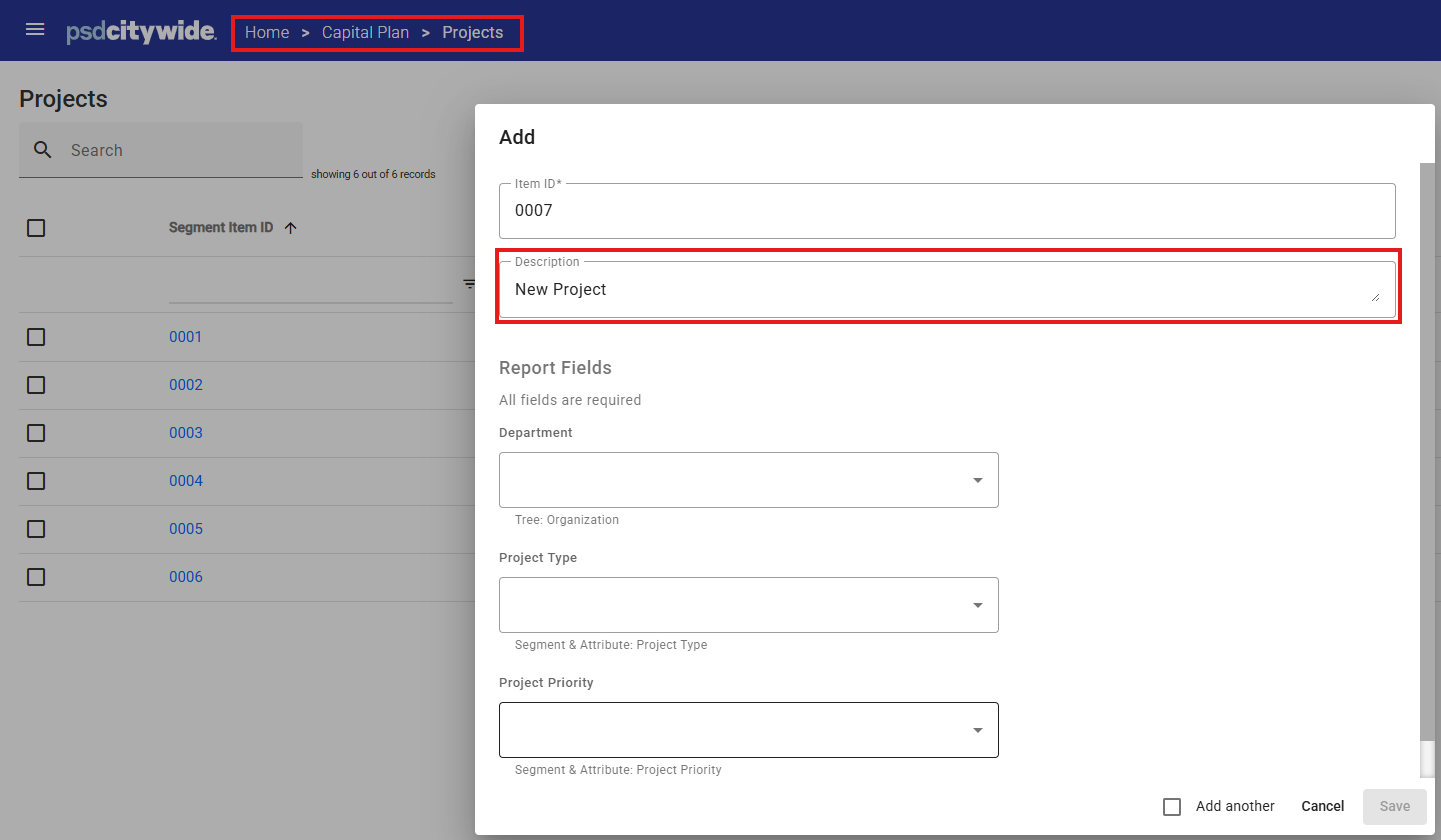
- Complete any mandatory report fields.
Project Summary Report fields may be one of three types:Tree - Select a Tree Node from the drop-down list.
Segments & Attributes - Select a Segment or Attribute item from the drop-down list.
Text - Enter project information. Text fields contain a rich-text editor that allow the content to be spell-checked and formatted.
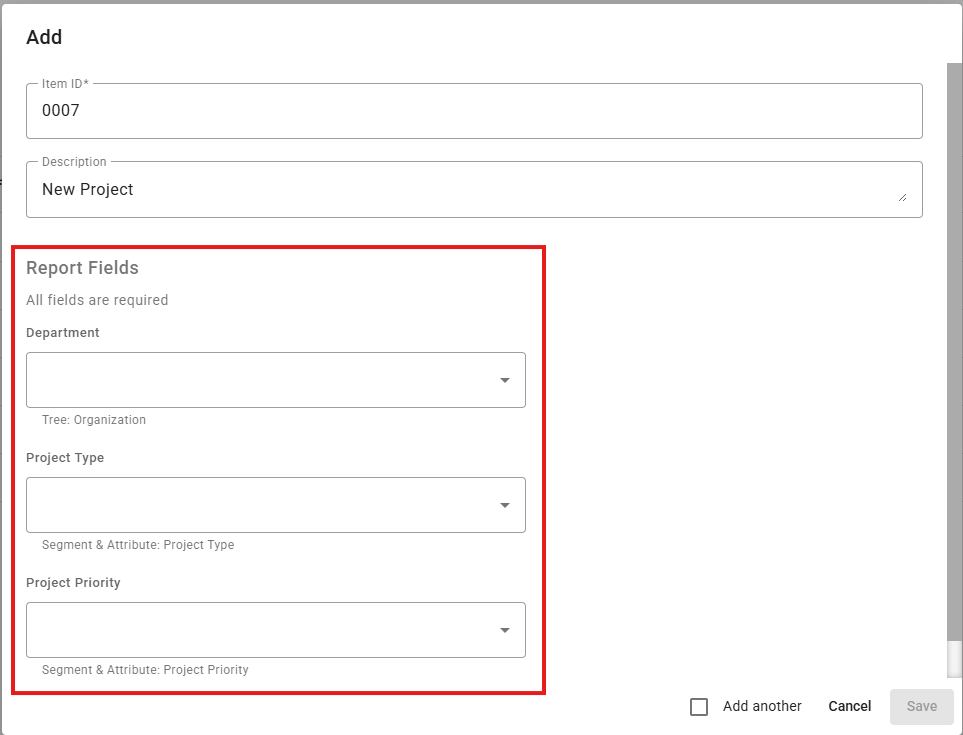
Note: the Save button will remain greyed-out until all mandatory fields are completed.
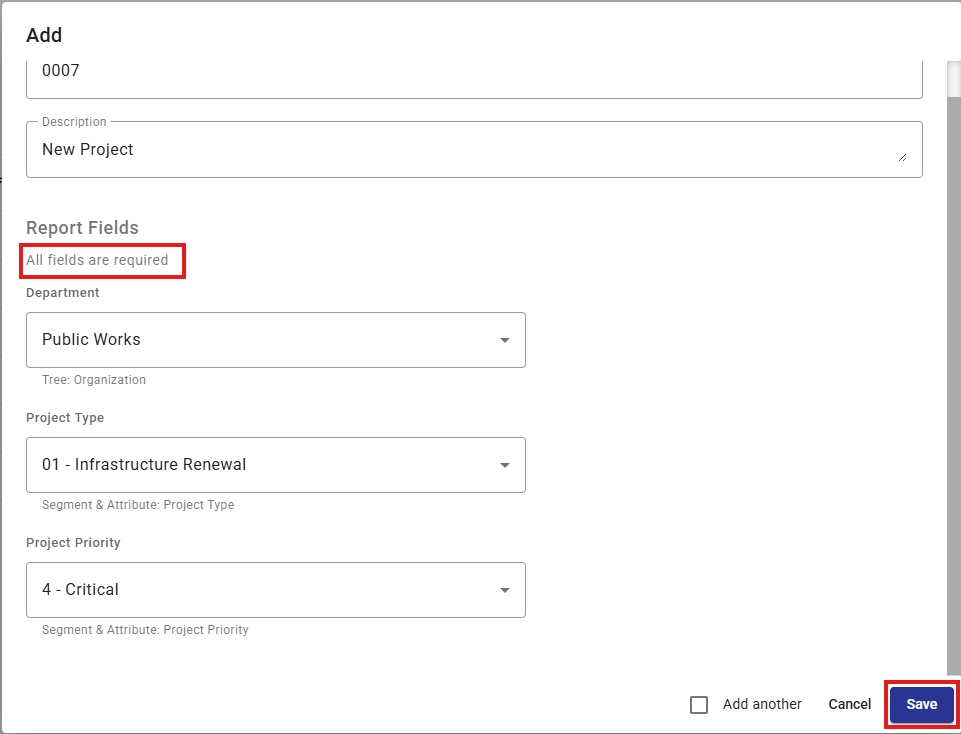
-
Click Save.
Copying a Project
A project may also be created from a copy of an existing project.
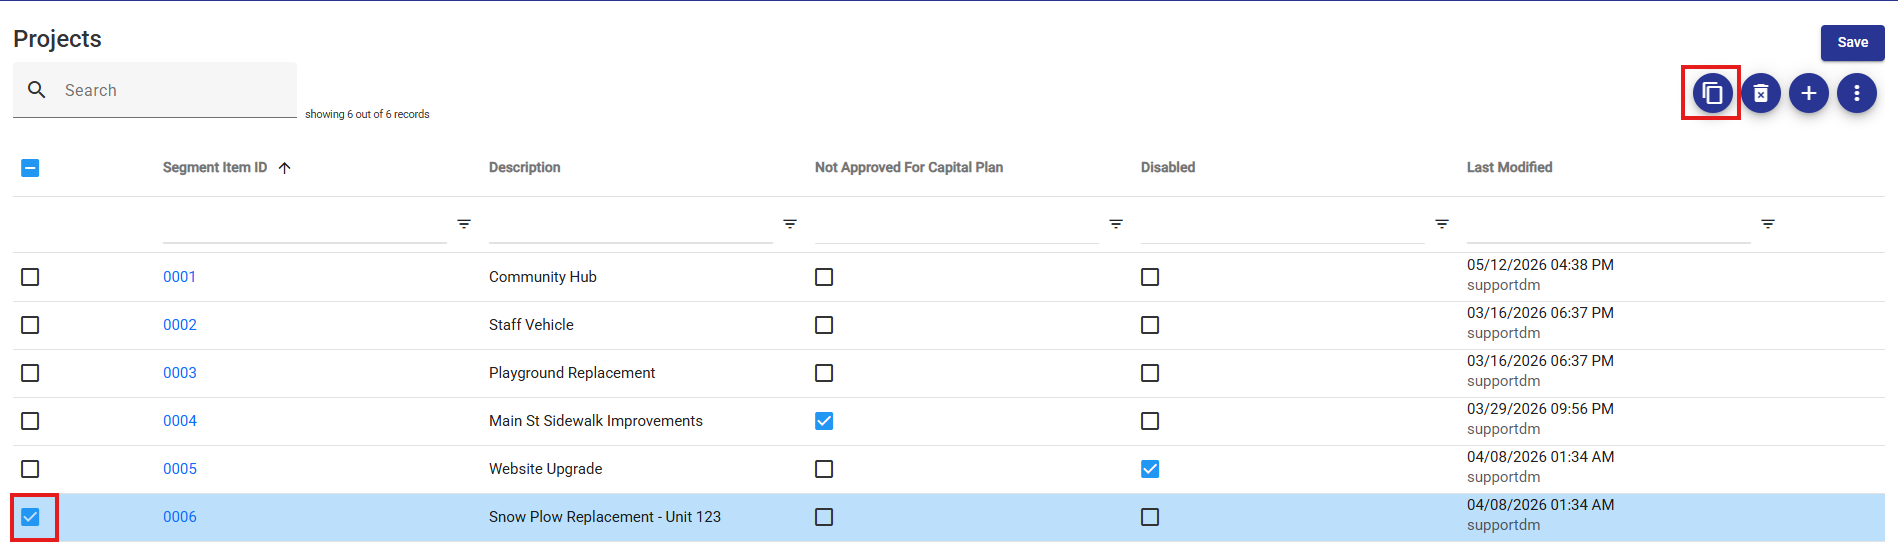
- Select the source project from the project list.
- Click the Copy button
 to copy an existing Project.
A new project number will be assigned and the project name will be copied from the source project to the new project.
Deleting a Project
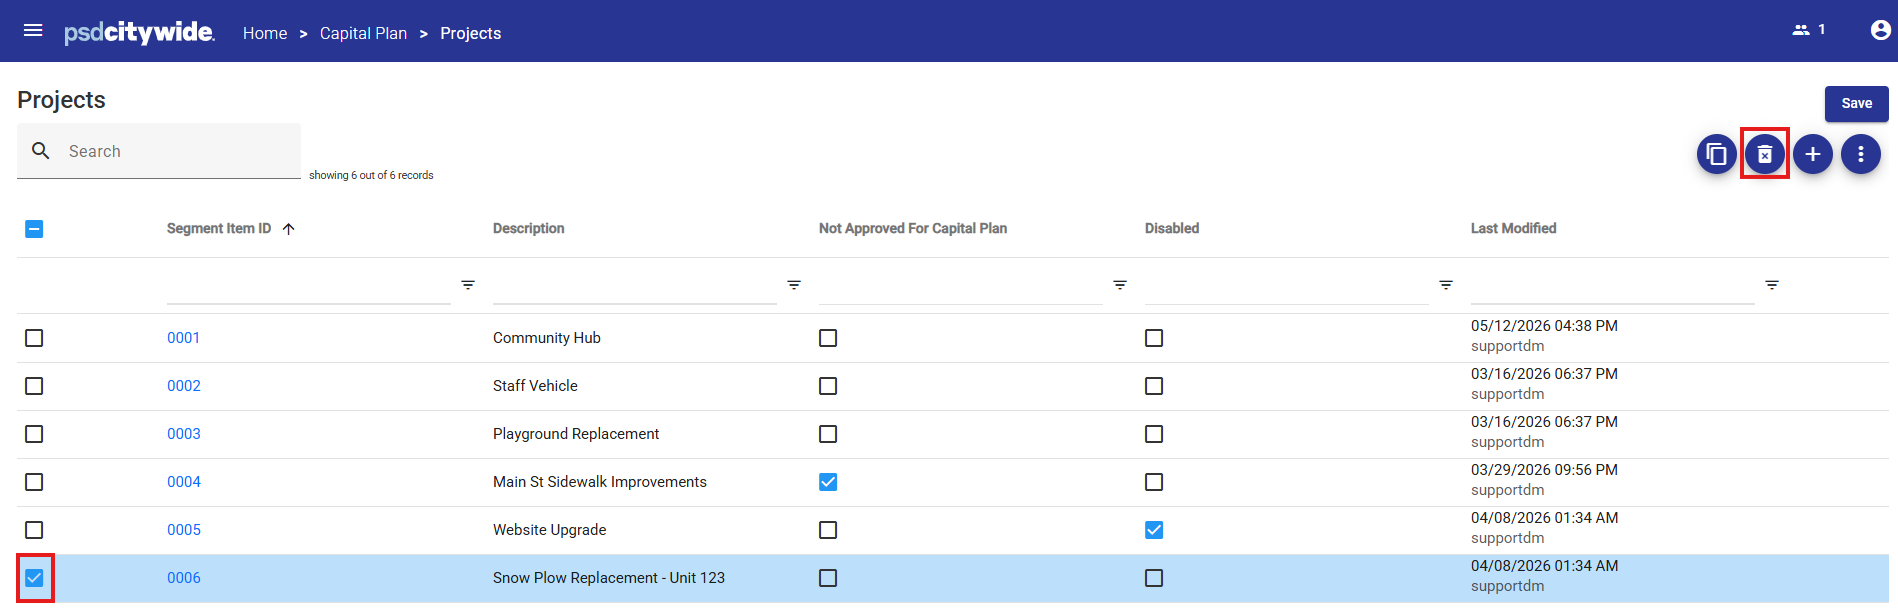
If a User has appropriate permissions, a project may be deleted.
- Select the project to be deleted from the project list.
- Click the Delete button
 to delete the project.
Entering Capital Project Financial Information
Capital Project financial information is stored in Datasets grouped by fiscal year.
Capital Plan Budget data is entered, viewed, modified and saved by Users in grid-like budget entry views called Worksheets.
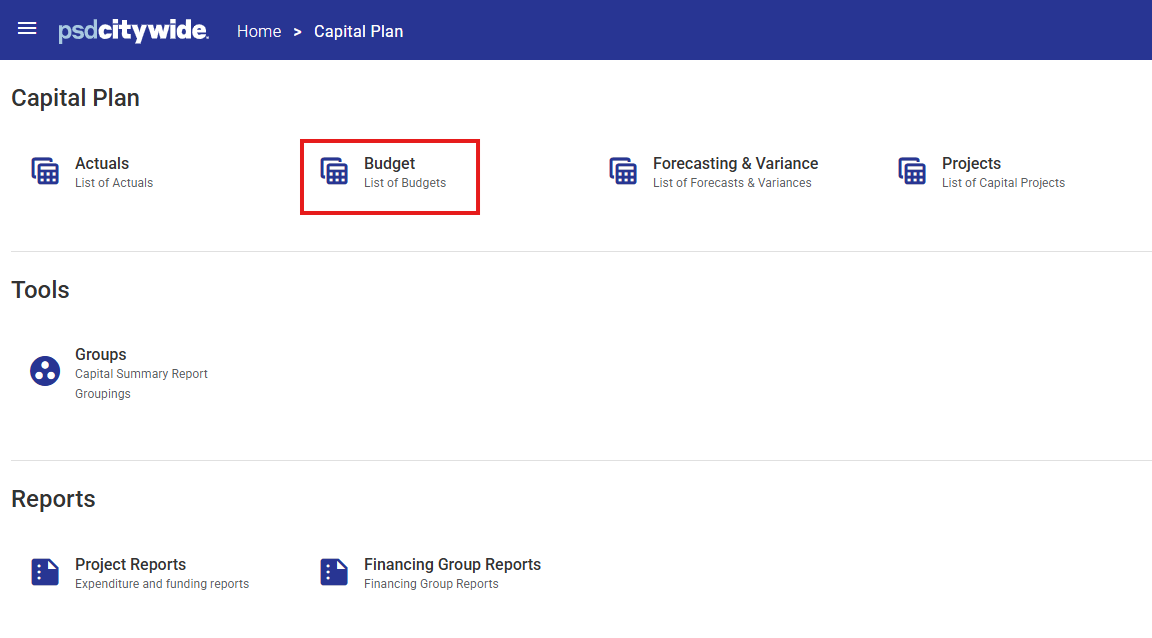
- To enter or update the budget amounts for a capital project, go to Capital Plan > Budget and click the Budget icon.
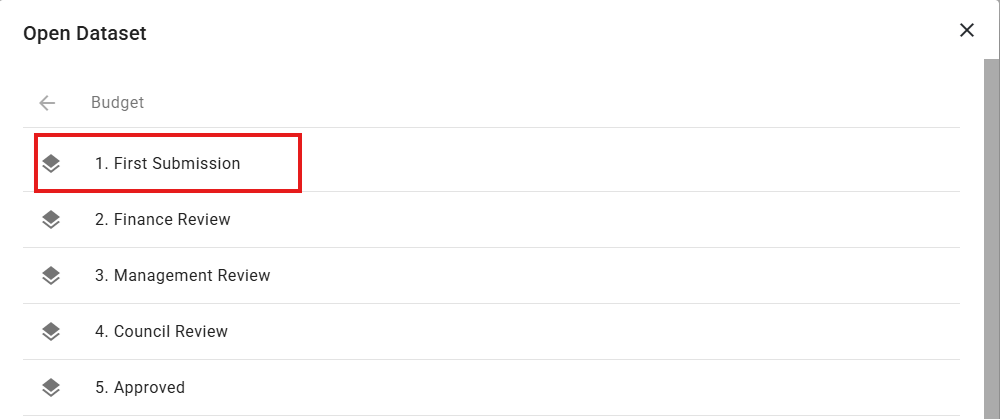
- A list of Datasets will be displayed. Select the Dataset to be viewed or edited from the available list.
Note that Datasets are configured by your PSD Advisor during implementation and may differ from those displayed below.
- Select the Worksheet, Year and Capital Project from the drop-down lists.
Note that Worksheets are configured by your PSD Advisor during implementation and may differ from the one displayed below.Worksheet
A template made by the System Administrator defined by Views in Model Administration. Worksheets allow configurable characteristics, such as data selection, formatting, column and row layouts, subtotaling, calculations etc.
Users use the worksheet to view and input and modify financial information for capital projects.
Year
The budget year to be viewed or updated.
Selection
The selection drop-down box contains Capital Project item list or Tree (as defined by the System Administrator in the Worksheet definition).
To retrieve data, select the Worksheet, Year and Capital Project. Data related to the selected project will appear in the grid.
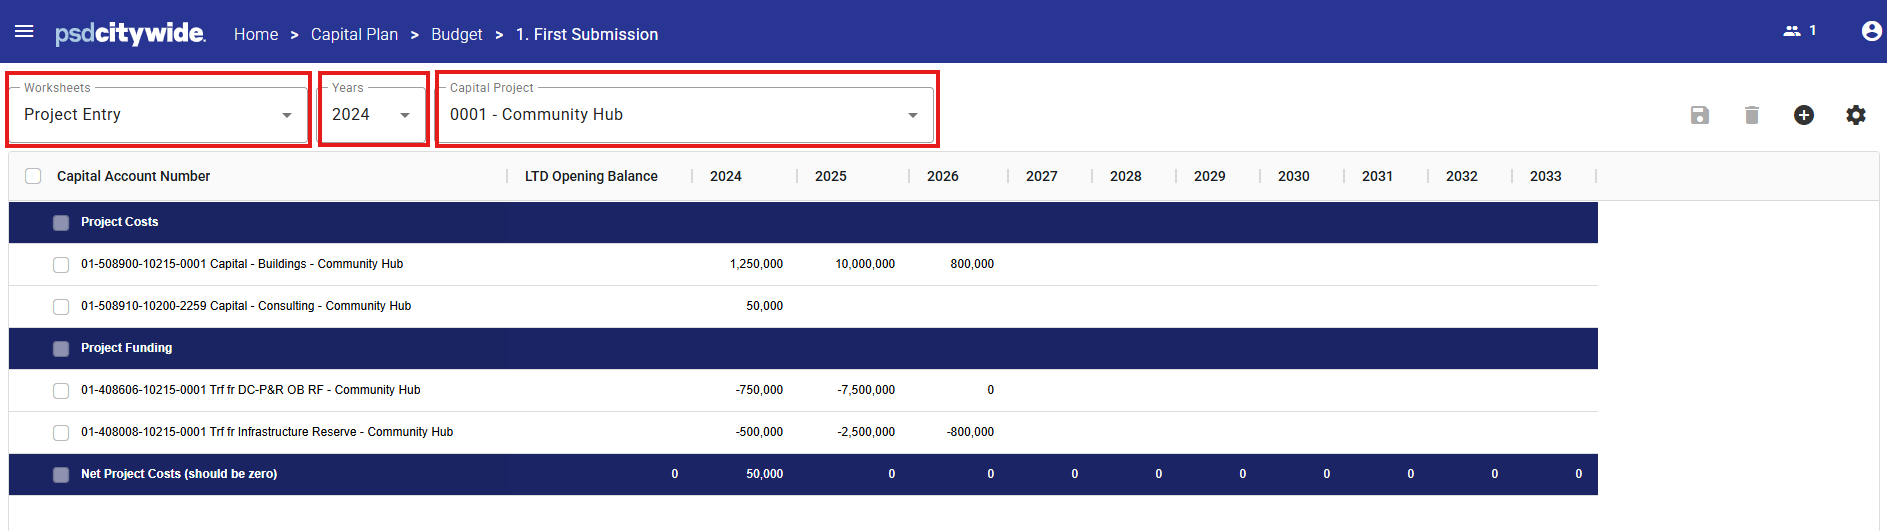
- If financial data exists for the project, it will be displayed in the Worksheet.
Amounts can be updated by entering new amounts as required.
New budget amounts can also be added by inputting amounts directly in the appropriate cells. - If no financial data exists, no rows will be displayed.
Budget accounts for the capital project can be added using the Add button on the Action Menu.
- If Capital Account Numbers exist for the project (typically from prior year budgets), then the account can be selected from the drop-down list.
Multi-select is permitted if required.
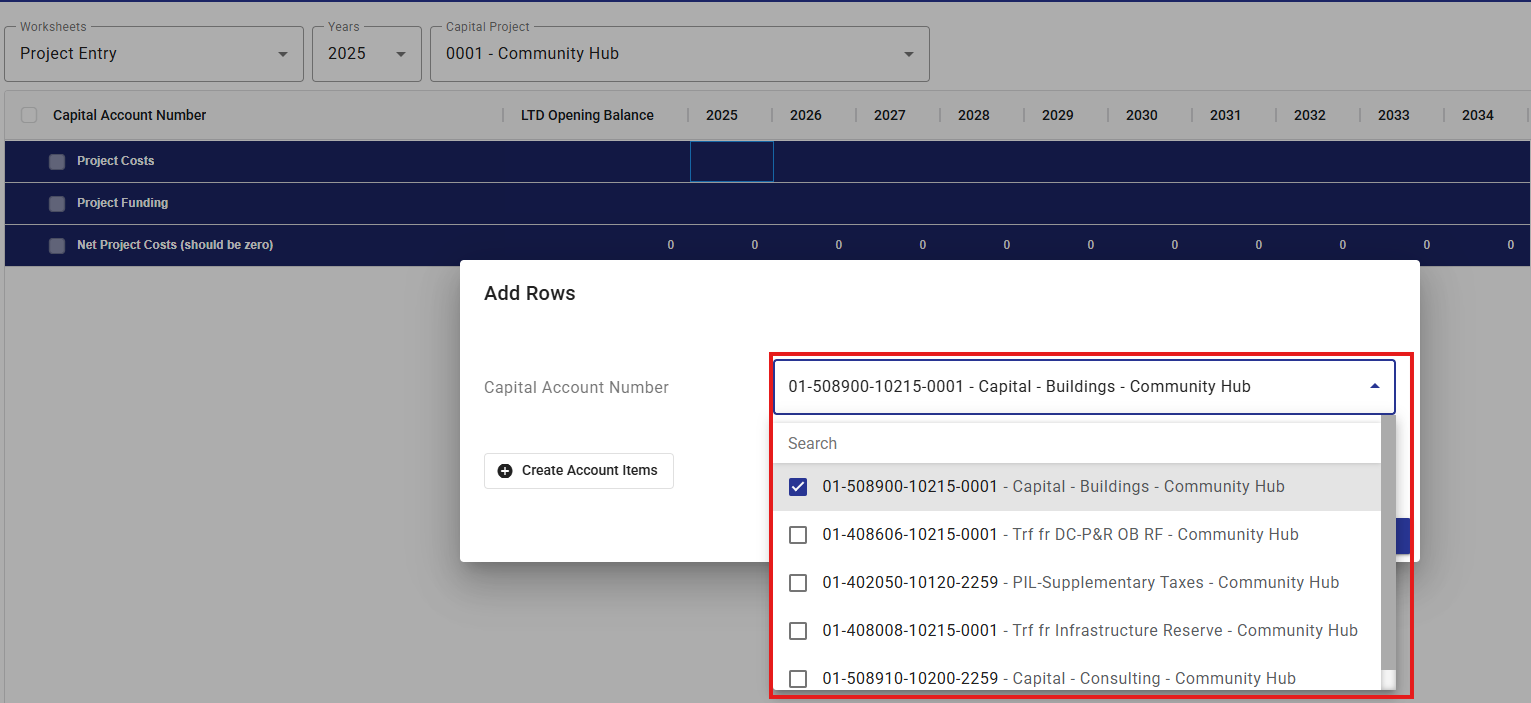
- If the required Capital Account Number does not appear in the drop-down list, then it can be created by clicking the +Create Account Items tool.
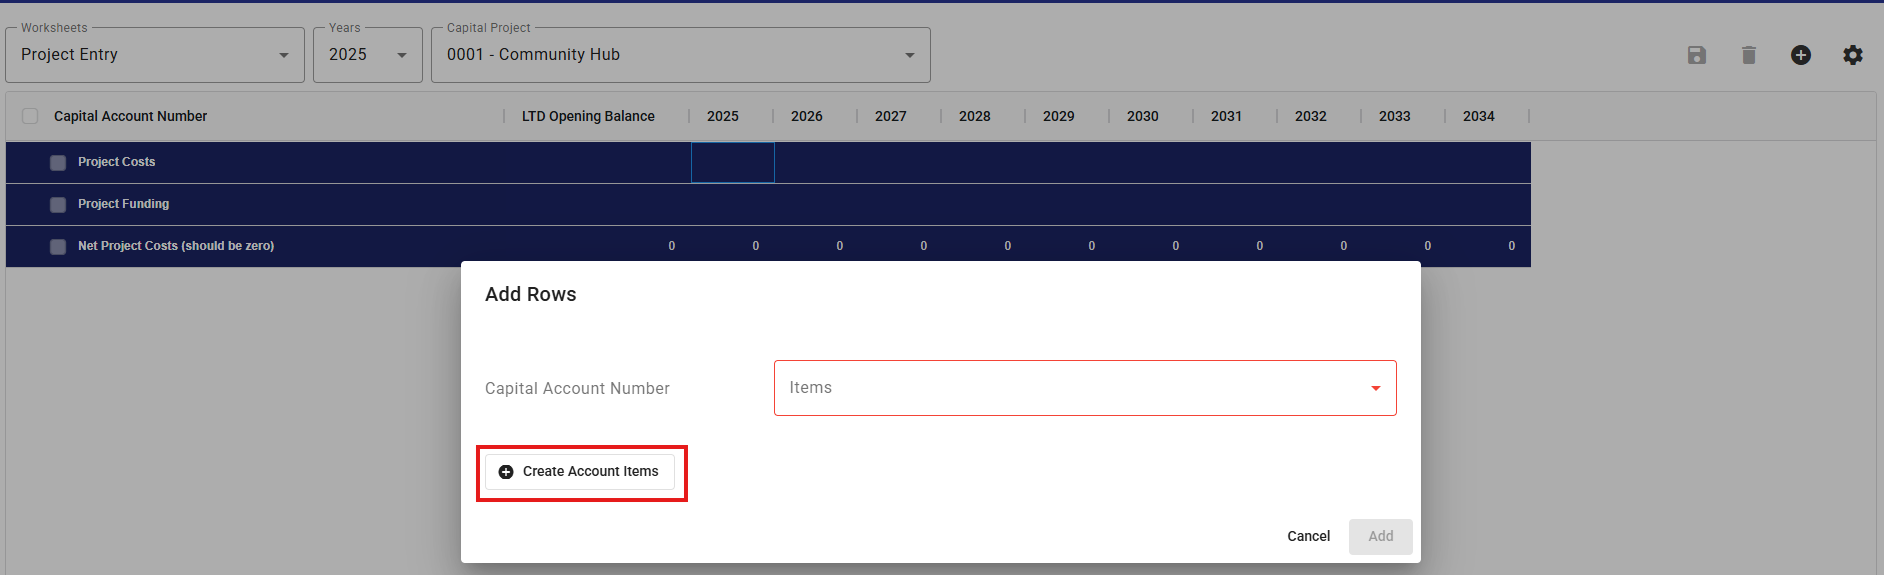
The User will be prompted to select the Key Segments associated with the capital project expenditures and financing.
Users may seek guidance from their System Administrators or Finance staff to make these selections.
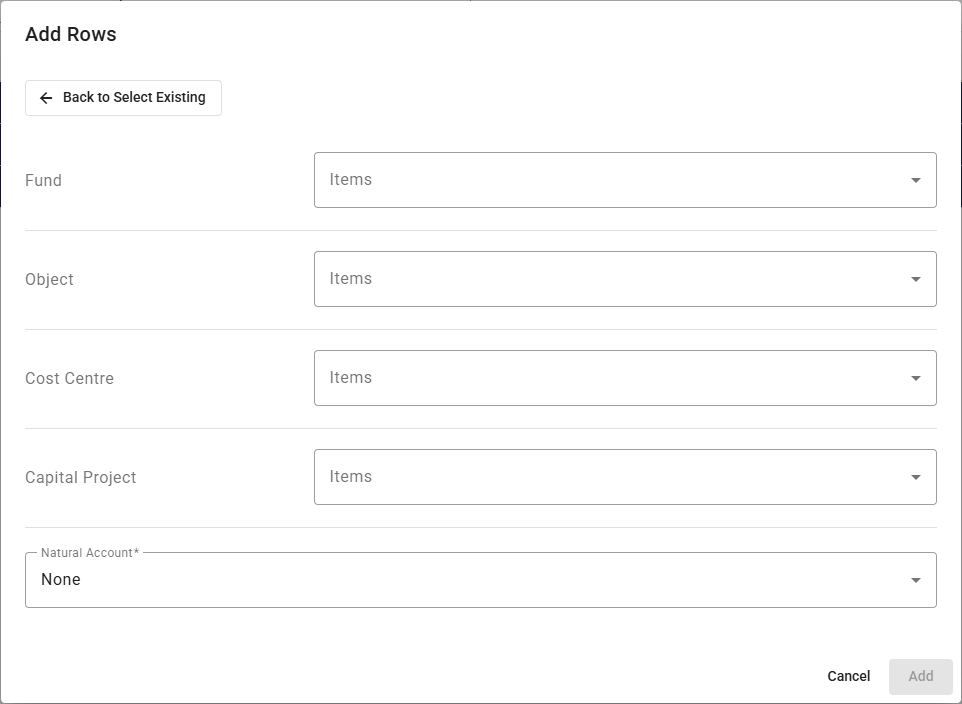
Typically, the Natural Account Type selection will be either:
Revenue - for capital project funding accounts
Expense - for capital project expenditure accounts
- If Capital Account Numbers exist for the project (typically from prior year budgets), then the account can be selected from the drop-down list.
Data Entry Tools
To assist users with budget entry, several data entry tools are available.
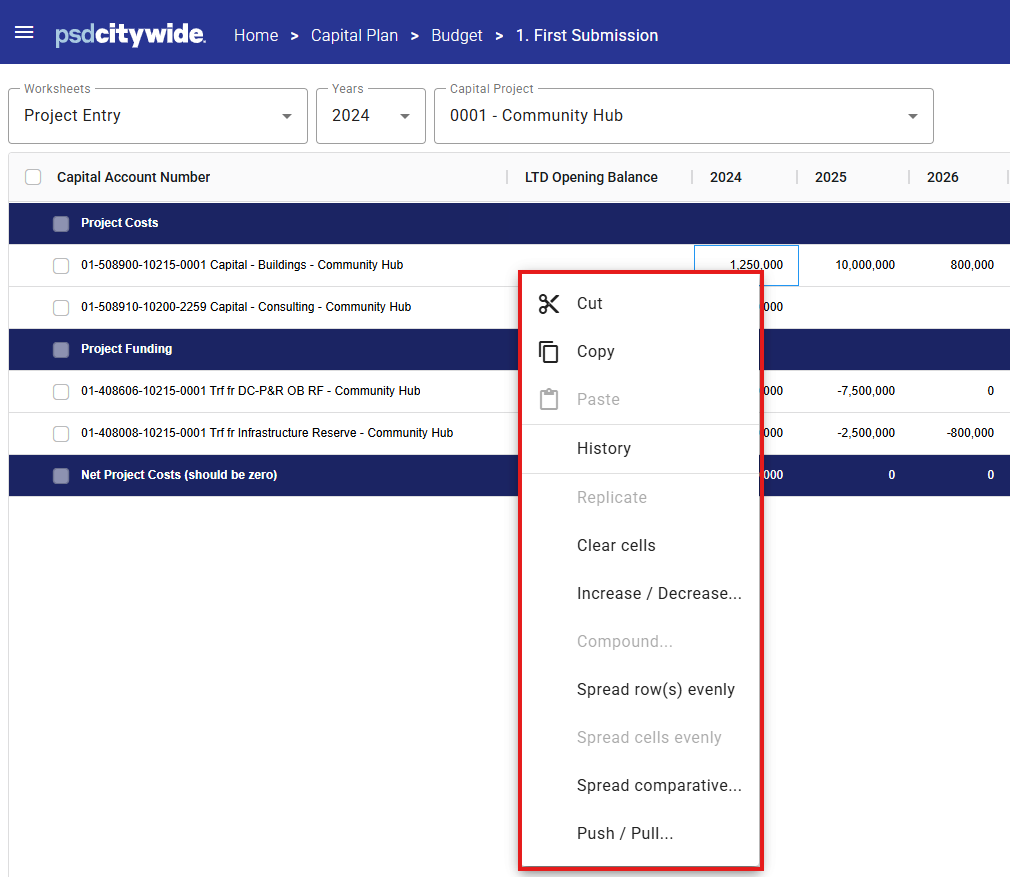
To access the data entry tools, right click on a Worksheet cell. The available tools (based on the cell(s) selected will be displayed.
Select the desired tool from the list. For guidance on using each tool see Data Entry Tools.